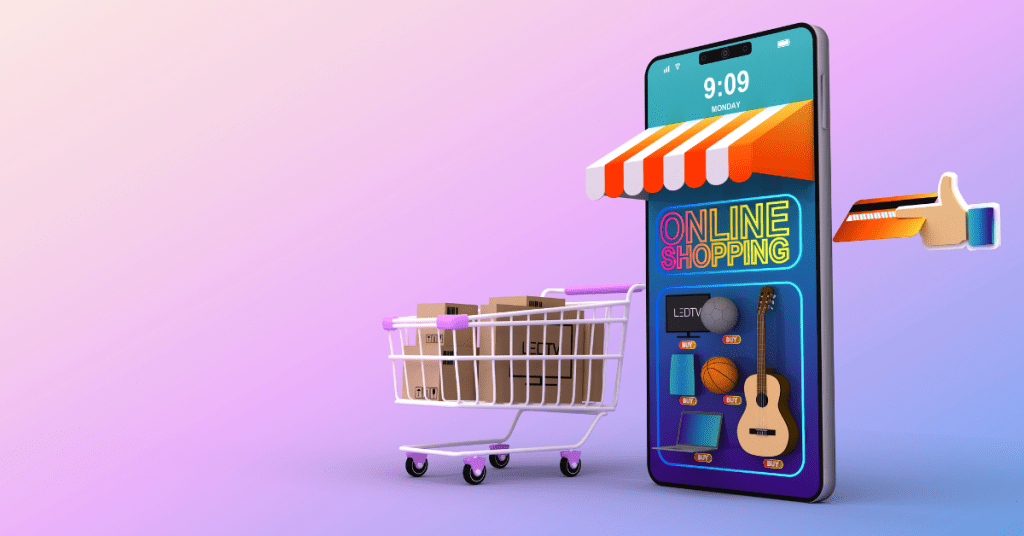
Thinking of how to start an online store and sell your products or services? Starting an online store has never been so easy, and there are huge opportunities for you still to get into the eCommerce market.
It used to be complicated and costly to have an online store as you would need to hire a developer and website designer to get it done. And it might take weeks just to get it ready and launch.
But things have changed and you too can start an online store without any technical knowledge today. Join us in this step-by-step guide on how to start an online store.
Start Your Shopify Store with Free Trial
1. Pick an eCommerce Platform To Start an Online Store

To build your online store, you are going to pick a platform to build your eCommerce store. Rather than coding it from scratch, you should build your eCommerce store on an online store builder.
These platforms are designed to provide a solution for building an online store without the hassle of coding. Not only that, differs from a web builder, the eCommerce platform will include all eCommerce features like adding new products, managing your product, accepting payments, and shipping.
And in most cases, the eCommerce platform is custom code based on its key features and benefits. This means it is hard for you to migrate from one platform to another. Hence, you will need to choose the right platform so that you can scale big when your business grows.
Here are some features that you need to consider when choosing an eCommerce platform:
Key features to look for in an ecommerce platform include:
Ease of Use
As you are most probably not an experienced or technical expert in building an online store, the eCommerce platform should be easy to use. Ideally, it should be a drag-and-drop online store builder where you can create your online store easily.
Excellent Customer Support
When you are starting, support is really important if you face some problems when working with your online store. And if you are hustling and wanting to get things done, it can be frustrating if you can’t get any support right at the time. Hence, having 24/7 live chat, phone or email support is important. More importantly, the platform should have a huge community where you can get peer support in case you want something that the platform cannot provide by default.
Simple Checkout Process
Checkout and process payment is the most important for a business. It means collecting money from your customers. Ideally, you want to complete the checkout process on the sales page itself. It is possible if you are having a separate sales page or funnel for specific products. But if you are running an online store, the process is a bit different.
You will have a few products on your online store, so your potential customers will need to go through the main page or product page, then the checkout page and next, the payment page. And in the checkout page you would want to add some upsells so they can buy more if they want.
Anyway, having fewer steps in your checkout process will get more people to buy from you.
Web Hosting Service
A web hosting server is a place to store your eCommerce store. And it is important as it will determine how fast your website is loading and how many concurrent users it can handle.
Depending on the eCommerce platform you choose, it can be coming with a web hosting service with a subscription plan. Or you need to get your web hosting service to install the software on it.
So, depends on your preference whether you want an all-in-one solution like Shopify where you will have less hassle in getting everything together. Or a self-hosted solution like WooCommercehen where you will need to build everything by piece.
Nevertheless, you can get a free trial with Shopify to see if it’s suitable for you. If you are dedicated to launching your store, you can get everything ready and launch within a day.
2. Identify Your Dream Customer
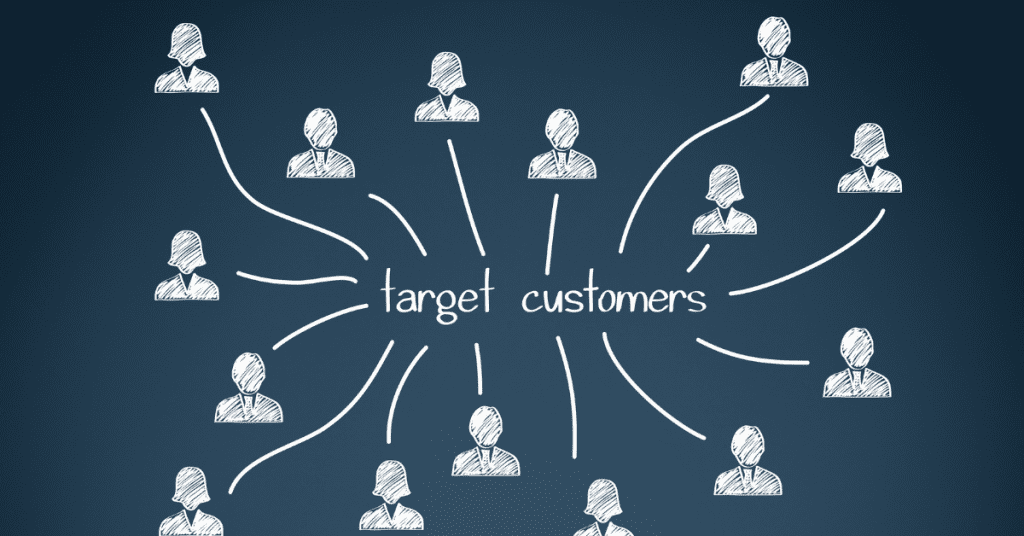
When you want to build a business, you need to know who you want to serve and what problem you want to solve for them. The bigger the problem you solve, the more you can charge for your product or service.
A dream customer is the group of people that you want to focus on when you are designing your product and your marketing effort. For instance, when you are creating a new product, your first question would be
“Will your dream customers want it”.
To identify your dream customer, it’s not to understand the basic information only like age range, sex and interest. You need to go beyond that by creating a customer avatar for your dream customer. Name it and then describe your dream customer in detail.
And ideally, it should include details like
- what time does he wake up in the morning?
- What time did he go out to work?
- How he is travelling to work?
- What’s his occupation?
- What time did he go home?
- How he went home?
- And, What does he do after work or at weekends?
In short, you should know their demographics, location and interests.
From there, you can then look for which forum, social media, or Facebook group they hang out the most online. And how you can get connected with them and show your marketing message to them.
Start Your Shopify Store with Free Trial
3. Choose Your Products To Start an Online Store

Before choosing your product, you should know which business you want. It can be either something that you design and create yourself, something you resell, dropshipping, print-on-demand, and so on. You need to first identify the niche that you want to sell in. And also, the product that you want to sell.
You need to know if is there a market demand for that product and how much people are willing to pay for it.
To research your product, you can
- Look for the hobby list and see which one resonates with you and your target audiences
- Be early to the market and capture the market early.
- Spy on your competitor’s store and their ads
4. Create Your Online Store
We will be using Shopify in this guide. We highly recommend that you get a free Shopify trial before continuing so you can follow our guide and get your store launched at the end.
Then, you add on and manage your other products later.
When you register for the free trial, you will be prompted to enter some information about your online store, including your store name. Then when it’s done, you will be directed to Shopify’s main dashboard.
Start Your Shopify Store with Free Trial
By default, the Shopify store comes with a domain name which is yourstorename.myshopify.com. As a consumer, I will not be buying from a store with this domain name style. It looks scammy and not professional. This is why you should always get your custom domain that looks like yourstorename.com. You can buy one with the registrar like Namecheap (exclusive deal available) and integrate with your store, or get it directly from Shopify.
To continue, there are a few things that you need to be ready for.
First, the product that you want to sell.
Second, your business name. You can use a free tool like Namechk to check whether the store name you chose is available across different social media platforms. This is important as you need to dominate all the platforms with the same branding.
Next, your company logo. You can come out with a simple logo with Canva or use a logo generator to generate one.
1. Add your products To Start an Online Store
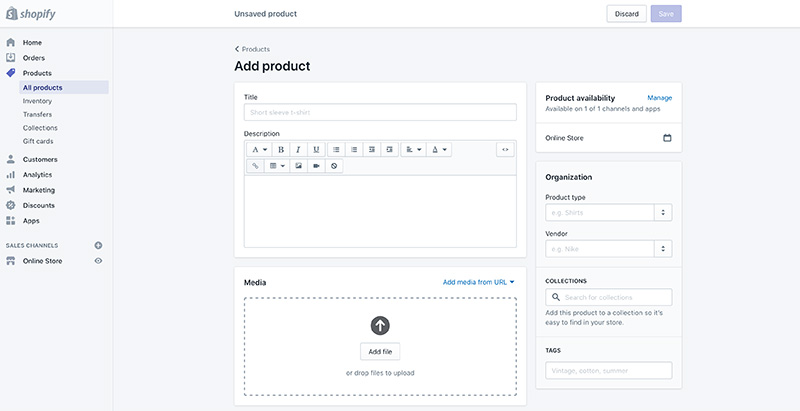
When you are in the Shopify dashboard, first of all, you should add your first product so people can start buying once your online store is launched. And also, as a guide to show how your website will look and feel when you are customizing your online store.
In your Shopify dashboard, go to Products > Add product to create your first product listing.
WRITE A COMPELLING PRODUCT TITLE AND DESCRIPTION
On your product page, your product title and description are the most important to get people to buy your product. They don’t get to touch and feel about your product. This is why, your words are important. Your word is the thing that persuades them to buy from you.
When you are writing your product title, it needs to explain what the product is and what’s in it for them. Then in your product description, explain how your product will benefit them. Don’t focus on the product specification in your product description but on the benefit and hidden benefit for your customers. The product spec can be at the bottom of your product description for those who want to know about it.
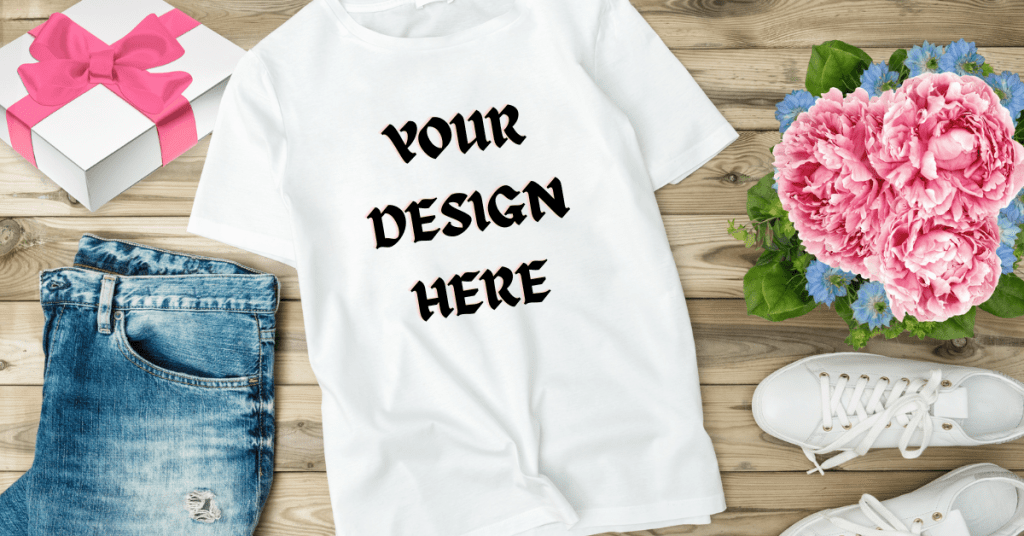
UPLOAD HIGH-QUALITY PRODUCT PHOTOS
For your product, focus on taking high-quality product photos to show how the product is in use. You can also have videos for your product to show them how it works.
Images and videos speak louder than words. By looking at how it works, it is more likely they will buy from you.
SET YOUR PRODUCT PRICE
When you want to set your product price, you need to consider a few factors. Your price should include all the fees that you need to pay for selling on Shopify.
For instance, if you are adding a 20% margin to your product cost, you might end up losing money after minus your product cost, marketing cost, Shopify platform cost, payment gateway cost and so on. This is especially important if you would like to run a sale.
Hence, you should have a price calculator to calculate the retail price after considering all the possible costs.
INVENTORY
If you are relying on your supplier to fulfil your product like dropshipping or print-on-demand service, you may not need to track your inventory. You can always get it from your backup supplier if your main supplier can’t supply it.
However, if you are having your physical product that you keep in stock, you will need to track your inventory in Shopify to avoid your stock running out when people are ordering it. Not only that, there is a product manufacturing lead time, and you need to plan your stock to avoid being out of stock.
SHIPPING
There is one huge mistake beginners make when setting their shipping profile. If you are not aware, Shopify will only be able to sell in countries that you include in your shipping profile. If it’s not there, there is no option to supply at all.
You can first print the shipping label from Shopify itself and configure your shipping cost. If your market competition is not fierce, you can always charge a bit for your shipping. However, if your market is saturated, you can try to use the free shipping model and embed the shopping cost in your product price. People do consider this when making their buying decision. No one likes to pay additional for shipping.
VARIANTS
Depending on your product listing strategy, you can have one product with multiple variants in terms of colour and size or you can have different products set up for each variant. It all comes down to how you want to design your online store.
And if your product has no variant, you can ignore this part.
SEARCH ENGINE OPTIMIZATION
To get your online store or product page on the search engine result page, you need to optimise your website based on Google’s SEO algorithm. This is what we call on-page SEO.
There are many benefits to getting your online store ranked on Google. You will get traffic once people search for the keywords you ranked and click on your link. While there might be some initial cost to get your link on the top, once it’s there for the right keywords, you will be getting much free traffic.
Since it’s a product page with less word content, there are only a few things you can set for your online store or website SEO.
Page Title
This is what people will see when your website shows up in their search results. The page title should be short, precise and describe what you are offering. Include some hook and the target keyword in the title so people will be interested to click on it.
Meta Description
Other than your title, the next thing they will see is your meta description. Because there are only a limited amount of words you can include in your title, you can expand it in your meta description. When you share your link on social media, this will show up as well, but there are only a few words to be shown due to space limitations. Hence, focus on the first few words of your description.
URL Handle
Keep this short, simple and meaningful for our target customers. The relevancy of your URL handle is important for your SEO ranking as well as it’s how it reads.
In Shopify, you will have a preview of how the search result will look before saving it. Repeat this for each product for your store to optimize each of them.
2. Create Online Shopping Key Pages To Start an Online Store
Apart from the product you are selling, you will need other pages to complete your online store. These pages will include some basic information about your business, contact method, legal page, and maybe your blog posts.
All these pages are essential for an online store to give more information to your potential customers as well as legal compliance.
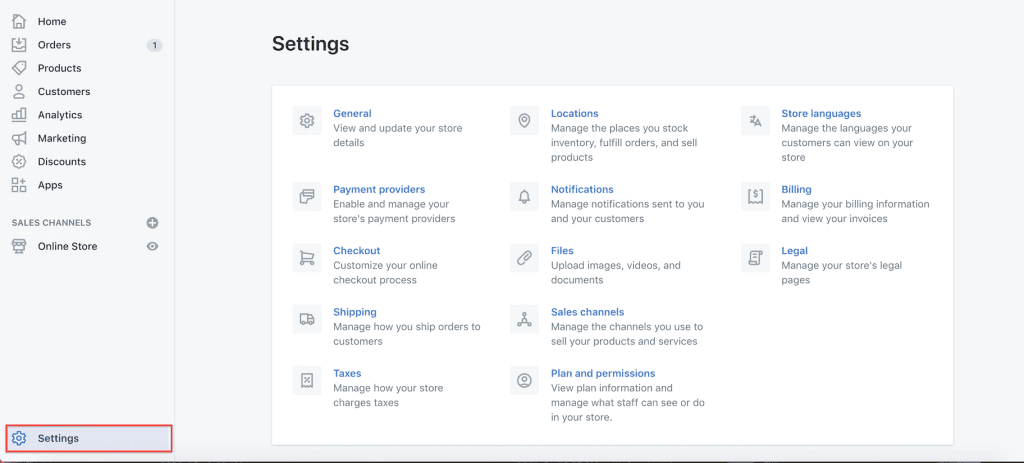
For Shopify, you can create these pages under the Online Store -> Pages tab, or part of the Settings.
Some pages that you need to have includes:
About Us Page: This page is important to share your backstory with your customers so they can relate more to your business and how you started the journey.
Contact Us Page: One of the things customers don’t like is not getting any support or don’t know how to contact you. Hence, the contact page here will be the place where you can have a contact form for them to leave their messages. And also, your contact details like phone number and emails.
FAQ Pages: This is a very important page for your online store. If done correctly, you can solve at least half of your customer questions with the FAQ page. And your customer will appreciate that as well and they can get instant answers.
Policy pages. As this is required legally, Shopify simplifies the page creation for policy pages such as privacy policy, return policy and terms of use under its Setting -> Legal section. You just need to generate your policy and paste it there.
Here’s how to create each page:
ABOUT PAGE
The About Page is how you explain your business background to resonate with your potential customers. You can have a background about how you start this business, what is your journey for product creation and how your product is unique.
A good story here will help to sell your products better. It can be some product details that you did better than other competitors. The improvement might be something small that people normally don’t realise but at the same time important as it is useful for the users.
Your story will help to sell your product. This is because they can relate to your story and feel how you put in your effort to create the solution for the problem they want to solve.
CONTACT PAGE
There are a few things that we normally put on the Contact page. First and foremost, the most important will be the contact form where they can leave their message for you.
Next, would be your contact details like your phone number, email address and your company address if you are running a physical shop.
In Shopify, there is a prebuilt template page for the Contact page. You just need to import that to your online store and modify it.
POLICY PAGES
When you are running a business, the least you want to have is a dispute between you and your customers. Disputes will lead to customer dissatisfaction and loss of your reputation with your customers. Policy pages are there to tell your customers what they should expect from your service.
We understand that most people won’t read this. And it’s up to them whether they read it or not, but you have to spell it out.
In Shopify, you can create your policy pages under Settings-> Legal. And Shopify will generate the standard templates that include your store name and emails in the policy.
3. Make an online store that’s completely customized
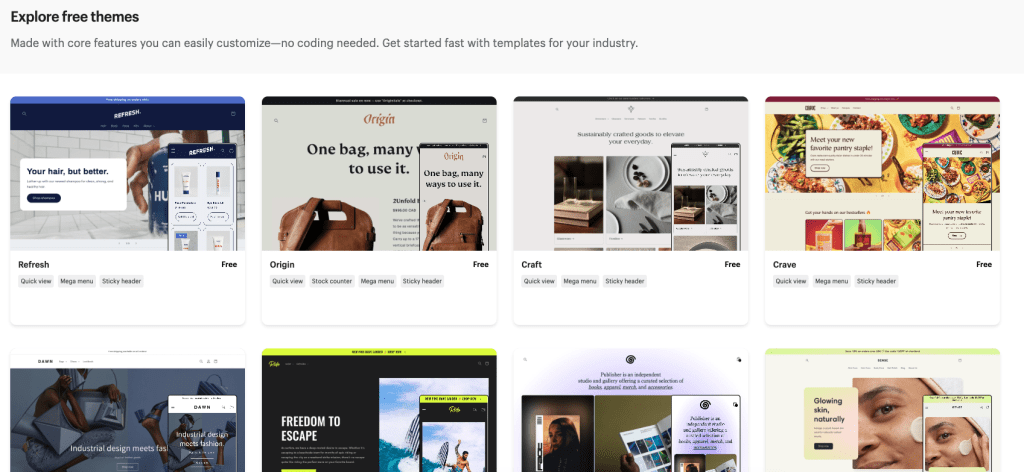
Like most online stores or website builders, the customization and design for a Shopify store will be based on a theme. You can head over to the Online Store -> Themes section, to choose the theme you want.
Different product and store strategies will use a different designs. For example, if you are building a one-product store, your main page will be the sales page for your product. And if you are building a huge catalogue of products, then you will need to have a good product categorization so people can find it easily.
Selecting Your Theme To Start an Online Store
In the Shopify theme store, there are both free and paid themes. There is nothing wrong to use a free theme. However, if you need deep customization for some processes or your layout, maybe some paid themes will do the job better.
For example, you can start with the Brooklyn theme which is suitable for both general and one-product stores.
You can customize the front page based on your product strategy. The key to a good online store is not to have too many complicated designs or elements. Those unnecessary elements will only confuse and distract your customers. If you ever read about how a sales funnel increases your sales, you will understand why we said so.
Design Your Homepage To Start an Online Store
The Shopify theme is designed to be modular based on the section. In each section, it can be a single column or multiple columns. And at the same time, it can be an image + text, text only, banner and so on.
All you need to do is to pick the section you want and then add it to your homepage. If you would like to change the design, you can just drag it around to change the sequence.
Try to limit the number of sections and information you have on your homepage as you don’t want them to scroll endlessly. Instead, add some CTA buttons in between so that when they are ready, they can buy on the spot.
Create Your Navigation Menus
When you have multiple pages and product categories in your online store, you would want to have a clear navigation bar so people can find the page they want instantly.
In your header navigation bar, you can have your main product, product categories, add to cart and shipping policy. Try to limit the number of links in your navigation bar and put the rest on your footer bar. They can find it if they want, but not too many links that they will get lost browsing around your store.
You don’t want them to browse around your store too much wasting time there. But instead, focus on selling your best-selling item.
Branding For Your Online Store – Colors, Typography and Other Theme Settings
Colours and typography play a big role in your brand’s visual identity. You should have standardised branding across your online store and all your marketing platforms.
Under the Theme Settings tab in the editor, you can customize the look and feel of your online store. This includes your colours and typography. When choosing your typography, you can choose one or two basic font that is easy to read. Then, make sure it is large enough for people to read on different devices.
As for the colour, you can have two to three colour combinations for your online store. You can refer to the colour wheel to find colours that complement each other. And for your CTA button, use a high-contrast colour so that it will be obvious.
Customize Your Checkout Setting
Shopify does not allow you to customize its checkout page. This is due to there being some compliance requirements for some info or elements to be on your checkout page.
However, you can still add your logo on the checkout page and also change the setting to decide whether what they need to enter for the checkout. For example, you can disable the customer account requirement to avoid customers to leave because they feel that it’s troublesome.
Then, you can have the option to copy their shipping address as their billing address and also a small box to tick to subscribe to your newsletter.
Always make it easy for your customers to check out and get their contact details first so you can follow up with them if they don’t purchase.
4. Shipping Options To Start an Online Store
You will need to have different shipping options for people around the world. You can offer a flat rate shipping for all products or it can be based on the product weights and destinations.
Not only that, but you can also offer free shipping if they bought over X amount. When you are setting up your shipping options, you need to be very careful and include all countries that you want to serve. This is because, if you did not have the shipping options for the product or include the country, then your potential customers will not be able to check out.
5. Set up taxes
You need to pay taxes even if you are selling and buying online. Shopify will help you to calculate the sales tax rates for most countries around the world. But if you are focusing on a few countries only, it is worth conducting some research or getting a tax expert to help you with this.
You can override the default tax settings if there are specific requirements for your region, such as taxes for specific products or shipping.
Go to Settings -> Taxes and Duties to set up your tax regions.
None of this should be taken as tax advice and you should consult with a tax professional if you’re uncertain about your tax situation. Shopify doesn’t file or remit your sales taxes for you.
5. Connect To a Payment Gateway To Start an Online Store
Now, it’s an exciting time to add your payment gateway so you can start collecting payments from your customers.
Go to Settings -> Payments to set up your payment gateway. You can use a common payment gateway like Paypal or Stripe to accept different payment methods. If you don’t have your payment gateway, you can always use Shopify Payments.
6. Final Setup Before Launch
By now, your online store is ready to launch. But people still can’t access it unless you remove the password protection. Under Online Store -> Preferences, disable the password options so that people can start buying from you.
Do remind me about this, you need to have a live subscription plan to start accepting payments.
There are a few more important steps to complete the final setup. This includes the custom domain name, sales channel, notifications and tracking.
Adding a custom domain
A custom domain is a unique URL for your online store. It’s reserved for your online store only as long as you pay for the registration and annual fee. You could buy the domain yourstore.com to replace yourstore.myshopify.com as your online store URL).
Now, integrate your domain name with Shopify on Settings > Domains. You can either integrate your existing domain name that you bought or buy from Shopify itself. A third-party registrar like Namecheap.com sometime provides cheaper domain names compared to Shopify.
It’s the same thing you get for buying a domain from Namecheap or Shopify. Just the integration part you will need an additional step if you buy it outside.
Add Other Sales Channels
Shopify allows seamless integration with different sales channels. You can sell your products not only on the Shopify store only, but also on other platforms.
Besides, you can create online shopping in a variety of places, selling your products to other sales channels where your target customers are and keeping track of your product inventory and sales data.
You can start with social media like Facebook shop, Facebook page, Instagram, Pinterest and more. At the same time, you can add your product to Google Shopping so it will appear on both Google and YouTube. And if you have other websites or blogs, you can add the product buy button to your websites. When they click on the product, they will be directed to the checkout page immediately.
Customizing your notifications
There are different ways you can know when someone sends you a chat or buys an item from you. You can configure it for automated email and SMS notifications to be sent out and also if any status updates or order confirmations.
If you need to customize these notifications, you can have a look at Setting->Notifications to see what notifications are available and how you can optimize them.
7. Launch Your Store
When you are launching your store, it might not be the best or perfect one. You have to launch it, get some data from the market and then optimize it. If you are waiting for everything to be perfect before launching, you are going to lose so much.
Shout out about your store launch and get people into your store and start selling. Don’t ignore their feedback or the data you collected from it. There is nothing more valuable than getting live feedback from your customers.
8. Marketing For Your Store
Depending on your business niche and your customer’s behaviour, you will need a different marketing plan. And it is important to have a clear marketing plan for your business so that you know what you are doing and what to optimize for better results.
First and foremost, you can get your data from Shopify Reports to help you to see which is your main traffic source, how many sales are generated every day and also, how is the conversion rate for your marketing effort.
Then, look at where your target customers congregate. It can be Facebook, Instagram, Pinterest, Forums and so on. Focus on building your reputation and authority on that platform to attract more customers.
Read more on How To Create A Marketing Plan That Works
Final Thoughts – How to Start a Successful Online Store
You can sell anything online now, it can be physical or digital products and it can be something you don’t produce. As you can see, it is so easy to build and launch your online store with the store builder. There is no excuse for not starting your own business today.