So, you’ve got a major update to carry out on your WordPress site. What’s your plan? Do you risk it all, perform the update, and hope for the best? Or do you play it safe and put your WordPress site in maintenance mode first?
We highly recommend enabling maintenance mode for any significant updates or changes. It’s a step we take every time, and it’s something we strongly suggest you do as well.
Why? Because it’s safer, prevents disruptions to the visitor experience, and gives you the breathing room to work at your own pace without worrying about how it affects your site’s users.
If you’ve never used WordPress maintenance mode before, this post will cover everything you need to know to get started and ensure your updates go smoothly.
What Is WordPress Maintenance Mode?
WordPress maintenance mode is a feature that temporarily takes your website offline while you make updates or changes. This mode ensures that visitors aren’t met with errors or confusion while you’re working on your site.
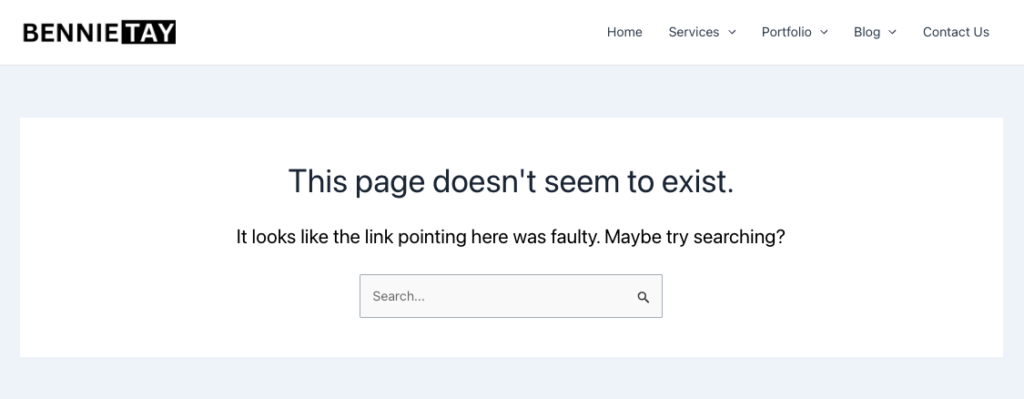
When your website is in maintenance mode, visitors will see a friendly, informative message explaining that the site is temporarily unavailable. This way, they won’t encounter a “404 Page Not Found” error or wonder if the site has been compromised, which could create a sense of panic or mistrust.
Imagine this scenario: You’re updating your WordPress site, but you forget to activate maintenance mode. What happens next? Visitors might land on an incomplete or broken page, leading to confusion about the status of your site. Even though a 404 error might be polite, it’s far from ideal for visitors expecting a smooth experience.
That’s why it’s always better to display a well-designed maintenance page instead of a generic error message. A maintenance page can be not only professional but also functional. You can include helpful features like a search bar, a contact form, or even a countdown timer to inform visitors exactly when the website will be back up and running.
The key is clarity—letting visitors know that you’re working on improvements and giving them relevant information about what’s happening and when they can expect normal access. By using a well-crafted maintenance mode page, you’re ensuring that the visitor experience stays positive, even during temporary downtime.
When You Need to Use Maintenance Mode
You should activate WordPress maintenance mode whenever you’re making substantial changes to your website, particularly during working hours when visitors are likely to be active. These changes could involve significant updates like upgrading WordPress itself, switching themes, changing security plugins, or performing maintenance on your database. Anything that has the potential to disrupt the user experience—whether it’s a visual change or a backend update—should be done behind the scenes, using maintenance mode.
For minor updates, such as publishing new content, updating images, making small theme tweaks, or updating specific plugins, it’s generally fine to proceed without maintenance mode. These changes are less likely to impact the functionality of the site or confuse visitors.
Here’s the process we follow when performing major updates or maintenance on our sites:
- Make changes on a staging site (a cloned version of your live site)
- Run tests to ensure everything works as expected
- Schedule the maintenance during off-peak hours to minimize disruptions to your visitors
- Activate maintenance mode on the live site
- Perform the updates and test the site again to confirm everything is working
- Disable maintenance mode once you’re satisfied with the changes and run another round of testing
Notice that we recommend scheduling updates during off-peak hours. Even though a maintenance page provides helpful information to visitors, it’s still best to avoid causing any inconvenience. Carrying out updates during quieter times minimizes the chances of visitors encountering your maintenance page.
One of the key advantages of using a staging site is the ability to test all updates in a safe environment before applying them to your live site. If something goes wrong during testing, you don’t have to worry about disrupting the user experience. Once the update works as expected on the staging site, you can confidently push it live.
How to Use WordPress Maintenance Mode
There are several ways to put your WordPress website into maintenance mode, ranging from using plugins to custom coding. Using a plugin is the easiest method, but we’ll walk you through all the options.
Option 1: Use a Maintenance Mode Plugin
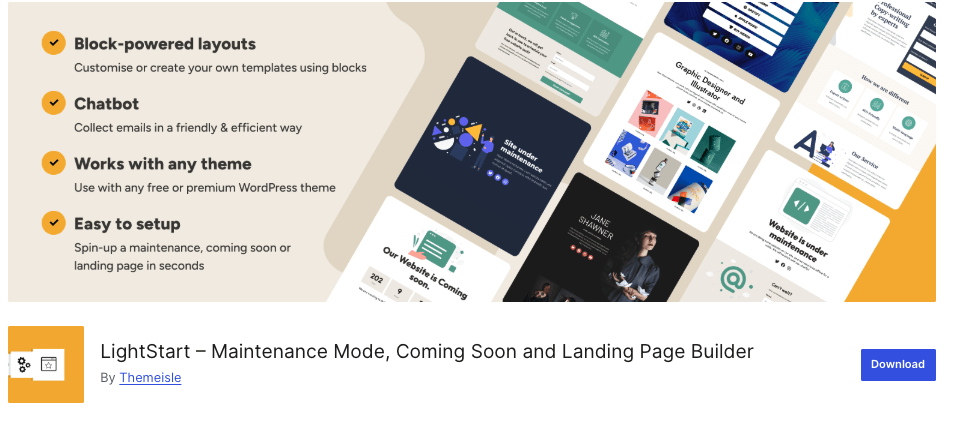
One of the simplest ways to enable maintenance mode is by using a plugin. There are several plugins available, such as LightStart – Maintenance Mode, Coming Soon, and Landing Page Builder. These plugins are free and straightforward to use.
Steps:
- Install and activate the plugin: Install your chosen maintenance mode plugin in the usual way (Plugins > Add New, then search for the plugin and click Install).
- Access the settings: Once activated, you should see a new “Maintenance” menu item in the left-hand sidebar of your WordPress dashboard. Click it to set up your maintenance page.
- Enable maintenance mode: At the top of the page, you’ll see a green toggle button. If this is on, the plugin has already put your site into maintenance mode. You can toggle it off and save the change immediately if you’re working on a live site.
- Customize your page: In the Content box, change the title, headline, and description, and adjust other details to suit your needs. You can also configure branding in the Design box to match your site’s theme.
- Additional options: If desired, you can add Google Analytics, Facebook Pixel tracking, and other settings at the bottom of the page.
- Save and activate: Once you’re ready, click the blue “Save Changes” button. You can toggle the green button at the top of the page anytime you need to activate or deactivate maintenance mode. The notification at the top of the screen will clearly indicate whether maintenance mode is on or off.
Option 2: Using Elementor Website Builder Maintenance Mode
If you’re using Elementor to design your pages, you can create and display a maintenance mode page directly from Elementor.
Steps:
- Create a maintenance page: Go to Pages > Add New Page, then edit it with Elementor. Add any content you like, such as text blocks, images, or custom design elements. You can name the page “Maintenance Mode” for clarity, but feel free to choose another title.
- Save the page: Once you’re happy with the design, click Save.
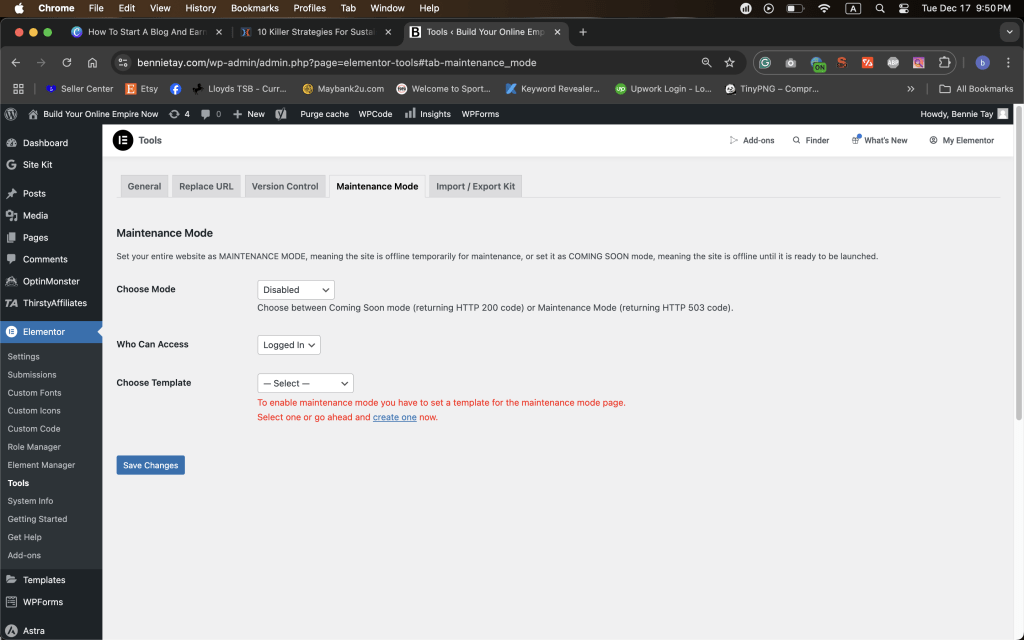
- Activate maintenance mode: Go to Elementor > Tools in the left-hand menu. Select the Maintenance Mode tab. From the Choose Template dropdown, select the page you just created. Then, in the Choose Mode dropdown, select Maintenance and click Save Changes.
- Check the maintenance page: You’ll see a red “Maintenance Mode On” notification at the top of the page. To see the maintenance page, either log out of your WordPress account or view the site in incognito mode.
- Deactivate maintenance mode: Once your maintenance is complete, return to Elementor > Tools, set Choose Mode to Disabled, and save the changes. The red notification should disappear, and your site will return to normal.
Option 3: Use a Custom Function
If you’re comfortable editing code, you can manually put your site into maintenance mode by modifying the functions.php file. While this method requires more technical knowledge, it’s useful for custom solutions.
Steps:
- Backup your site: Before editing any code, it’s crucial to back up your website if you’re working on a live site. If you’re using a staging environment, you can skip this step.
- Edit the functions.php file: Navigate to Appearance > Theme Editor and open the functions.php file.
- Add the maintenance mode code: At the end of the functions.php file, add the following code snippet:
// Activate WordPress Maintenance Mode
function wp_maintenance_mode() {
    if (!current_user_can('edit_themes') || !is_user_logged_in()) {
        wp_die('<h1>Website Under Maintenance</h1><br />We have some exciting updates lined up for you. We’ll be back online in a little while!');
    }
}
add_action('get_header', 'wp_maintenance_mode');- Save the file: Click Update File to save your changes.
- Customize the message: You can edit the maintenance message to suit your needs (e.g., “We are performing updates and will be back shortly”).
- Deactivate maintenance mode: To turn off maintenance mode, simply remove the code from functions.php and save the file again.
Whether you prefer using a plugin, Elementor, or custom code, putting your WordPress site into maintenance mode helps ensure a smooth and professional experience for your visitors during updates. Each method has its advantages, so you can choose the one that best fits your workflow and technical comfort level.
What is WordPress Staging?
We’ve mentioned the importance of creating a staging site, so now let’s dive into what it is and why it’s so valuable for managing your WordPress site.
A staging site is an exact copy of your live website that you can use to test updates, plugins, themes, and code changes before implementing them on your live site. It is typically set up on a subdomain, like https://staging.yourdomain.com, while your main site is hosted on https://yourdomain.com.
Staging sites are crucial for:
- Testing plugins and themes: You can experiment without the risk of breaking your live site.
- Running updates: Test WordPress, plugin, or theme updates before pushing them to the live environment.
- Code experimentation: Safely modify code or test customizations to ensure compatibility.
- Making major changes: Any changes that could impact the user experience, such as layout changes, new features, or security updates, should be tested first on a staging site.
By using a staging site, you can ensure your live site remains fully functional and uninterrupted while you make changes or experiment.
How to Create a Staging Site
The easiest way to create a staging site is through your hosting control panel. Most hosting providers offer user-friendly tools for creating a staging environment. Here’s an example of how to set one up using Bluehost:
- Log in to your Bluehost account and go to the control panel.
- Navigate to WordPress Tools: Once inside your dashboard, navigate to Bluehost from the left-side menu. Then, Click Staging
- Create the staging copy: It will prepare the staging environment for your website. Once finished, you will see a success message with a link to visit your staging website.
- Access your staging site’s dashboard: Once the site is created, click the icon next to the three dots under Actions. This will redirect you to the WordPress dashboard of your staging site.
Now you can freely experiment with updates, plugins, and other changes on your staging site without worrying about affecting the live site.
WordPress Maintenance Mode Not Working
Have you ever run into the issue where your WordPress site won’t exit maintenance mode, even after you’ve disabled it? This can happen if the site is stuck during an update process. Fortunately, it’s an easy fix.
Steps to Fix a WordPress Site Stuck in Maintenance Mode:
- Log in to your hosting account and open the file manager.
- Navigate to your WordPress directory: This is typically found in the root folder of your website.
- Delete the .maintenance file: This is the file that’s responsible for putting your site into maintenance mode. Deleting it will remove the maintenance message.
- Force reload your site: After deleting the file, use CTRL + R or CTRL + F5 to refresh your site. It should now load as normal.
It’s perfectly safe to delete the .maintenance file. This action only removes the temporary maintenance status and will not affect your site’s functionality in any way.
By keeping a staging site and knowing how to manage maintenance mode issues, you can avoid disruptions on your live site and ensure smooth, problem-free updates and changes.
Final Thoughts: Why You Should Use WordPress Maintenance Mode
While you may not need to use maintenance mode often, there will undoubtedly be times when it’s necessary. When that moment comes, it’s important to know exactly what to do and how to do it. In this post, we’ve covered three methods to put your WordPress site into maintenance mode, with using a plugin being the easiest option.
No matter which method you choose, remember to time your maintenance correctly, thoroughly test everything, and test it all again. Taking these steps ensures a seamless experience for your visitors, and they’ll appreciate it!
