Did you know that at any given moment, over 4.1 million websites are infected with malware? In fact, nearly 70% of consumers believe businesses aren’t doing enough to safeguard their personal information. Having a secure website isn’t just important—it’s essential. Visitors expect their data to be protected, and search engines favor sites that prioritize security. The best part? Securing your website with an SSL certificate doesn’t have to cost you a thing.
Whether you’re launching an online store or running a business website, adding an SSL certificate not only protects your visitors but also helps build trust and boosts your site’s visibility.
This guide will show you step-by-step instructions on how to set up your SSL certificate. You’ll be able to activate SSL quickly and easily, making your website safer for users and more trusted by search engines. Let’s get started!
What is an SSL certificate?
An SSL (Secure Sockets Layer) certificate is a critical security measure for any website. It protects both the site owner and visitors from cyber threats. At its core, an SSL certificate encrypts all data transmitted between a website and its users. This keeps sensitive information, such as credit card details, personal data, and login credentials, safe from hackers and unauthorized access. By establishing a secure, encrypted connection, SSL keeps user information private and confidential. This gives visitors peace of mind when interacting with your website.

Websites without an SSL certificate face significant risks, both in terms of security and reputation. Many modern web browsers, such as Google Chrome, flag these sites as “Not Secure,” displaying warning messages to visitors. This can immediately deter potential customers or users from proceeding, damaging your website’s credibility and trustworthiness. In an online landscape where security is paramount, a lack of SSL can lead to lost traffic, lower conversion rates, and diminished customer trust.
SSL not only plays a critical role in security but also positively impacts search engine optimization (SEO). Google has made it clear that websites with SSL certificates get a ranking boost in search results. This is because secure websites are prioritized for users. By securing your site with SSL, you’re not only protecting your visitors but also improving your site’s visibility in search engines. This can drive more traffic and enhance your online presence.
Why you need a free SSL certificate for WordPress
A free SSL certificate is an essential feature for any WordPress website, ensuring that your site remains secure while also enhancing its performance in search engines and building user confidence. By securing the data exchanged between your site and visitors, SSL provides multiple benefits that go beyond basic security. Let’s explore some key factors that make an SSL certificate a must-have:
1. Enhances Website Security
One of the main reasons to install an SSL certificate is to protect sensitive data, such as passwords, credit card details, and personal information. SSL works by encrypting the connection between your website and its visitors. This makes it much harder for hackers to intercept or manipulate data.
Whether you run an e-commerce store or a personal blog, SSL encryption keeps shared information secure and private. It helps prevent data breaches and cyberattacks, ensuring that your website remains a safe space for users.
2. Boosts SEO Ranking
In today’s competitive online space, search engine optimization (SEO) is crucial for attracting traffic. SSL certificates do more than just secure your site—they can also improve your search engine ranking. Google and other major search engines consider SSL a ranking factor. This means they favor websites with SSL certificates, which appear as HTTPS, in search results. If your goal is to increase your site’s visibility and attract more organic traffic, having an SSL certificate is a simple yet effective way to improve your chances of ranking higher.
3. Improves Trust and Confidence
One of the first things visitors notice when they land on your website is its security status. A visible security indicator, like the padlock icon in the browser’s address bar, instantly reassures users that their personal data is protected. This sense of security builds trust, making users more likely to engage with your site. Whether it’s making a purchase, submitting their email, or filling out a contact form, users feel safer when they see the padlock.
On the other hand, the absence of an SSL certificate can drive users away. When browsers flag your site as “Not Secure,” it discourages people from interacting with your website.
4. Prevents Attacks
Phishing attacks are a common form of cybercrime where hackers create fake websites to trick users into providing personal information, such as login credentials or credit card numbers. SSL certificates play a key role in preventing these attacks by making it more difficult for hackers to impersonate your site. When users see the HTTPS connection, they can be confident that they’re interacting with the legitimate version of your website. This extra layer of protection reduces the risk of phishing, further boosting user trust.
How to install a free SSL certificate on WordPress
Now that you’re ready to secure your WordPress site follow this simple step-by-step guide to install and configure a free SSL certificate:
Step 1: Log in to Your Web Hosting Account
Start by logging into your web hosting account. Once you’re logged in, access the control panel for your hosting account—this could be cPanel or a custom dashboard, depending on your host. Locate the website you want to secure. Every hosting control panel may look slightly different, so find the area where your website management options are displayed.
Step 2: Enable the Free SSL Certificate in the cPanel
Once in your hosting dashboard, navigate to the Security section. Many hosting providers offer a free SSL certificate through services like Let’s Encrypt. In this section, you should see an option to enable a free SSL certificate. Follow the prompts to activate SSL for your website. The process is typically automated, and SSL will be applied to your domain once it is enabled.
Step 3: Update WordPress to Use HTTPS
After enabling the SSL certificate, you’ll need to configure your WordPress site to use HTTPS instead of HTTP. This step ensures that your site fully transitions to the secure protocol. You can do this manually or with the help of a plugin:
Option 1: Manually Update WordPress to HTTPS
- Go to your WordPress admin dashboard.
- Navigate to Settings > General.
- In the WordPress Address (URL) and Site Address (URL) fields, change the URLs from “http://” to “https://.”
- Save the changes.
Option 2: Use a Plugin to Setup HTTPS
For a more automated solution, install a plugin like Really Simple SSL:
- Go to your WordPress dashboard and navigate to Plugins > Add New.
- Search for “Really Simple SSL” and install it.
- Once installed, activate the plugin. It will automatically detect your SSL certificate and update your WordPress settings to use HTTPS across your site.
Step 4: Test Your SSL Certificate
Once you install your SSL certificate and configure WordPress to use HTTPS, testing is crucial to ensure everything is working properly. Start by visiting your website and checking if the URL begins with “https://”. Also, look for the padlock icon next to the URL in the browser’s address bar. If both are present, this confirms that your SSL certificate is correctly installed and that your site is secure.
Troubleshooting Tips:
If you don’t see the padlock icon or encounter mixed content warnings, some resources, such as images or scripts, may still be loading over HTTP. You can fix this by using the Really Simple SSL plugin to force all content to load securely or by manually updating any remaining HTTP links in your site’s code.
By following these steps, you will secure your WordPress website with a free SSL certificate, enhancing security and creating a more trustworthy experience for your visitors.
How to Get a Free SSL Certificate
Some web hosting service providers like Bluehost include a free SSL certificate from https://letsencrypt.org/, a trusted certificate authority with every WordPress hosting plan. This means that as soon as you launch your website, you equip it with the security and trust of an SSL certificate at no additional cost. The setup process is hassle-free, and with just a few clicks, Bluehost ensures your site is secure. This protects both your visitors and your website from potential threats right from the start.
What is Let’s Encrypt?
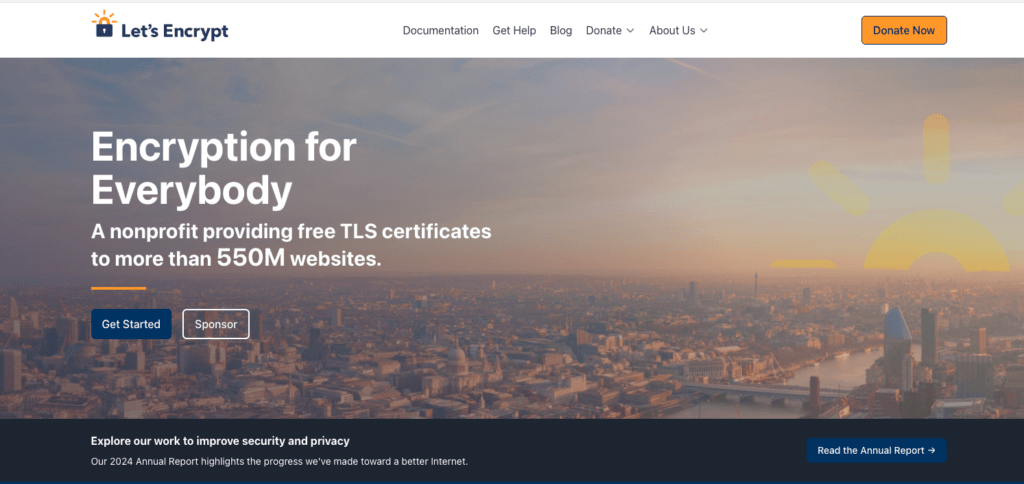
Let’s Encrypt is a nonprofit certificate authority that provides free SSL certificates to promote a more secure web. These certificates enable HTTPS (Hypertext Transfer Protocol Secure), which encrypts data shared between a visitor’s browser and your website. This encryption makes it much harder for hackers to access sensitive information.

By integrating Let’s Encrypt into its hosting plans, Bluehost simplifies the process for site owners. You can automatically obtain, install, and renew SSL certificates without manual intervention. There’s no need to purchase expensive certificates from third-party providers. This seamless integration also ensures the padlock icon appears in the browser’s address bar, giving your visitors confidence that their data is protected.
An SSL certificate is essential for building trust with your visitors and securing your website. When visitors see the padlock icon and the “https://” prefix in the URL, they know that your website is safe. Furthermore, major search engines like Google favor websites with SSL certificates, boosting your SEO performance and helping you rank higher in search results.
By including Let’s Encrypt in its hosting packages, Bluehost provides users with a reliable, automatic SSL solution, allowing you to focus on growing your website without worrying about security. One of the convenient features Bluehost offers is automatic SSL renewal. Once activated, you never have to worry about renewing your SSL certificate manually. Bluehost will handle the renewals for you, ensuring that your site remains secure without interruption.
Setting up an SSL certificate with Bluehost is quick and easy. With just a few clicks, you can secure your WordPress site. Thanks to the integration of Let’s Encrypt, your website is protected from day one. Plus, Bluehost automatically renews your SSL certificate, ensuring long-term security for your site.
By offering this essential security feature for free, Bluehost helps you build a trustworthy and safe online presence with minimal effort.
Common Issues During SSL Certificate Installation
Installing free SSL certificates on your website is generally a straightforward process, but occasional issues can still arise. Understanding how to troubleshoot these common problems will help ensure that your website remains secure and functions smoothly. Here’s how to address some of the most frequent SSL certificate issues:
Mixed Content Warnings
After installing an SSL certificate, you may still encounter “mixed content” warnings. This occurs when certain elements of your website, such as images, scripts, or stylesheets, still load over HTTP instead of HTTPS. When this happens, the browser will flag the site as insecure, even though an SSL certificate is in place.
How to fix mixed content issues:
- Install a Plugin: Use a plugin like Really Simple SSL (for WordPress sites) to automatically update all URLs from HTTP to HTTPS, ensuring no elements load insecurely.
- Manually Update URLs: Check your site’s theme files and settings for any hardcoded HTTP links. This may include media files, external scripts, or custom code. Replace these with HTTPS URLs to eliminate the warning.
SSL Certificate Not Recognized
Sometimes, even after installation, your site or browser may not recognize the SSL certificate. This could be due to improper installation or activation.
How to resolve this:
- Verify Installation: Most web hosting providers offer a tool that checks if the SSL certificate is properly installed and active. Utilize this tool to confirm its status.
- Reinstall if Necessary: If the certificate is not recognized, try reinstalling it via your hosting control panel. Alternatively, contact your hosting provider for assistance if the issue persists.
Site Not Redirecting Correctly
A common issue after installing SSL is that your site may not automatically redirect visitors from HTTP to the more secure HTTPS version. This leaves some visitors potentially exposed to unsecured traffic.
How to enable automatic redirection:
- .htaccess Redirect: For websites hosted on Apache servers, you can add a rule in your .htaccess file to force all traffic to HTTPS. A typical rule might look like this:
RewriteEngine On
RewriteCond %{SERVER_PORT} 80
RewriteRule ^(.*)$ https://www.yoursite.com/$1 [R,L]
- Use a Plugin: For an easier solution, use a plugin like Really Simple SSL to handle the redirection automatically without editing core files.
Expired or Self-Signed SSL Certificates
If your website displays warnings about an expired SSL certificate, you’ll need to renew it to maintain secure connections.
Steps to handle expired or self-signed certificates:
- Renew Your Certificate: If you purchased your SSL certificate through your hosting provider, you can usually renew it via their dashboard. Let’s Encrypt, a popular free SSL provider, also offers automated renewal for their certificates.
- Avoid Self-Signed Certificates: While self-signed certificates provide encryption, they are not trusted by browsers, leading to warnings for visitors. Switch to a certificate issued by a trusted Certificate Authority (CA), such as Let’s Encrypt or a paid provider, for better browser support and visitor trust.
If you’ve implemented the above fixes and are still encountering problems, don’t hesitate to contact your hosting provider or SSL service for assistance. Often, the issue may stem from specific server configurations or hosting environment settings that require expert attention.
Paid SSL Certificates: Are They Worth It?
Free SSL certificates like those provided by Let’s Encrypt offer standard encryption, but paid SSL certificates can offer additional benefits. These certificates come in different validation levels, each providing varying degrees of security and trustworthiness:
- Domain Validation (DV): This is the most basic level of SSL, where the Certificate Authority (CA) verifies that the applicant controls the domain. It’s sufficient for personal websites or blogs, but doesn’t provide any detailed information about the organization behind the site.
- Organization Validation (OV): OV SSL certificates go a step further, requiring the CA to verify that the organization is legitimate and registered. This validation level provides more trust signals to users, making it ideal for business websites where visitors may be concerned about the site’s credibility.
- Extended Validation (EV): The highest level of SSL certification, EV SSL requires rigorous checks of the business’s identity and legitimacy. Websites with EV certificates often display a green address bar or a padlock, signaling to visitors that the site is highly secure and trustworthy.
Benefits of Paid SSL Certificates
For businesses that handle sensitive data, such as e-commerce sites or financial institutions, paid SSL certificates offer significant advantages:
- Trust Signals: Paid certificates, especially OV and EV, provide additional trust indicators like the company name in the address bar, which can boost customer confidence.
- Warranty Protections: Many paid SSL certificates come with warranties that offer financial compensation in the unlikely event of a security breach due to certificate failure.
- Boost in Conversion Rates: Sites that display clear security indicators often see improved conversion rates, as visitors feel more confident making purchases or submitting sensitive information.
While free SSL certificates provide basic encryption, paid SSL certificates are ideal for businesses that prioritize trust, security, and credibility. The extra assurance provided by paid certificates can go a long way in protecting both your website and your customers.
Final Thoughts: How to Get a Free SSL Certificate for Your WordPress Website
Browsing the web comes with risks, but securing your website with an SSL certificate is a crucial way to protect both your visitors and your data. The good news is that obtaining an SSL certificate doesn’t have to be expensive. Many WordPress hosting companies, like Bluehost, include free SSL certificates in their hosting packages.
By providing free SSL certificates, hosting providers like Bluehost make it simple for website owners to secure their sites from day one. SSL encryption protects sensitive information, such as login credentials and payment details, while also assuring visitors that your site is safe and trustworthy.
This extra layer of protection builds visitor confidence without additional costs. Since hosting plans often include SSL certificates, new website owners can secure their sites without facing a financial barrier.
In short, securing your website and building trust with your audience doesn’t have to be complicated or costly. Thanks to companies like Bluehost, you can get a free SSL certificate and protect your site from the start, ensuring a secure browsing experience for your visitors.


