To create and launch a website is important as it acts as your online storefront or identity for your business. There are different website builders available out there for you to create a website without any experience.
A well-designed website will enable new leads to enter your business, increase the conversion rate and generate sales for your business.
Creating and launching a website used to be a very hard and complicated process. You will need to either know how to code it yourself or get someone to develop it for you. But now, anyone can do it with the website builder.
Website builders are designed for anyone without any experience to be able to launch their website in no time.
In this post, we will be sharing how to create a website for your business from scratch. Also, we will focus on showing how to do it with Shopify.
Start Your Website with Shopify Today!
How To Create and Launch a Website in 9 Steps
We will start this by explaining the different steps required to create and launch a website no matter which website builders you use. There are some slight differences in the process as different website builders offer different features in their subscription plans.
1. Decide The Type of Website To Create and Launch
There are different types of websites that you can create and launch. Those are categorized into various types based on their purpose, and functionality.
- Ecommerce website to sell products/services
- Business website to show your business portfolio
- Blog
- Landing page
- Testimonials
- Lead generation
You need to determine what is the goal of your website and plan your website accordingly. Although different website builders all aim to provide a seamless experience to create and launch your website, each platform will have its own expertise.
Only by understanding the type of website you want to build, you can choose the best website builder for your business.
2. Choose A Website Builder
Choosing the right website builder is a critical decision that can significantly impact the success and functionality of your website. A website builder is a tool that allows you to create and design a website without the need for advanced technical skills or coding knowledge. Here are key factors to consider when choosing a website builder:
Start Your Website with Shopify Today!
Ease of Use
Firstly, you should opt for a website builder that is user-friendly and intuitive. The interface should be easy to navigate, allowing you to create, edit, and manage your website efficiently.
Besides, drag-and-drop features, pre-designed templates, and straightforward customization options are also important for anyone to start.
This is especially true if it’s your first time to do it yourself. Even if you are hiring someone to do it for you, it will be good if you can make some urgent changes yourself when required.
Templates and Design Flexibility
You need to then evaluate the available templates and design customization options. The website builder should offer a variety of professionally designed templates that align with your website’s purpose.
Templates are important to help you get started in no time. Normally, for it to be selected as a template, the website builder has done several rounds of A/B testing to optimize it. This will ensure that the template is proven to work for their customers.
Additionally, it should provide flexibility to customize colours, fonts, layouts, and other design elements to match your brand or style.
Features and Functionality
Next, you should assess the features and functionality provided by the website builder. Consider essential features such as mobile responsiveness, SEO capabilities, e-commerce tools, blogging capabilities, multimedia integration, forms, and social media integration.
Depending on your website’s needs, choose a builder that offers the features necessary for your website’s objectives.
Scalability
You are not building your website for now only. Instead, you will need to think about the future growth and scalability of your website. Hence, you should select a website builder that allows for scalability. This will enable you to add more features, pages, and functionality as your website expands.
And when your business grows, there is no need for you to migrate to another platform. The same website builder is able to scale to cater for your business needs. It should adapt to the changing needs and demands of your audience and business.
Cost and Pricing Structure
When you are starting out, most probably you are on a limited budget. Take a look at your budget and how much you can afford for the monthly fee to run the website.
Don’t look at the short-term cost only. But you should also look at any hidden costs. For example, some services may require you to commit to a longer contract to secure a cheaper monthly recurring charge. And when the contract ends, the price might spike.
Not only that, you need to understand well what’s included in the price and what are the additional services that you will need to subscribe elsewhere.
Hence, you should compare all the pricing options and choose a plan that fits your budget while meeting your requirements.
Customer Support and Resources
No one likes the frustration of not getting any support when they are in need. When choosing a website builder, you must evaluate the level of customer support and available resources provided by the website builder.
You won’t want your website to stop for a long time as it will affect your business and revenue.
Therefore, look for a platform that provides accessible customer support channels. It can be live chat, email, or phone support. Additionally, check if they offer tutorials, FAQs, forums, or a knowledge base to assist you in using the platform effectively.
Reviews and Recommendations
Read reviews, seek recommendations, and gather feedback from users who have experience with the website builder you’re considering. Real-life experiences and insights can provide valuable information to help you make an informed decision.
Example of Some Best Website Builders
Shopify website builder – Website builder that focuses on online store creation and with excellent website-building features.
WordPress website – Mostly widely used CMS platform. Easy to start and use, but you will need to manage your own web hosting service.
Wix – Easy-to-use website builder. A free option is available with limited features.
GetResponse – Starting as an email autoresponder, GetResponse also provides website building and other digital marketing features for your business.
ClickFunnels – Excellent sales funnel, landing page and website creator. Since ClickFunnels 2.0 is out, it has improved its features to be more than a sales funnel builder.
Go ahead and claim a free trial for each website builder to understand how it works. It will help you to choose better.
Start Your Website with Shopify Today!
3. Choose a Web Hosting Service to Create and Launch a Website
You need to host your website somewhere so that your visitors can visit them anytime. Web hosting is the space on servers where your website sits. When someone wants to visit your website, they will enter your domain name in the browser. It will then send a request to access the data of your website.
Choosing the right web hosting service is a crucial step in establishing a successful online presence. Web hosting is essentially where your website’s files and data are stored and made accessible on the internet.
Understand Your Needs
Firstly, you need to evaluate your website’s needs. Consider the type of website you’re building, its expected traffic, the amount of data you’ll be handling and any specific technical requirements.
Different websites (e.g., small blogs, e-commerce stores, or enterprise-level sites) have varying needs that dictate the type of hosting. There are different hosting plans that are designed for specific website types.
Types of Hosting
Next, you need to familiarize yourself with the different types of hosting available, such as shared hosting, VPS (Virtual Private Server) hosting, dedicated hosting, and cloud hosting.
Shared hosting is cost-effective but shares resources with other websites. VPS provides more resources in a private environment. Dedicated hosting offers an entire server for your website, while cloud hosting provides scalability and flexibility.
Reliability and Uptime
Then, look for a web hosting provider with a strong track record of reliability and high uptime guarantees. Uptime refers to the percentage of time your website is accessible to users. Opt for a provider that ensures at least 99.9% uptime to minimize disruptions to your site’s availability.
Performance and Speed
Website speed is critical for user experience and SEO. If your website is not loading within a few seconds, your visitors will leave your website. This is why search engines put these metrics as one of the most important elements in the SEO ranking.
Choose a web hosting service that offers high-performance servers, efficient hardware, and optimized software. A host that uses SSDs (Solid State Drives) for storage and provides a content delivery network (CDN) can significantly enhance your website’s speed.
Not only that, you should also choose the server location that is nearest to your customers so it will load faster. This is especially important if you are serving the local community.
Scalability and Growth Options
Consider the scalability options the hosting service provides. Your website may grow over time. Hence, it’s essential to have a host that allows easy scaling of resources as needed. Scalability ensures your website can handle increased traffic and data without disruptions.
Security Measures
Prioritize security features offered by the hosting provider. These may include SSL certificates for data encryption, regular backups, firewalls, DDoS protection, and malware scanning. A secure hosting environment is essential to safeguard your website and user data.
Customer Support and Service Level Agreements (SLAs)
Assess the quality and availability of customer support. Look for a host with 24/7 customer support through various channels like live chat, email, or phone. Additionally, review the SLAs to understand the level of service and support commitments they offer.
Reviews and Recommendations
Read customer reviews and seek recommendations from peers or online communities. Hearing about other users’ experiences with a hosting provider can provide valuable insights and guide your decision.
Cost and Budget
Evaluate the pricing plans and overall costs associated with the hosting service. Compare the features, performance, and support offered for the price. Balance your budget with the value you’ll receive to make an informed decision.
By carefully considering these factors and understanding your website’s specific needs, you can choose a web hosting service that aligns with your goals and ensures a reliable and efficient online presence.
Start Your Website with Shopify Today!
4. Pick A Domain Name to Create and Launch a Website
A domain name is the address used to locate and access websites on the internet. It serves as the gateway for users to access specific web pages, websites, or online services.
Domain names are a crucial part of the website, enabling people to easily remember and access websites without having to remember complex numerical IP (Internet Protocol) addresses.
Each domain name is unique and consists of two main parts: the domain itself and the domain extension. For instance, in the domain name “example.com,” “example” is the domain, and “.com” is the domain extension, also known as a top-level domain (TLD).
When you are choosing a domain name, it should be short and memorable. Besides, you should select a top-level domain if possible. And if you are serving a certain country, it is good to have country-specific domains.
How to Register Your Domain Name
The domain name is unique to your website. Hence, there is a global system established to ensure there is no duplication. The agent to trade and register the domain name is called a Registrar.
Before buying your domain name, you need to check whether the name is available across different platforms. This is because you would want to standardize your branding message. Your domain name, brand name, and social media profile name should be aligned too.
You can check the overall availability through the free tool namechk.
To register your domain name, you can either choose to get it from a domain name registrar like Namecheap or get it from your web hosting or website builder platform.
If your chosen domain name is not available on the TLD, you can choose different extensions like .io, .shop and so on. No matter which domain name you choose, be very careful in this as changing your domain name will affect your SEO ranking too.
5. Decide on A Website Layout
For most website builders, you just need to start the subscription and then you are good to start. But if you are using the WordPress CMS platform, then you will need to have another step to install WordPress into your hosting server.
Once you have all these ready, it’s time to design your website.
Most website builders will provide themes for their users to start designing their websites. In order to increase its competitiveness, the theme or template is designed and tested multiple times to ensure workability. Not only that but knowing that different websites will need different elements and design structures, a different theme is designed for a specific purpose.
All you need to do is choose from the theme available and then customize it based on your website requirements. Different platforms will have different website builder features.
Most website builders will have drag and drop feature to add elements to the page. However, some will let you customize each element and some only limit to sections.
6. Add Relevant Pages
Other than your homepage, you will need to have other pages included in your website as well.
The first group would be your legal and policy page. You will need to include your T&C and private policy for your website to avoid any legal issues. If you are building an eCommerce site, it will be good if you have a shipping and refund policy so your customers will know and understand what to expect when they buy something from you.
Another required page would be your product and collection pages for your eCommerce site. This is for your potential customers to check out your product and buy it. Therefore, you will also need a cart page and checkout page to collect payments and complete the sale.
Besides, for specific campaigns or purposes, you will also need different landing pages to register new leads and collect their contact details.
To build your following and branding, you can also add a section for a blog where you will build your reputation and followings.
7. Connect To a Payment Gateway

The most important element for a business is to be able to collect money from your customers. And the more payment options you can offer to your customers, the easier they can buy from you.
It is very easy to connect to a payment gateway like Paypal, or Stripe nowadays with the seamless integration features. However, Shopify takes it a step forward to offer Shopify Payments where you can accept payments from a credit card, Apple Pay, Google Pay and other payment options.
8. Other Business Tools
Apart from the basic website feature, there are other features required for your website to run your business effectively. These features are normally offered via app or plugin as it does not want to increase the weight of all websites.
When you have more features installed on a website, it will take more time for the page to load and run. Hence, the website builder created a basic website that is optimized for lightweight and fast loading. All additional features are installed via an app or plugin.
Some additional features required for marketing, customer support and analytics like email marketing, social media marketing, running ads, lead generation popups, live chat, membership and discounts, Google analytics and other features can be added to your website based on your requirement.
9. Test and Launch Your Website
Now we are at the last step, once you have completed setting up and customising your website. It’s time to launch it to the public.
Don’t rush to launch it first. Instead, run a thorough test of your website. Have a look at every single page, button, popup and all features to see whether they work well.
Also, run a proofreading to your copy to make sure there is no spelling or grammar error. This will affect the professionalism of your website. You can also send it to your friends and family to have a look and give feedback to see how can you make it better.
When everything is done, it’s time to get it live.
Start Your Website with Shopify Today!
How To Create and Launch a Website with Shopify
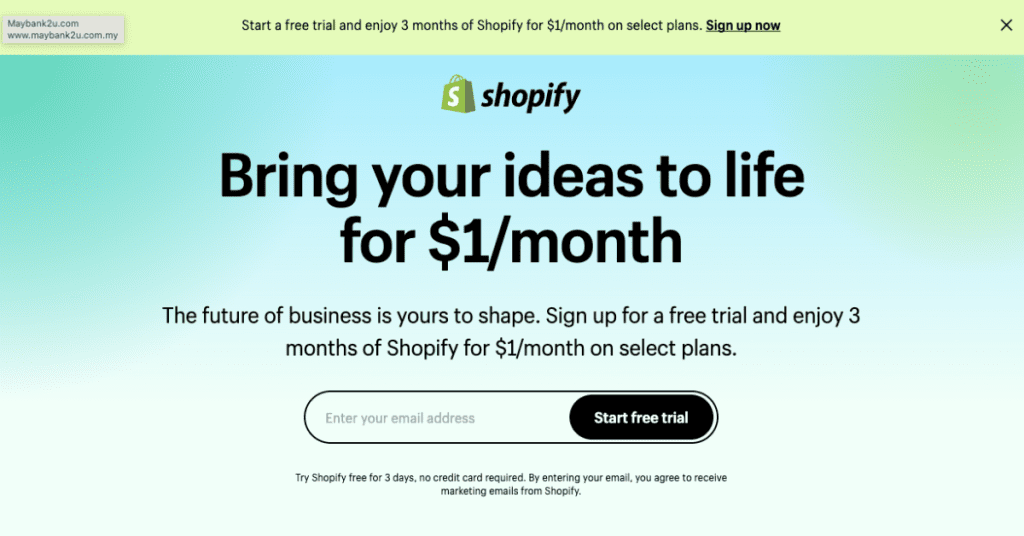
For this part, we will share how to create and launch a website with Shopify step by step. Shopify offers a three-day free trial and follows with $1 per month for the first three months.
If you are wondering, this plan is much better than the 14-day free trial. This is because you have 3 months to test out and get your business running. And at the same time, when you start paying for the service, you will appreciate it more. Although it’s just $1 per month, the mindset is different because you have committed to it.
Shopify is a professional eCommerce store builder. It incorporates every feature you need to build your website and comes with the eCommerce function if you want to sell your products.
To get started,
Start Your Website with Shopify Today!
Step 1: Sign Up and Choose a Plan
Visit Shopify’s Website: Head to the Shopify website (www.shopify.com) and click on “Get Started.” You’ll be prompted to create an account.
Fill in Your Details: Enter your email address, create a password, and fill in the required details to sign up.
Choose a Plan: Select a suitable pricing plan based on your needs, whether you’re starting a new store, migrating an existing one, or looking for advanced features. Shopify offers various plans catering to different business sizes.
Step 2: Set Up Your Store
Enter Your Store Name: Create a unique and catchy name for your store that represents your brand. Shopify will check its availability.
Complete the Onboarding: Follow the onboarding process, providing the necessary details about your business and what you intend to sell.
Customize Your Store: Navigate to the Shopify dashboard and customize your store’s appearance, including themes, colours, fonts, and more. Shopify offers a range of customizable themes to suit your brand’s aesthetics.
Step 3: Configure Your Settings
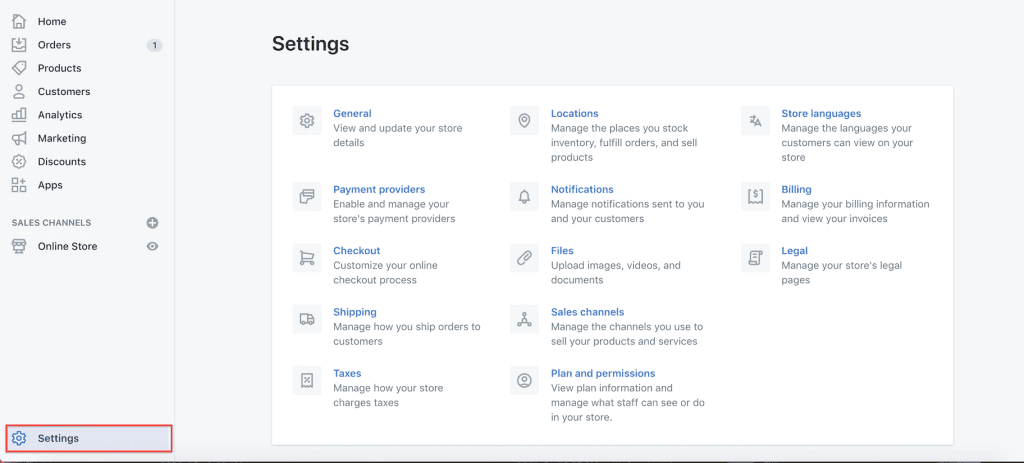
Payment Settings: Set up your payment gateway to securely accept payments. Shopify integrates with various payment providers, ensuring a seamless checkout process for your customers.
Shipping Settings: Configure shipping options and rates based on your preferences and location.
Step 4: Create Important Pages
Create Your Legal Page: There is a section in your Shopify setting where you can input all your policies. Get your lawyer to advise on this and copy it there.
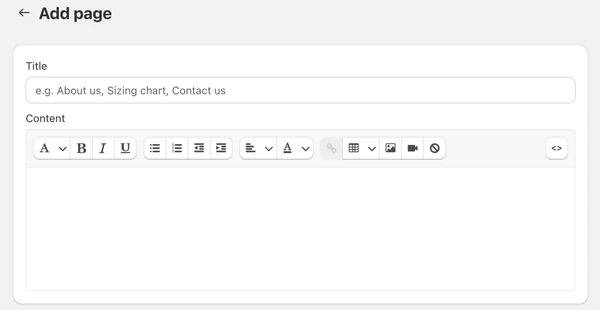
Other pages: Create other pages like your about us page, blog page and other useful pages.
Step 5: Add Products and Collections
Add Your Products: Click on the “Products” tab in the dashboard and start adding your products. Provide product details, images, prices, and any other relevant information.
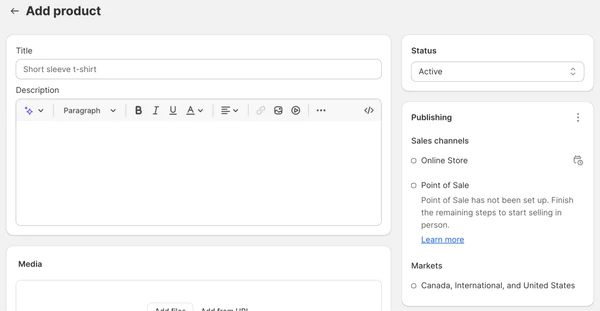
Organize Collections: Create product collections to organize your items. Collections help customers navigate your store more efficiently based on categories, types, or any criteria you choose.
Step 6: Launch Your Website
Preview Your Store: Utilize Shopify’s preview feature to view your website before making it live. Check for any necessary adjustments and ensure everything looks and functions as intended.
Connect Your Custom Domain: You can either connect your existing domain name to your Shopify store. Or you can purchase a domain name through Shopify. A memorable domain name adds professionalism and helps visitors find your website easily.
Launch Your Store: Once you’re satisfied with your website’s design, product listings, and settings, click on “Launch your store” to make it live and accessible to the public.
Step 7: Optimize and Promote
Optimize for SEO: Enhance your website’s visibility by optimizing it for search engines (SEO). Add relevant keywords, meta descriptions, alt text for images, and optimize loading speed.
Market Your Website: Use various marketing strategies like social media marketing, email campaigns, content marketing, and paid advertising to drive traffic to your website and increase sales.
Launching a website on Shopify is a relatively straightforward process, allowing you to create a professional online presence and reach your target audience effectively.
Final Thoughts – How to Create and Launch a Website with Shopify
A website is your digital asset that showcases your business online. With the ever-changing online environment, you need to update your website and maintain it regularly to keep it up to date.
Shopify takes up most of the hard work and you will just need to manage your website from your dashboard.
So, get started to create and launch your website today.