Building a website might feel overwhelming, but WordPress simplifies the process, making it incredibly user-friendly. With over 43% of websites worldwide powered by WordPress, it has become the leading platform for creating all types of websites, whether you’re building a blog or launching an eCommerce store. Combined with the drag-and-drop website builder, the process becomes even more seamless and accessible to users of all skill levels.
In this guide, we’ll take you step by step through the process of creating your WordPress site. By the end, you’ll have a fully functional website that’s optimized for search engines and designed to stand the test of time.
What is WordPress?

WordPress is an open-source content management system (CMS) that greatly simplifies the process of building and managing websites. In fact, it’s one of the most popular platforms worldwide, powering over 40% of all websites on the internet. Whether you’re looking to create a personal blog, a professional portfolio, or a fully functional eCommerce site, WordPress provides all the tools necessary to accomplish it.
One of the primary reasons people choose WordPress is its remarkable flexibility. With thousands of free and premium themes, you can easily design your website to fit any aesthetic or brand identity. Themes allow you to instantly change the look of your website while keeping your content intact. Furthermore, WordPress offers an extensive library of plugins—small software add-ons—that can extend the functionality of your site in countless ways.
In addition, WordPress is highly user-friendly, making it an excellent option for beginners with no coding experience. The platform includes an intuitive drag-and-drop editor and a simple dashboard that enables you to manage content, media, and plugins effortlessly. On the other hand, for those who are more technically inclined, WordPress is highly customizable. Its open-source nature allows developers to access and modify the source code, enabling them to create tailored solutions for unique website requirements.
Another advantage is the choice between WordPress.com and WordPress.org. WordPress.com is a hosted service, which means WordPress manages the technical aspects like hosting, backups, and security for you. It’s ideal for users who want to focus purely on content creation without dealing with technical maintenance. On the other hand, WordPress.org is a self-hosted solution. While this requires users to arrange their own hosting and handle site maintenance, it offers complete control over the site’s functionality and customization. This distinction makes WordPress suitable for everyone—from casual bloggers to professional developers.
Why WordPress is Perfect for Everyone—From Beginners to Developers
One of the standout features of WordPress is its accessibility. Whether you’re a complete beginner or an experienced developer, WordPress is designed to meet you where you are. If you have no knowledge of HTML, CSS, or other programming languages, WordPress makes it easy to build a professional-looking website through its intuitive dashboard. You don’t need to handle a single line of code to create a website that looks polished and functions seamlessly.
The WordPress dashboard offers a user-friendly interface that allows users to manage content, add images, customize the site’s appearance, and even install plugins with just a few clicks. This is especially beneficial for clients or users who want control over their site without the need for extensive technical expertise. Even tasks like updating the website or making design changes can be done quickly through the visual editor.
Whether you’re a first-time user or an advanced developer, WordPress adapts to your needs. Beginners can create stunning websites using pre-made themes and plugins, while experienced developers can dive into the code to build custom solutions.
Step-by-step Guide To Build a WordPress Website
Now that you know what WordPress is, let’s get started to build your WordPress website.
Step 1: Choose Your Domain Name and Web Hosting
The first step in creating your WordPress website is choosing a domain name, which serves as your website’s address (e.g., www.yourwebsite.com). A well-chosen domain name plays a critical role in your site’s success. Here are a few essential tips to keep in mind when selecting one:
- Keep it Short and Memorable: Avoid long or complex names, as short and simple domain names are easier for users to remember and type.
- Easy to Spell and Pronounce: The simpler your domain name, the easier it will be for users to recall and find your site, reducing the chances of misspelling or confusion.
- Relevance to Your Brand: Your domain name should reflect your business, niche, or purpose. A well-matched domain name helps to establish your brand identity and instantly communicates what your site is about.

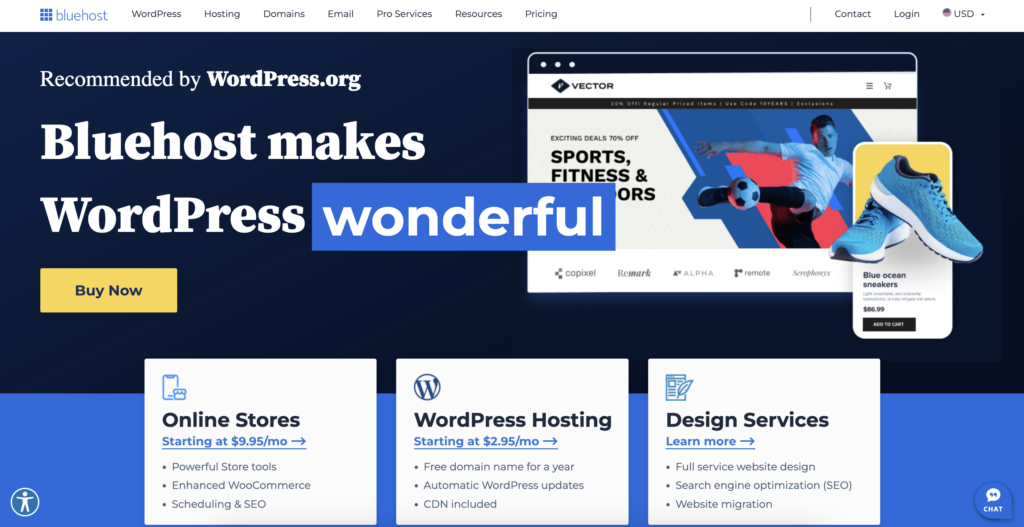
Many hosting providers, like Bluehost, offer a domain name search tool to help you quickly check the availability of your desired domain. If you’re struggling to come up with a name, Bluehost also provides an AI Domain Generator that suggests domain names tailored to your business or website focus, simplifying the naming process.
Choose Your Web Hosting Provider
Once you’ve decided on a domain name, the next crucial step is choosing a web hosting provider. Web hosting is where your website’s files are stored and delivered to visitors when they access your site. There are various hosting options available, and choosing the right one depends on your site’s needs and goals. Some popular hosting types include:
- Shared Hosting: A budget-friendly option where multiple websites share server resources. Ideal for small or personal sites with lower traffic.
- WordPress Hosting: Specifically designed for WordPress sites, offering optimized performance, security, and convenience.
- Cloud Hosting: A scalable hosting solution perfect for growing websites with fluctuating traffic. It offers flexibility and uptime reliability.
For beginners, Bluehost’s WordPress Hosting is highly recommended. Not only is WordPress pre-installed on Bluehost plans, eliminating the need for manual setup, but Bluehost also offers a free domain for the first year, a free SSL certificate (which ensures your site is secure), and automatic WordPress installation. This package makes it incredibly simple to launch your WordPress site without needing technical expertise.
Why Choose Bluehost WordPress Hosting?
- Optimized for Performance: Bluehost’s WordPress hosting is fine-tuned to provide fast loading speeds, ensuring a smooth user experience.
- Automatic WordPress Updates: You don’t have to worry about keeping your site up to date, as Bluehost automatically updates your WordPress installation to the latest version, improving security and functionality.
- 24/7 Customer Support: Bluehost provides around-the-clock customer support to help you with any issues that may arise.
- Essential Features in One Package: From a free domain and SSL certificate to automatic backups, Bluehost includes all the key elements you need to build and maintain a website in one plan.
Whether you’re starting a blog, launching an online store, or building an eCommerce platform, Bluehost’s WordPress hosting is designed to make the process seamless. You can focus on customizing and growing your site while Bluehost handles the technical side. After choosing your web hosting plan, the next step is to install WordPress. Fortunately, many hosting providers, including Bluehost, offer one-click WordPress installation, allowing you to set up your site in minutes.
If you choose Bluehost, WordPress comes pre-installed with their hosting plans, meaning you can skip the installation process entirely and dive straight into customizing your website. This convenience is ideal for beginners who want to get their website up and running quickly without dealing with the complexities of manual installation.
Step 2: Customize your WordPress Website
One of the key advantages of using WordPress is the flexibility it offers through its themes. WordPress themes allow you to easily change everything from fonts and colors to page layouts, helping you create a unique look and feel for your website. Even if you start with a pre-designed theme, you can fully customize it to match your brand’s identity or specific design preferences.
Customizing Your WordPress Theme
If you’re not satisfied with the default, you have the freedom to change your WordPress theme at any time. WordPress themes are essentially pre-designed templates that control your site’s visual layout and style. Whether you want a minimalist design, a vibrant portfolio, or an elegant online store, there’s a theme for every need.
Even if the AI builder selects a theme for you initially, switching to another theme is simple. Here’s how to change your WordPress theme:
- Log in to your WordPress Dashboard: Go to your admin panel, where you can control all aspects of your website.
- Navigate to the ‘Appearance’ Tab: From the left-hand menu, click on Appearance and select Themes.
- Click ‘Add New Theme’: This button allows you to browse and install new themes.
- Browse the WordPress Theme Directory: You can select from thousands of free themes or purchase premium themes. The directory also has filters to help you narrow down your search based on layout, style, or functionality.
- Install and Activate the Theme: Once you find a theme that suits your needs, click Install, and then Activate to apply it to your site.
When selecting a new WordPress theme, always ensure that it’s mobile-responsive and compatible with essential WordPress plugins. A mobile-responsive theme ensures that your site looks great on all devices and compatibility with plugins guarantees smooth performance and better SEO optimization. Google favors mobile-friendly websites, so this is crucial for boosting your site’s search engine ranking.
Elementor Website Builder For Easier Page Customization
For even more flexibility, you can use Elementor, a popular drag-and-drop page builder that makes it incredibly easy to customize every aspect of your site without needing any coding knowledge. Elementor lets you add images, buttons, text, and custom sections simply by dragging elements into place. It offers a range of pre-built templates and widgets to speed up the design process, giving you creative control over your website’s layout..

Elementor is especially helpful if you want to:
- Customize individual pages without altering the entire site design.
- Create visually stunning landing pages or product pages for eCommerce.
- Easily integrate interactive elements like sliders, contact forms, and social media feeds.
When selecting or customizing your WordPress theme, always prioritize mobile responsiveness. Mobile-friendly websites not only offer a better user experience, but they also perform better on search engines like Google. Google’s algorithms now prioritize mobile-optimized websites, so using a responsive theme can directly improve your site’s ranking and increase your traffic. Additionally, a fast, mobile-friendly website can reduce bounce rates and keep users engaged longer.
Step 3: Install New Plugin For Your WordPress Website
One of the greatest advantages of WordPress is the ability to expand your website’s functionality through plugins. Plugins are small software add-ons that allow you to integrate additional features like SEO tools, contact forms, enhanced security, and more—without needing to code. With over 59,000 plugins available, WordPress gives you the flexibility to customize your site for your specific needs, whether it’s a blog, eCommerce store, portfolio, or corporate website.
How to Install a WordPress Plugin
Installing plugins on WordPress is a straightforward process that can be done right from your dashboard:
- Log in to your WordPress Dashboard: Head to your WordPress admin area.
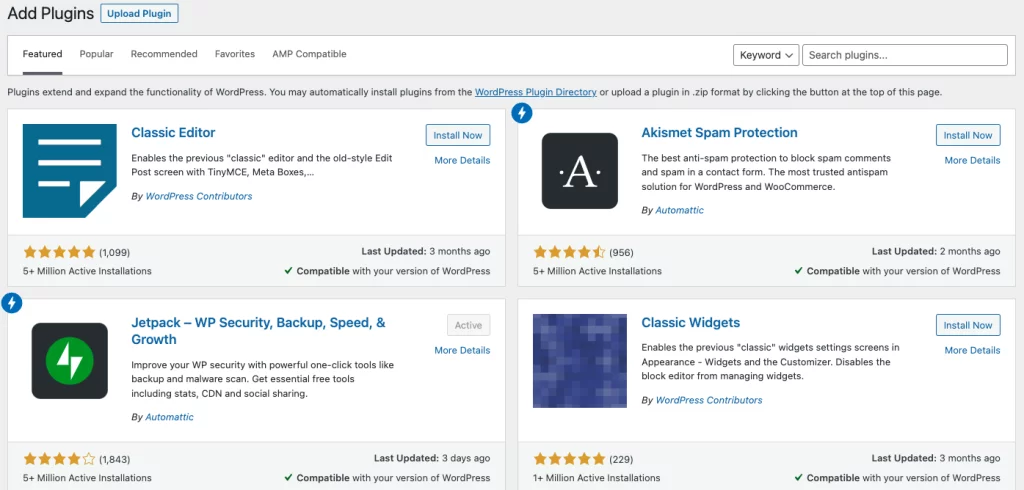
- Navigate to the Plugins Menu: From the left-hand menu, click on Plugins and then click on Add New.
- Search for a Plugin: In the search bar, type the name of the plugin you want to install (e.g., Yoast SEO).
- Install the Plugin: Once you find the plugin you want, click Install Now.
- Activate the Plugin: After the installation is complete, click Activate to enable the plugin on your WordPress site.
With these simple steps, you can instantly add new features to your site. Now, let’s explore some essential plugins that can significantly enhance your WordPress website.
Essential Plugins for Your WordPress Website
Here are some of the most essential plugins that can help optimize your WordPress site for performance, security, and user experience:
1. Yoast SEO
Yoast SEO is one of the most popular SEO plugins, making it easier to optimize your site’s content for search engines. It helps improve your website’s search engine rankings by providing on-page optimization tips, keyword analysis, and readability scores. With Yoast SEO, you can:
- Customize your meta titles and descriptions.
- Optimize your content with keyword recommendations.
- Ensure your content is structured in a way that search engines can easily understand.
This plugin is essential for driving organic traffic and improving your site’s visibility on platforms like Google.
2. Jetpack
Jetpack is an all-in-one plugin created by WordPress to enhance your site’s security, performance, and traffic monitoring. It offers features like automatic backups, malware scanning, spam protection, and even social media integration. Additionally, Jetpack helps to:
- Monitor site traffic and performance analytics.
- Secure your site from attacks with real-time security features.
- Speed up your site with image optimization and lazy loading.
For site owners who want to improve performance while keeping their site secure, Jetpack is an indispensable tool.
3. WPForms
If you need to add a contact form, newsletter sign-up form, or any other type of form to your website, WPForms is one of the best plugins for the job. It offers a drag-and-drop interface, allowing you to build forms without any coding. With WPForms, you can:
- Create contact forms, survey forms, and even payment forms.
- Customize the design and functionality of your forms.
- Collect and manage visitor information, enabling better communication with your audience.
This plugin is great for improving user interaction and lead generation.
4. W3 Total Cache
A faster website provides a better user experience and improves your SEO. W3 Total Cache is a powerful caching plugin that speeds up your WordPress website by reducing load times. This plugin works by caching static files, minimizing HTTP requests, and compressing files to improve performance. Some of its key benefits include:
- Faster page loading times.
- Improved search engine rankings due to better performance.
- A smoother browsing experience for visitors, which can lower bounce rates.
If site speed is a priority (and it should be), W3 Total Cache is a must-have plugin.
5. Smush
Images are often the heaviest elements on a website, which can slow down loading times. Smush is an image optimization plugin that compresses your images without sacrificing quality. It automatically compresses and resizes images as you upload them, helping to improve site speed and performance. With Smush, you can:
- Optimize and compress images in bulk.
- Enable lazy loading, which delays image loading until the user scrolls down to them.
- Improve page load speed, enhancing both user experience and SEO.
This plugin is perfect for websites that rely heavily on images, such as blogs, portfolios, and eCommerce stores.
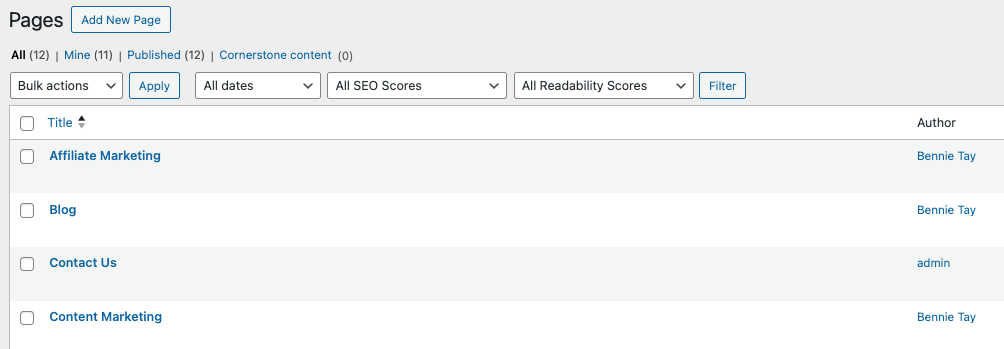
Step 4: How to Add a New Page to Your WordPress Website
To provide a professional and user-friendly experience on your WordPress website, it’s important to create key pages that offer relevant information and help visitors easily navigate your site. Here’s how you can add a new page to your WordPress website:
How to Add a New Page:
- Log in to your WordPress Dashboard: Access your admin panel.
- Navigate to Pages: From the left-hand menu, click on Pages, then select Add New.
- Enter a Page Title: For example, titles like “About Us”, “Services”, or “Contact” clearly describe the purpose of the page.
- Add Content Using the Block Editor: WordPress’s block editor makes it easy to insert text, images, videos, and other content into your pages. You can structure your page using pre-built blocks like headings, paragraphs, images, and columns.
- Click Publish: Once you’re satisfied with the content, click Publish to make the page live on your site.
When adding content to your pages, use headings and subheadings to break up the text for better readability. Incorporating relevant keywords will also improve your SEO, helping search engines understand your page’s focus.
Essential Pages for a WordPress Website
Here are the must-have pages for any professional WordPress website, each serving a specific function:
1. About Page
The About page is one of the most visited sections of a website. It introduces your business, brand, or personal story and communicates your mission, values, and the purpose of your site. A well-crafted About page helps build trust and a personal connection with your audience by:
- Explaining who you are and what you do.
- Sharing your brand’s story or history.
- Highlighting your unique value or what sets you apart from competitors.
2. Contact Page
A Contact page is crucial for encouraging visitors to get in touch with you. It should include:
- A contact form (created easily with plugins like WPForms).
- Your email address and phone number (if applicable).
- Your business location, if relevant, with an embedded Google map for easy navigation.
Making it easy for visitors to contact you enhances credibility and customer satisfaction.
3. Services or Products Page
If you offer services or sell products, dedicate a page to explaining what you provide. On this page, include:
- A clear description of each service or product.
- Pricing information and any special packages.
- Benefits of choosing your product or service, along with testimonials, case studies, or reviews if possible.
For eCommerce websites, detailed product pages with descriptions, images, and pricing are essential to guide visitors through purchasing decisions.
4. Blog Page
A Blog page is vital if you plan to create and share content regularly. Blogging improves your site’s SEO by adding fresh content that targets specific keywords, driving traffic and engaging visitors. A blog can also:
- Establish yourself as an authority in your niche.
- Build a community around your brand.
- Provide value to your audience through informative or entertaining posts.
The blog page automatically organizes your posts, and visitors can easily navigate through your content.
5. Privacy Policy and Disclaimer
If you collect data from users (e.g., through forms, cookies, or analytics), you are legally required to have a Privacy Policy page that outlines how you collect, store, and use that data. A Disclaimer page is also recommended, particularly if you provide advice or affiliate links. These pages ensure transparency and protect your business from legal risks.
Most WordPress sites, especially eCommerce and blog-driven sites, need to clearly outline their terms and conditions for data handling, product use, or liability.
Step 5: Optimize Your WordPress Website For SEO
Search Engine Optimization (SEO) is essential for driving organic traffic to your WordPress website. Fortunately, WordPress is inherently SEO-friendly, providing a solid foundation for ranking well in search engine results. However, there are several additional strategies you can implement to enhance your site’s visibility and performance in search engines.
1. Use SEO Plugins
One of the most effective ways to optimize your WordPress site for search engines is by utilizing SEO plugins. Among the best options available is Yoast SEO. This powerful tool helps you optimize your content in several ways:
- Keyword Optimization: Yoast allows you to focus on specific keywords, providing suggestions on how to incorporate them effectively throughout your content.
- Meta Descriptions: The plugin enables you to easily create and customize meta descriptions, which are crucial for improving click-through rates from search results.
- Readability Analysis: Yoast offers readability scores and tips to enhance your content’s clarity and engagement, ensuring that it’s accessible to your audience.
By integrating an SEO plugin like Yoast, you can significantly improve your site’s chances of ranking higher in search engine results.
2. Compress Images
Large image files can slow down your website’s loading speed, negatively impacting user experience and SEO rankings. To maintain optimal performance, it’s important to compress your images before uploading them. Tools such as Smush or Imagify can help you achieve this without compromising the quality of your visuals. Here’s how:
- Bulk Compression: Both tools allow you to compress multiple images at once, saving time and ensuring that your site remains fast.
- Automatic Optimization: Set up these plugins to automatically optimize images as you upload them, ensuring consistent performance across your site.
By reducing image sizes, you improve load times, which can lead to better SEO rankings and a more enjoyable user experience.
3. Caching
Implementing a caching plugin is another effective way to enhance your WordPress site’s speed. Caching plugins like W3 Total Cache create a static version of your website, reducing the time it takes to load pages for visitors. The benefits include:
- Faster Load Times: Caching minimizes server load by serving cached versions of your pages, resulting in quicker response times.
- Improved User Experience: Faster websites lead to happier users, which can reduce bounce rates and improve your overall SEO performance.
By leveraging caching, you can provide a seamless browsing experience for your visitors while also boosting your search engine rankings.
4. Enable HTTPS
Website security is a significant ranking factor for Google. Sites that use HTTPS (HyperText Transfer Protocol Secure) are prioritized in search results over non-secure sites. To secure your WordPress website, follow these steps:
- Obtain an SSL Certificate: Most hosting providers, including Bluehost, offer free SSL certificates. Installing this certificate encrypts data transferred between your site and its visitors.
- Update Your URLs: After enabling HTTPS, make sure to update your website’s URLs from HTTP to HTTPS to maintain consistent security across your site.
By enabling HTTPS, you not only enhance your site’s security but also improve its credibility and visibility in search engine rankings.
Step 6: Launch your website
Congratulations on setting up and optimizing your WordPress website! Before publishing your website, it’s essential to complete a few final checks to ensure everything is functioning.
1. Preview Your Site
To begin, take the time to preview your website to ensure it displays correctly across various devices. By utilizing the WordPress dashboard’s preview function, you can easily check how your site looks on desktops, tablets, and mobile devices. Next, make sure that all elements are properly aligned and visually appealing on larger screens. Then, verify that the layout adapts well to medium-sized devices like tablets. Finally, test the mobile view to confirm that the content remains readable and the navigation is user-friendly. Pay special attention to font sizes, image placement, and button visibility on smaller screens to guarantee a seamless user experience.
2. Test Functionality
Next, it’s crucial to test the functionality of your website. This step is vital for guaranteeing a smooth experience for your visitors. Click on every link to confirm they direct users to the correct pages and test all buttons—especially call-to-action links—to ensure they work as intended. Additionally, fill out and submit any contact forms, newsletter sign-ups, or other interactive elements to verify that submissions are processed correctly. Thorough testing will help you identify and resolve any potential issues before your site goes live.
3. Monitor for Errors
Moreover, consider using tools like Google Search Console to monitor your website for any potential errors or issues that could impact its performance. By proactively checking for crawl errors and SEO-related issues, you can enhance user experience and improve your site’s search engine rankings. Analyzing performance metrics will also provide valuable insights into how your site is functioning, allowing you to make any necessary adjustments before launch.
4. Publish Your Website
Once you’ve thoroughly previewed and tested your website, you’re ready for the final step: hitting the “Publish” button. With your WordPress site now live, take the opportunity to announce your launch through social media, email newsletters, and other platforms to attract initial visitors.
Final Thoughts: How to Create a Website on WordPress Easily
To start, you can install WordPress, select a free theme, and create a website in just a few minutes. This guide is designed for everyone, from beginners to professional developers, ensuring that your WordPress website is fast, responsive, and optimized for success. Moreover, with AI tools managing the technical aspects, you can focus on what truly matters: crafting a beautiful and functional website.
Next, kickstart your website journey with Bluehost, where you can secure a free domain name along with a variety of additional features. Additionally, you’ll experience firsthand how easy it is to bring your ideas to life and create an online presence that reflects your vision. Whether you’re starting a blog, building a portfolio, or launching an online store, Bluehost provides everything you need to get started effortlessly.