Shopify is one of the most popular eCommerce builder platforms. In 2023, there were 1.75 million merchants using it to build their business online. Adding and managing your products on Shopify is simple with the correct guide.
This guide aims to streamline the process of adding products to your Shopify store, empowering you to extend your online presence and showcase your creations to a global audience. After all, you will gain insights into navigating the Shopify admin, refining product details, and effectively utilizing various sales channels.
Whether you’re introducing a single product or a huge catalogue of items, our guide offers valuable tips to enhance your store’s overall appeal and boost sales. The goal is to equip you with the knowledge and tools necessary to optimize your eCommerce experience on Shopify.
Let’s embark on the journey of adding products to your Shopify store and elevating your eCommerce game.
Start Selling on Shopify Today
How to Manually Add Your Products on Shopify
Shopify has made the process of adding new products straightforward. You can either add a new product through the web browser or mobile app. Before starting, you will need:
- Compelling descriptions that vividly portray the unique qualities of your products.
- Capture attention with enticing product photos or videos. You may then experiment with angles to create captivating visuals using your mobile device’s camera. On the other hand, opt for a professional photo shoot for a polished and refined appearance.
- Generate high-quality product mockups to showcase your items effectively. Besides, you can utilize tools such as Printify’s Mockup Generator, Placeit, or AI-based services for professional-looking images, even without the physical products.
- Ensure professionalism and smooth operation by optimizing product image sizes according to Shopify’s guidelines. You need to also size your image properly to enhance your store’s visual appeal and contribute to optimal performance.
Steps to Add New Product
Here’s a detailed guide on how to do it:
Step 1: Log in to your Shopify account
- Open your web browser and go to Shopify’s official website.
- Log in to your Shopify account using your credentials.
- After logging in, you’ll be taken to the Shopify Admin dashboard.
Step 2: Navigate to the Products Section
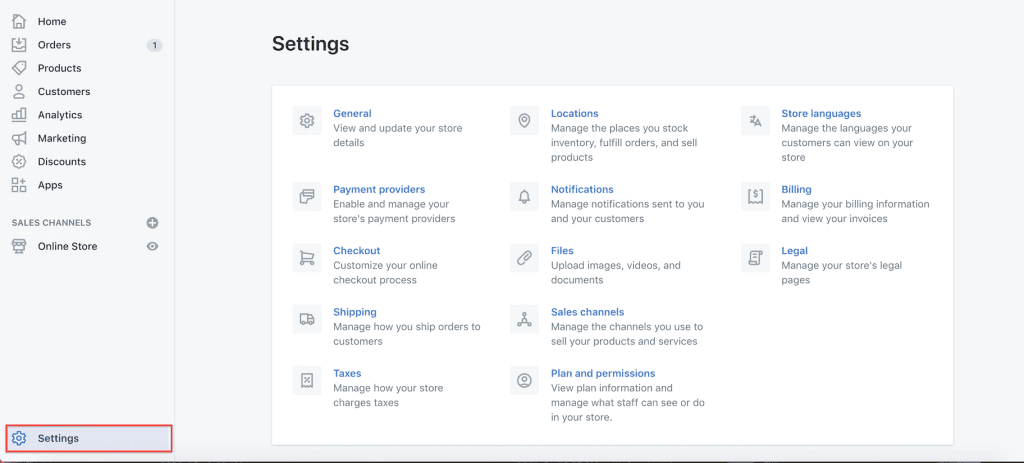
In the Shopify Admin, find and click on the “Products” tab located in the left-hand sidebar.
Step 3: Add a New Product
Once you are in the “Products” section, click on the “Add product” button.
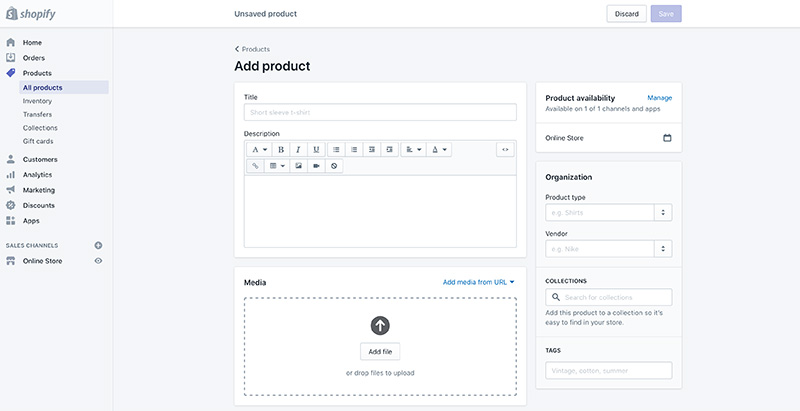
Step 4: Enter Product Details
Fill in the product details:
- Title: Enter the name of your product.
- Description: Add a detailed description of your product, including its features and specifications.
- Images: Upload high-quality images of your product. You can add multiple images to showcase different angles.
- Pricing: Set the price for your product. You can also add a compare-at price if you want to show a discounted rate.
- Inventory: Enter the initial quantity of the product you have in stock.
- Shipping: Configure shipping details, including weight and dimensions.
- Variants: If your product comes in different variations (e.g., sizes or colours), add them here.
Step 5: Collections & Tags
Assign the product to a collection if you have organised your products into different groups. This step is optional. Then, add relevant tags to make it easier to search and filter products within your store. Tags can include keywords related to your product.
Step 6: SEO Settings
Optimize your product for search engines by adding meta titles and meta descriptions. This will help improve your product’s visibility on search engines.
Step 7: Save and Publish
Once you’ve entered all the necessary information, you can either save the product as a draft or publish it immediately by clicking the “Save” or “Save and publish” buttons, respectively.
Step 8: Check Your Store
- Go to your Shopify store and check if the product has been added correctly. Make any adjustments if needed.
That’s it! You’ve successfully added a product to your Shopify store manually. Repeat these steps for each product you want to add.
Start Selling on Shopify Today
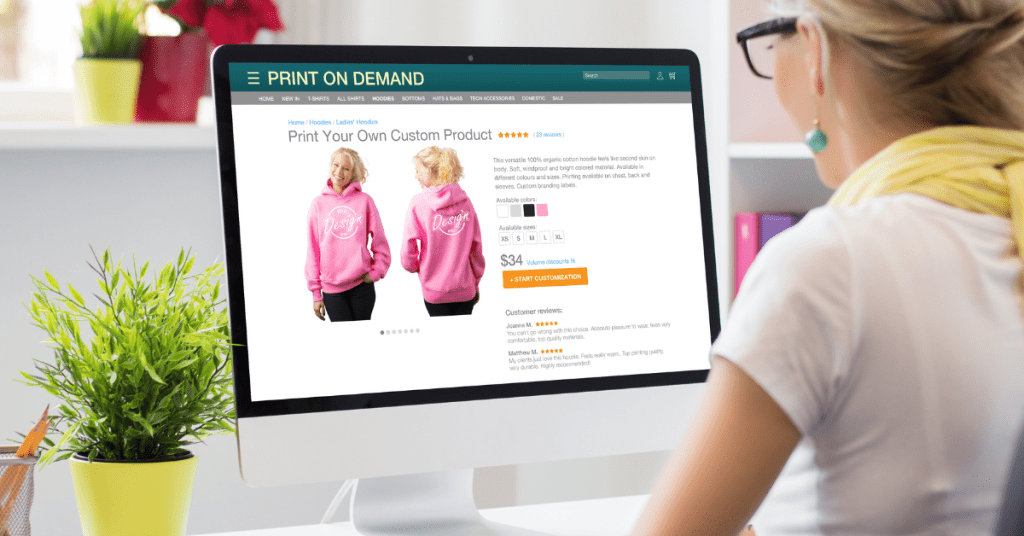
How to Add Products to Your Shopify Store With Print-on-Demand
Print on Demand(POD) is a business model where you can start your business without requiring a huge investment and keeping your inventory. Each product is printed only when a customer makes a purchase, and your POD supplier will handle the production and shipping.
Besides, adding products to your Shopify store with Print on Demand (POD). Most POD suppliers like Printify and Printful offer seamless integration that allows you to effortlessly offer custom-designed merchandise to your customers.
Here’s a comprehensive guide on how to seamlessly integrate and manage Printify products on your Shopify store:
1. Set Up Your Printify Account:
Firstly, you start by creating an account on Printify’s platform. Navigate to the Printify website and sign up for an account. Once registered, you can explore the platform to familiarize yourself with its features and product offerings.
Create Your Free Printify Account Now
2. Connect Printify to Your Shopify Store:
In your Shopify admin, go to the ‘Apps’ section and search for ‘Printify.’ Then, install the Printify app and follow the prompts to connect it to your Shopify store. This integration enables a seamless flow of products from Printify to your Shopify inventory.
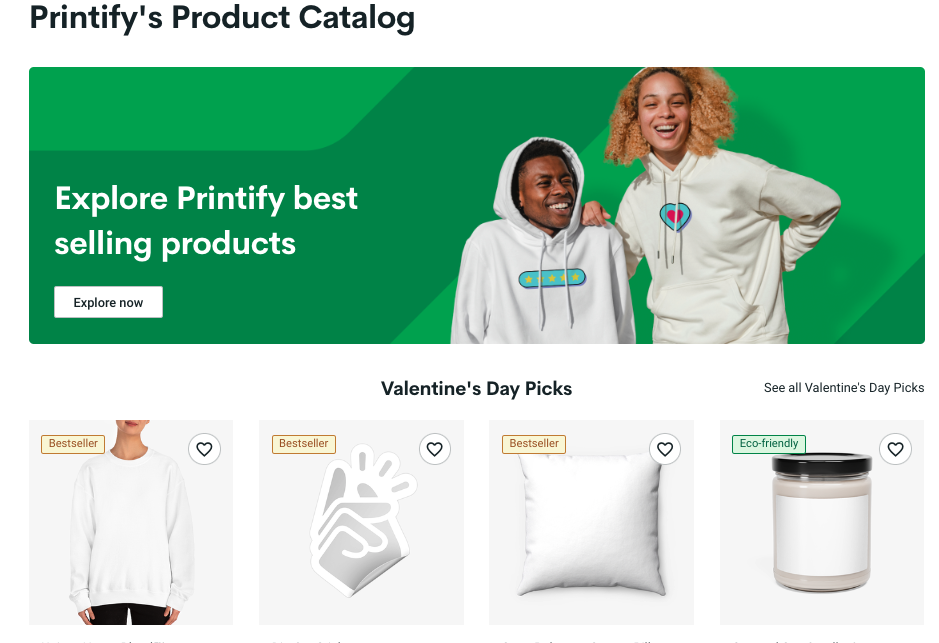
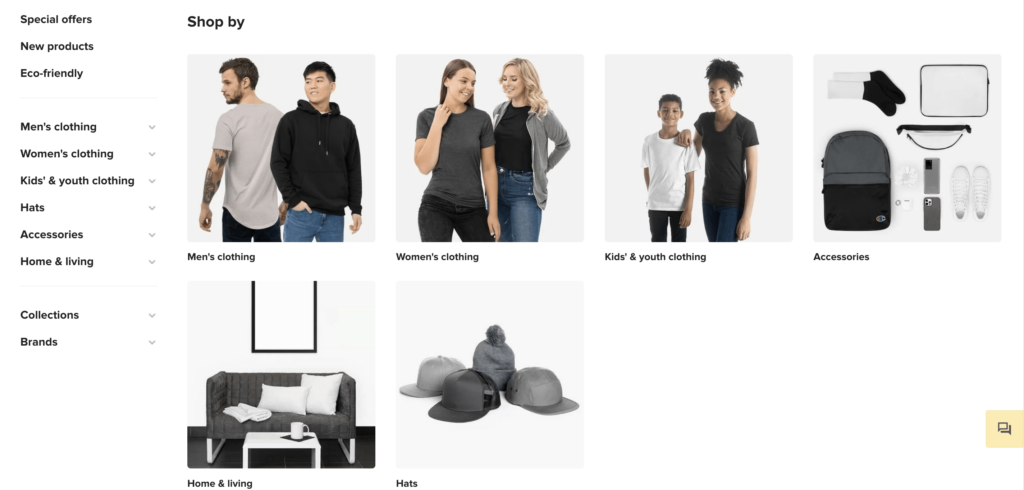
3. Browse and Choose Products:
Once the integration is complete, browse through Printify’s extensive catalogue of customizable products. You can then choose items that align with your brand and niche, such as T-shirts, hoodies, mugs, or phone cases. Each product listing provides details about the available colours, sizes, and printing options.
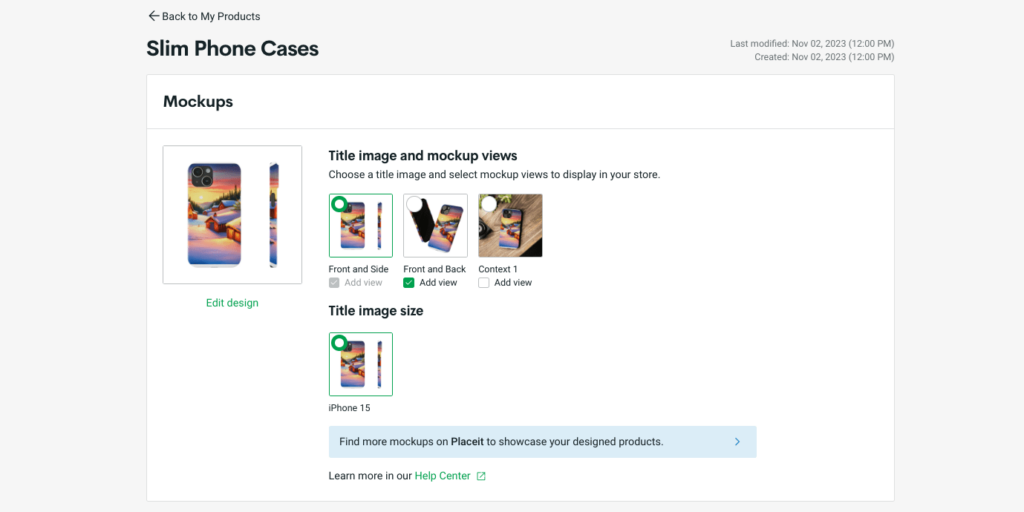
4. Design Your Products:
Followed by customizing your chosen products with unique designs or artwork. Printify allows you to upload your designs directly through the platform. This will ensure that your designs comply with the recommended dimensions and file formats for optimal printing quality.
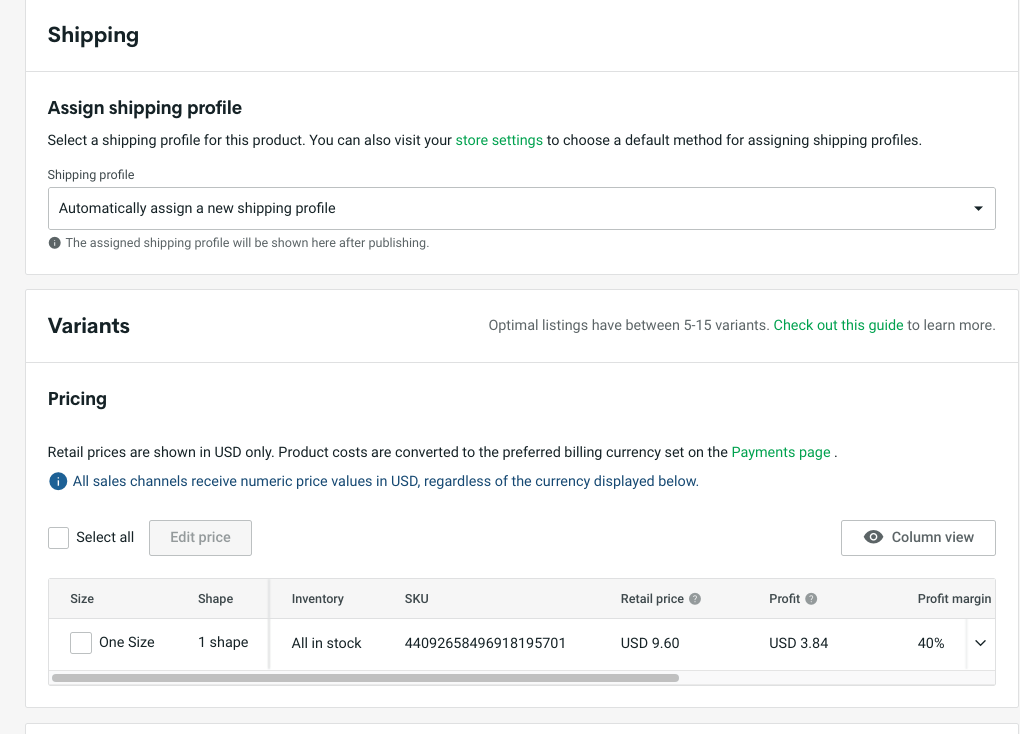
5. Set Pricing and Profit Margins:
Then, determine the pricing for each product. You need to factor in the production costs from Printify and setting your desired profit margins. Printify provides transparent pricing information, allowing you to make informed decisions about your retail prices.
6. Add Products to Your Shopify Store:
In your Shopify admin, go to the ‘Products’ section. Click ‘Add product’ and select the Printify product you want to add. Customize product details such as title, description, and variants. Then. link the product to the appropriate Printify variant to ensure accurate fulfilment.
7. Preview and Publish:
Before making your products live on your Shopify store, use the preview feature to ensure everything looks as expected. You need to confirm that product details, pricing, and images are accurate. Once satisfied, publish the products to make them available for purchase.
8. Manage Orders and Fulfillment:
As customers place orders on your Shopify store, the order will be sent to Printify automatically. Then, Printify will process and fulfil these orders. You can also monitor your Printify dashboard for order status updates, tracking information, and production details. Printify handles the printing, packaging, and shipping processes on your behalf.
9. Monitor Performance and Adjust:
In addition, you need to review the performance of your Printify products on Shopify regularly. Analyze sales data, customer feedback, and any potential issues. Adjust product offerings, pricing, or designs based on customer preferences and market trends.
By following these steps, you can successfully add and manage Printify products on your Shopify store, offering a diverse range of custom merchandise to your customers with the convenience of Print on Demand fulfillment.
Create Your Free Printify Account Now
How to Import Products to Shopify by CSV
Importing products to Shopify using a CSV (Comma-Separated Values) file is a convenient way to add multiple products at once. Here’s a detailed guide on how to do it:
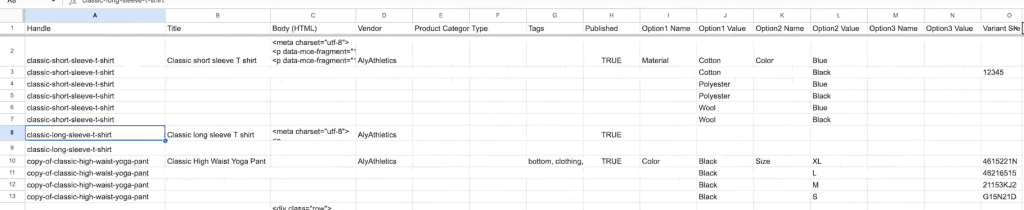
1. Prepare Your CSV File:
Start by organizing your product information in a CSV file. You can use spreadsheet software like Microsoft Excel or Google Sheets. Ensure your CSV file includes columns for key product details such as title, description, price, variants, images, and inventory levels.
2. Access the Shopify Admin:
Then, log in to your Shopify account, and from the admin dashboard, navigate to the “Products” section on the left-hand sidebar.
3. Import Your CSV File:
In the Products section, look for the “Import” button. Click on it to begin the import process. Then, Shopify will prompt you to upload your CSV file. Click on the “Choose File” button and select the CSV file from your computer.
Shopify will ask you to map the columns in your CSV file to the corresponding fields in Shopify. You need to also ensure that each column is correctly matched to the relevant product attribute such as title, description, price, etc. This step helps Shopify understand how to interpret the data in your CSV.
4. Review and Confirm:
After mapping the columns, then Shopify will provide a preview of your data. Review this preview carefully to ensure that the information is accurate and correctly aligned with the Shopify fields. Make any necessary adjustments.
If you’re importing products that already exist in your store, you can then decide whether you want to update existing products or ignore duplicates. Choose the appropriate option based on your preference.
5. Import:
Once you’ve reviewed and confirmed the import details, click on the “Import Products” button. Shopify will then process your CSV file and add the products to your store. This might take some time depending on the number of products being imported.
After the import is complete, then go to the “Products” section in your Shopify admin and verify that the products have been added with the correct information. Check details like titles, descriptions, prices, and images.
6. Update Images and Variants (if required):
In some cases, you may also need to manually update images or variant details for specific products after the import. Shopify makes it easy to edit and add additional information through the product editor.
7. Test a Sample Order:
To ensure everything is functioning correctly, you may also consider placing a sample order for one of the newly imported products. This allows you to check the checkout process, inventory management, and order fulfilment.
By following these steps, you can efficiently import products to Shopify using a CSV file, streamlining the process of adding multiple items to your online store.
Managing Your Products on Shopify
Properly managing your products on this sales channel is key to maintaining an organized, efficient, and customer-friendly online store. Managing products in Shopify involves a variety of tasks such as editing, duplicating, archiving, and deleting.
Here’s a detailed guide on how to perform these actions:
Editing Products:
To edit a product in Shopify, start by navigating to the “Products” section in your Shopify admin.
Then, locate the product you want to edit and click on its title. This will take you to the product details page. Make the necessary changes, such as updating the title, description, pricing, or images.
After making edits, then be sure to click the “Save” button to apply the changes. This ensures that the updated information is reflected in your online store.
Duplicating Products:
Duplicating a product can save time when creating similar items or variations. To duplicate a product, go to the “Products” section and find the product you want to duplicate. Click on the ellipsis (…) next to the product title and select “Duplicate.”
This creates a copy of the product, and you can then modify the duplicated product’s details as needed. Duplicating products is particularly useful when adding similar items with only slight variations.
Archiving Products:
Archiving a product is a way to temporarily remove it from your active product listings without deleting it permanently. To archive a product, go to the product details page and click on the “More actions” dropdown. Choose “Archive” from the menu.
The archived product won’t be visible on your storefront, but you can still access and unarchive it later if needed. Archiving is beneficial when you want to temporarily remove a product from your catalogue without losing its data.
Deleting Products:
If you need to permanently remove a product from your Shopify store, you can then delete it. To delete a product, go to the product details page and click on the “More actions” dropdown. Choose “Delete” from the menu. Confirm the deletion and the product will be permanently removed from your store.
Keep in mind that deleting a product also removes its associated data, such as order history, so use this option carefully.
Bulk Editing and Actions:
Shopify also provides options for bulk editing and actions. In the “Products” section, you can select multiple products and apply changes simultaneously. This is useful for making widespread adjustments to product details, such as updating prices or tags. You can also utilize the bulk actions menu to perform tasks like duplicating, archiving, or deleting multiple products at once.
Inventory Tracking:
For products with inventory, Shopify also offers robust inventory tracking features. Ensure that your product variants have accurate stock levels, and Shopify will automatically manage inventory as orders are placed. In addition, set up low-stock notifications to stay informed about products that may need restocking.
Start Selling on Shopify Today
Final Thoughts: How to Add Products to Shopify: A Complete Guide
You’re now fully equipped with the skills to handle your Shopify store, starting from the initial addition of product details through publishing and anticipating sales.
Hence, start your Shopify store today and add your first product to start selling today. Implement these insights and witness the growth of your business. Additionally, explore Printify’s Catalog and utilize its various tools and features to maximize your store’s potential.