Managing multiple websites separately can quickly become overwhelming. From updating themes and ensuring security to keeping content synchronized, the process demands significant time and effort. Imagine a restaurant chain needing different websites for each location, a university handling department pages, or a digital agency managing multiple client websites. The biggest challenge? Keeping everything streamlined and efficient. That’s where WordPress Multisite Hosting comes in.
This powerful feature allows you to oversee multiple websites from a single dashboard, simplifying updates, security management, and user control. Whether you’re scaling a business, running an educational platform, or handling multiple brands, WordPress Multisite saves time and optimizes workflow.
In this guide, we’ll dive into how WordPress Multisite works, when to use it, how to set it up, and essential management tips. Plus, we’ll explore why Bluehost is an excellent choice for Multisite hosting, offering the performance, security, and scalability needed for a smooth and efficient network.
What is WordPress Multisite Hosting?
WordPress Multisite is a feature that allows you to run multiple websites under a single WordPress installation. Each site in the network maintains its own settings, content, and user roles while sharing core resources. This structure streamlines website management, making it an ideal solution for businesses, organizations, and agencies managing multiple sites.

How Does WordPress Multisite Hosting Work?
To understand how WordPress Multisite operates, let’s break down its key components:
1. Administrator Roles
Multisite introduces an additional user role beyond the standard WordPress setup—the Super Admin.
- Super Admin: Has full control over the entire network. They can create and manage sites, add users, install themes and plugins, and configure network-wide settings.
- Site Admins: Manage individual subsites within the network. They have control over content, users, and settings for their specific site but do not have access to network-wide functions.
This separation ensures site managers can operate independently without impacting the overall network.
2. Core Files and Database Structure
With WordPress Multisite, all websites share the same WordPress core files and database, which helps optimize server resources. However, each subsite maintains separate database tables for posts, users, and other data, allowing for individualized management within the network.
This structure offers several advantages. First, it enhances efficient resource management by enabling all sites to operate from the same installation, reducing redundancy and saving server space. Additionally, backups and troubleshooting become more manageable since each subsite’s data is stored separately, making it easier to identify and resolve issues. Lastly, WordPress Multisite ensures organized media storage by assigning each subsite its own wp-content/uploads directory, keeping files distinct and preventing mix-ups.
3. Subsites and Domain Mapping
Multisite networks offer flexibility in structuring subsites using two different URL formats: subdomains and subdirectories. With the subdomain approach, each subsite functions as an independent entity under the main domain, such as men.example.com and women.example.com. Alternatively, the subdirectory structure organizes sites as folders within the main domain, like example.com/services and example.com/blog.
Additionally, domain mapping allows businesses to assign unique domains to their subsites. This provides two key options. Using the main domain helps improve SEO and ensures consistent branding across the network. On the other hand, assigning unique domains is ideal for businesses that want each subsite to maintain a distinct brand identity while still being part of the multisite network.
4. Theme and Plugin Management
Super Admins have full control over theme and plugin installation across a WordPress Multisite network. They can install and activate themes or plugins for all subsites, ensuring consistency across the network. Additionally, they have the ability to restrict certain themes and plugins to specific subsites, allowing for tailored functionality where needed.
While maintaining overall network-wide consistency, Super Admins can also grant individual site admins the flexibility to customize themes and plugins according to their needs. Since each subsite has its own database, any theme customizations or plugin settings apply only to that specific site, preserving both flexibility and control within the multisite environment.
How to Set Up WordPress Multisite: A Step-by-Step Guide
WordPress Multisite is a powerful feature that lets you manage multiple websites from a single installation. Whether you’re running a business, an organization, or a blog network, WordPress Multisite simplifies website management by centralizing updates, security, and administration.
Follow this step-by-step guide to enable and configure a WordPress Multisite network efficiently.
Step 1: Prepare Your WordPress Installation
Before enabling WordPress Multisite, it’s essential to optimize your setup to ensure a smooth transition.
Start by backing up your website, creating a full backup of your WordPress files and database to prevent data loss. Next, deactivate all active plugins temporarily to avoid compatibility issues—these can be reactivated after the Multisite setup is complete.
Additionally, check your hosting requirements, as Multisite functions best on a VPS, dedicated server, or managed WordPress hosting plan for optimal performance and scalability. Finally, set Pretty Permalinks by navigating to Settings > Permalinks in your WordPress dashboard and selecting a non-default structure, such as Post name, to ensure proper URL formatting across the network.
Step 2: Enable the Multisite Feature
To activate WordPress Multisite, you need to modify the wp-config.php file:
- Access your WordPress wp-config.php file using FTP or your hosting file manager.
- Locate the line / That’s all, stop editing! Happy blogging. /
- Add the following code above that line:
define( ‘WP_ALLOW_MULTISITE’, true ); - Save and upload the modified wp-config.php file back to your server.
Step 3: Install the Network
To enable WordPress Multisite, start by logging into your WordPress dashboard and navigating to Tools > Network Setup. This section allows you to configure your multisite network according to your needs.
Next, choose your preferred network structure. If you opt for subdomains (e.g., site1.example.com, site2.example.com), you will need to configure your DNS settings. Alternatively, you can select subdirectories (e.g., example.com/site1, example.com/site2), which is easier to set up but may not work on existing sites.
Once you’ve decided on the structure, enter a Network Title and Admin Email Address to establish your multisite network. Finally, click Install, and WordPress will generate the necessary configuration details to complete the setup.
Step 4: Configure Server Files
After installing WordPress Multisite, WordPress will generate code snippets that need to be added to your wp-config.php and .htaccess files to complete the setup.
First, update the wp-config.php file by copying and pasting the provided code just below the line you previously added during installation. Next, update the .htaccess file by replacing the existing WordPress rewrite rules with the new ones provided.
Once both files have been updated, save and upload them to your server. These changes ensure that your multisite network functions correctly and that all subsites operate as expected.
Step 5: Access Network Admin
After updating the necessary configuration files, log out of your WordPress dashboard and then log back in to apply the changes.
Once logged in, navigate to My Sites > Network Admin to access the Multisite Dashboard. This is where you can manage your network settings, add new subsites, and control themes and plugins across your multisite network.
Step 6: Configure Network Settings
In the Network Settings section under Settings > Network Settings, you can configure key options to manage your WordPress Multisite network effectively.
Start by adjusting User Registration settings to either allow or restrict new user and site registrations based on your preferences. Next, set up Default Site Content, which defines the default pages, posts, and comments for newly created sites within the network.
Additionally, manage Upload Limits to control the maximum media upload size per site, ensuring efficient use of server resources. Finally, configure Plugin Permissions by deciding whether individual site admins can activate or deactivate plugins.
Once all settings are adjusted, click Save Changes to apply them across your multisite network.
Step 7: Add New Sites
To add a new site to your WordPress Multisite network, navigate to Network Admin and go to Sites > Add New.
Enter the required details, including the Site Address, which determines the URL structure, the Site Title, and the Language preference for the new site. Additionally, provide an Admin Email to assign an administrator for the subsite.
Once all fields are filled out, click Add Site to create the new subsite within your multisite network.
Step 8: Manage Themes and Plugins
To manage themes in your WordPress Multisite network, navigate to Themes > Add New in the Network Admin panel. After installing a theme, click Network Enable to make it available for all subsites. This ensures consistency across the network while allowing site admins to activate the theme for their specific sites.
For plugins, go to Plugins > Add New to install the necessary extensions. Click Network Activate to enable a plugin for all subsites, ensuring uniform functionality across the network. Alternatively, if you prefer to give individual site admins control over plugin management, you can enable this option in Network Settings, allowing them to activate or deactivate plugins as needed.
Step 9 (Optional): Set Up Domain Mapping
If you want each subsite to have a custom domain (e.g., site1.com instead of site1.example.com), you’ll need to configure domain mapping.
Start by using a domain mapping plugin or your hosting provider’s domain mapping feature to enable custom domains for your multisite network. Next, update the DNS settings for each custom domain, ensuring it points to your WordPress Multisite installation. This typically involves setting the correct A record or CNAME in your domain registrar’s DNS settings.
Once the DNS changes are in place, navigate to Network Admin > Sites, select the subsite you want to update, and go to Edit Site. Under Site Address (URL), enter the custom domain for that subsite and save the changes. This process ensures that each subsite operates under its own unique domain while remaining part of your WordPress Multisite network.
The Best WordPress Multisite Hosting Providers
Managing a WordPress Multisite network requires a hosting provider that delivers speed, security, and scalability. Whether you’re overseeing a few interconnected sites or a large, complex network, choosing the right hosting solution is critical to ensuring smooth performance and hassle-free management.
Several top-tier hosting companies stand out for their optimized support of WordPress Multisite (WPMS). Here’s a breakdown of the best options available in the U.S.:
1. Bluehost – Best for Ease of Use and Dedicated Support
Bluehost is a leading choice for WordPress Multisite hosting, providing a user-friendly experience with powerful features designed for performance, security, and scalability.
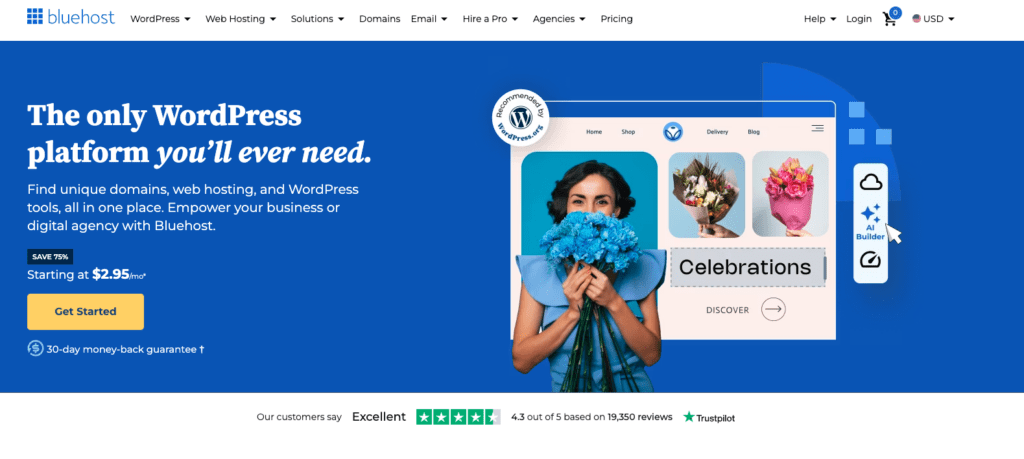
Their hosting plans include optimized performance, featuring built-in caching, SSD storage, and high uptime guarantees to ensure fast-loading websites. Enhanced security measures, such as free SSL certificates, daily backups, malware protection, and automatic updates, help safeguard your multisite network from potential threats.
For those managing multiple sites, scalability is a key advantage. Whether you’re running a few subsites or an expanding network, Bluehost’s robust infrastructure supports growing demands. Additionally, their 24/7 expert support team is available to assist with multisite setup, troubleshooting, and ongoing optimization.
With seamless one-click WordPress installations and an intuitive dashboard for easy site management, Bluehost remains a reliable solution for both beginners and experienced users running a WordPress Multisite network.
2. SiteGround – Best for Speed and Security
SiteGround is a managed WordPress hosting provider renowned for its top-tier security and blazing-fast performance, making it an excellent choice for WordPress Multisite hosting.
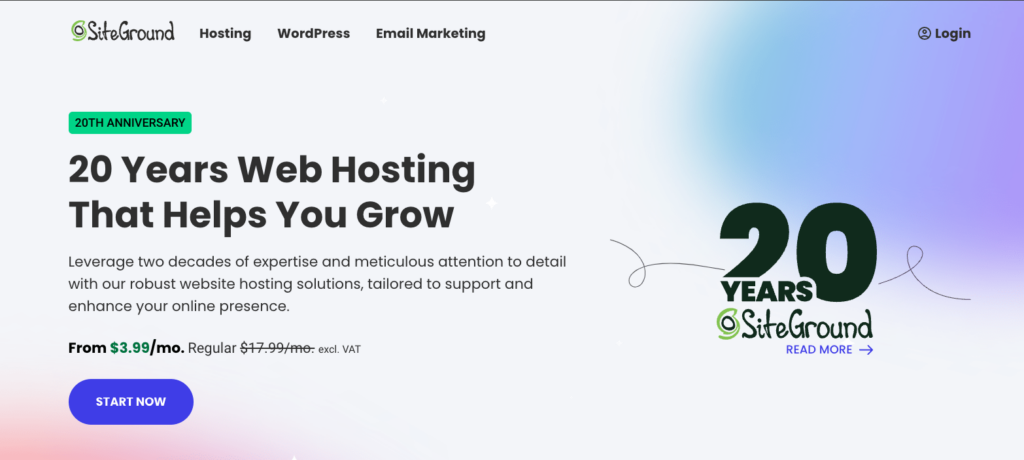
Their hosting plans feature advanced caching through SuperCacher technology, which significantly enhances site speed and ensures a smooth user experience. Proactive security measures, such as automated daily backups, AI-driven anti-bot systems, and free SSL certificates, provide robust protection for all sites within the network.
Designed with developers in mind, SiteGround’s WordPress-optimized infrastructure includes cloud-powered hosting, automatic updates, and staging environments, allowing for seamless testing and deployment.
For those who prioritize security and performance, SiteGround stands out as a reliable and high-performing solution for managing a WordPress Multisite network efficiently.
3. Kinsta – Best for Premium Cloud Hosting with Enterprise-Level Features
For businesses and high-traffic networks that require elite performance and cutting-edge technology, Kinsta provides an exceptional managed WordPress hosting experience. Built on the Google Cloud Platform, Kinsta ensures unparalleled speed, scalability, and security.
One of its standout features is automatic scaling, which dynamically adjusts resources to handle traffic spikes without downtime. Additionally, Kinsta’s global CDN and edge caching optimize content delivery, ensuring ultra-fast loading times for users across the world.
When it comes to security, Kinsta offers enterprise-grade protection, including DDoS protection, firewall integration, and daily automatic backups, keeping your multisite network safe from cyber threats.
For technical support, Kinsta provides access to expert WordPress specialists available 24/7, ensuring quick resolutions to any issues.
Though Kinsta comes at a premium price, its high-performance managed hosting environment is ideal for agencies, large-scale businesses, and enterprises that need a robust, hassle-free WordPress Multisite solution.
4. HostGator – Best for Budget-Friendly Hosting
For those prioritizing affordability, HostGator offers a cost-effective solution for WordPress Multisite users. While it may not include the ultra-premium features of high-end providers, it delivers solid performance at an accessible price point.
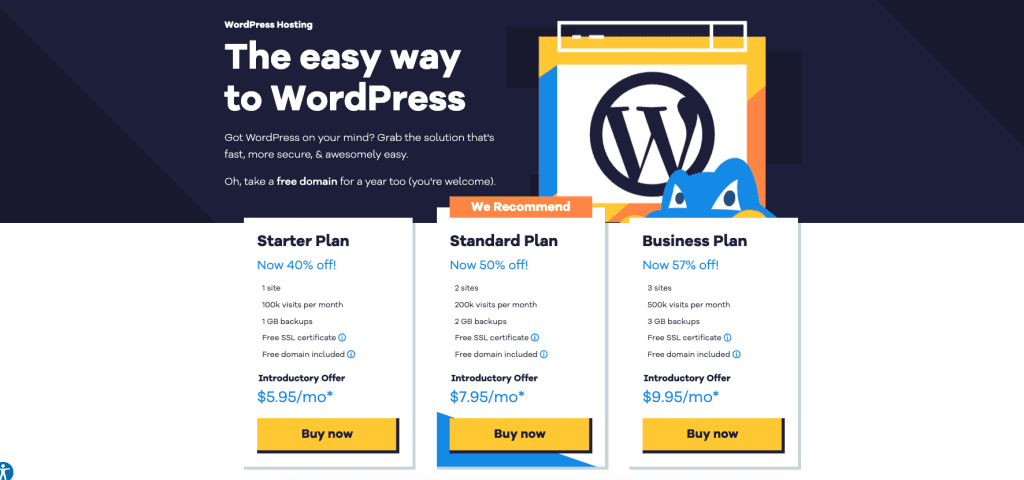
One of its key advantages is unlimited bandwidth, ensuring that sites remain accessible without the risk of unexpected overage charges. Additionally, free site migrations allow for a smooth transition from another hosting provider at no extra cost, making it easy for users to move their existing sites.
For beginners, HostGator simplifies the setup process with one-click WordPress installation, allowing users to launch their multisite network with minimal technical effort.
Ideal for individuals and small businesses, HostGator provides a budget-friendly way to manage multiple WordPress sites without compromising on essential hosting features.
Best Practices for Managing a WordPress Multisite Network Efficiently
Running a WordPress Multisite network allows you to manage multiple websites from a single dashboard, but it also requires careful management to ensure security, efficiency, and scalability. Whether you’re overseeing a few websites or an extensive network, following best practices will help you maintain smooth operations while minimizing risks.
Here are the top strategies for effectively managing a WordPress Multisite network in 2025:
1. Streamlining Updates, Backups, and Security
Since a WordPress Multisite network runs multiple websites from a single installation, maintaining updates and security is crucial to prevent vulnerabilities and ensure smooth operation.
Regular Updates for WordPress, Themes, and Plugins
Managing updates across all sites is essential for security and performance. Use the Network Admin dashboard to oversee and apply updates efficiently. Enabling automatic updates for WordPress core, themes, and plugins helps prevent security gaps. However, before deploying major updates to the live network, it’s best to test them on a staging site to avoid potential compatibility issues.
Automating Backups for Disaster Recovery
Regular automated backups are critical for protecting your network from data loss due to hacking or accidental errors. Solutions like CodeGuard, UpdraftPlus, or Jetpack Backup allow you to schedule daily or weekly backups. To ensure redundancy, store backups in multiple locations, such as cloud storage (Google Drive, Dropbox) and external servers.
Enhancing Security Across the Network
Strengthening security across all sites helps protect against cyber threats. Start by enabling SSL certificates to encrypt data and improve trustworthiness. Using firewalls and security plugins like Wordfence or Sucuri can help block potential attacks. For added protection, implement two-factor authentication (2FA) for network admin accounts and restrict admin access to prevent unauthorized logins.
By taking a proactive approach to updates, backups, and security, you can ensure your WordPress Multisite network remains stable, secure, and optimized for long-term success.
2. Managing Users and Assigning Appropriate Roles
A WordPress Multisite network allows multiple users to manage different sites, but setting clear roles and permissions is crucial to prevent conflicts and unauthorized changes. Understanding the different user roles within WordPress Multisite is essential for effective management.
The Super Admin has full control over the entire network, including the ability to manage themes, plugins, and settings across all sites. The Site Admin oversees an individual site’s content, users, and basic settings but does not have permission to install plugins or themes. Other roles, such as Editor, Author, Contributor, and Subscriber, function as they do in a standard WordPress installation, allowing for varying levels of content management access.
To ensure efficient user management, it is best to assign Site Admin roles only to trusted users, granting them the ability to manage their own sites without affecting the entire network. Role management plugins like User Role Editor can help customize permissions to meet specific needs. Additionally, limiting the number of users with Super Admin privileges reduces security risks. Enabling user activity logs is another effective strategy for tracking changes and preventing unauthorized modifications.
By properly managing user roles, site owners can prevent accidental site-wide changes and ensure smooth administration of their WordPress Multisite network.
3. Optimizing Performance and Efficient Resource Management
A WordPress Multisite network relies on a shared hosting environment, making performance optimization crucial for maintaining fast load times and a seamless user experience. Implementing the right strategies can significantly enhance the efficiency of your network and ensure smooth operation as it scales.
One of the most effective ways to improve speed is by using caching. Installing a caching plugin such as W3 Total Cache, WP Rocket, or LiteSpeed Cache helps reduce server load and speeds up page delivery. Additionally, enabling Object Caching with Redis or Memcached allows frequently used queries to be stored for faster access. A Content Delivery Network (CDN) like Cloudflare further enhances performance by serving content more quickly to visitors worldwide.
Monitoring server resources and upgrading hosting when necessary is also essential. Regularly checking server usage, database size, and bandwidth consumption helps identify potential performance bottlenecks before they become critical issues. If traffic increases significantly, upgrading to a VPS, dedicated server, or managed WordPress hosting can provide the necessary resources for optimal performance. Choosing a hosting provider optimized for WordPress Multisite, such as Bluehost, SiteGround, or Kinsta, ensures better support and scalability.
Another important optimization strategy involves reducing unnecessary load on the server. Using an image optimization plugin like Smush or ShortPixel compresses images without compromising quality, helping pages load faster. Lazy loading can be enabled to defer image loading until they are needed, reducing initial page load times. Additionally, minimizing HTTP requests by reducing the number of scripts and stylesheets loaded per page can significantly improve performance.
By implementing these optimizations, you can ensure that all websites within your WordPress Multisite network run efficiently, providing a fast and reliable experience for users as your network grows.
How to Set Up WordPress Multisite Hosting on Bluehost: A Step-by-Step Guide
WordPress Multisite is a powerful feature that allows you to manage multiple websites from a single WordPress installation. Whether you’re running a network of blogs, business websites, or educational portals, Bluehost makes it easy to enable and configure Multisite. Follow this detailed guide to set up your Bluehost WordPress Multisite hosting efficiently.
Step 1: Enable WordPress Multisite on Bluehost
Before enabling Multisite, ensure you have an active Bluehost account and a registered domain. Once you have these prerequisites in place, follow the steps below to set up WordPress Multisite.
Start by accessing your Bluehost dashboard and navigating to the WordPress Hosting section. Depending on your Bluehost interface, locate the Install WordPress option under either My Sites or cPanel.
Bluehost provides a simple one-click WordPress installation through Softaculous or its built-in installer. Select your domain name for installation and ensure that the directory is set to the root (public_html) to streamline site management.
During installation, check the option to Enable Multisite (WPMU) before proceeding. Then, enter your site name, description, and administrator email to finalize the WordPress setup.
Note: Bluehost’s servers support Apache mod_rewrite, which is required for WordPress Multisite to function correctly. Make sure this feature is enabled to avoid any issues with your network setup.
Step 2: Configure the WordPress Multisite Network
Once WordPress is installed, you need to activate and configure the Multisite Network to manage multiple sites from a single dashboard. Follow these steps to set up WordPress Multisite correctly.
To enable Multisite, you must first modify the wp-config.php file. Access your website’s File Manager through Bluehost’s cPanel or connect via an FTP client. Open the wp-config.php file and locate the line that says /* That’s all, stop editing! Happy publishing. */. Just before this line, insert the following code:
define(‘WP_ALLOW_MULTISITE’, true);
Once you’ve added the code, save the file and refresh your WordPress dashboard to proceed with the network setup.
After enabling Multisite, you need to configure the network in your WordPress admin panel. Navigate to Tools > Network Setup, where you will be prompted to choose between two structures for your network: subdomains (e.g., site1.yourdomain.com) or subdirectories (e.g., yourdomain.com/site1). Subdomains require additional wildcard DNS setup in your Bluehost account, while subdirectories are simpler to configure. Once you’ve made your selection, enter a Network Title and Network Admin Email, then click Install to finalize the setup.
Next, WordPress will provide code snippets that must be added to both the wp-config.php and .htaccess files. Copy and paste the provided code into the appropriate locations in these files, replacing any existing rules as necessary. After making these changes, save and close both files to ensure the new settings take effect.
To complete the activation process, log out of WordPress and then sign back in. Upon logging in, you should see a Network Admin menu in your WordPress dashboard, confirming that Multisite has been successfully enabled. This new menu allows you to manage multiple sites efficiently from a single control panel.
Step 3: Add New Sites to Your WordPress Multisite Network
As a Super Admin, you now have the ability to create and manage multiple sites within your WordPress Multisite network. This allows you to oversee various websites from a single dashboard while maintaining control over their settings and configurations.
To create a new site, navigate to Network Admin > Sites > Add New. Here, you will need to enter the site title and specify the site address. Depending on your Multisite setup, this could be in the format of either /site1 (for subdirectories) or site1.yourdomain.com (for subdomains). Next, assign an admin email for the new site, ensuring that the designated administrator has the necessary access to manage it. Once all details are entered, click Add Site to finalize the creation process.
Each site within your Multisite network will have its own WordPress dashboard, allowing for independent customization. Site administrators can manage their content, themes, and users separately while still being part of the overall network. This setup provides flexibility while maintaining centralized control over multiple websites.
Step 4: Manage Users and Assign Roles for Your WordPress Multisite
To effectively control access and permissions across your WordPress Multisite network, you need to manage user accounts and assign appropriate roles to ensure smooth administration.
To add a new user, navigate to Network Admin > Users > Add New. Here, you can create new user accounts by entering their details and granting them access to the network. Once a user is added, you can assign them to a specific site by going to Network Admin > Sites > [Site Name] > Users.
When assigning users, it is essential to define their roles based on the level of access they require. You can choose from Administrator, Editor, Author, Contributor, or Subscriber, depending on their responsibilities within the site. Proper role assignment ensures that users have the necessary permissions while preventing unauthorized changes to the network.
Step 5: Customize Each Site in the WordPress Multisite Network
Each site within your WordPress Multisite network can have a unique design and functionality, allowing for customization while maintaining centralized control. You can manage themes, plugins, content, and settings to tailor each site to its specific purpose.
As the Super Admin, you control theme availability across the network. To install new themes, navigate to Network Admin > Themes and upload the desired theme files. You can choose to enable themes for all sites in the network or allow individual site admins to select and activate themes that suit their needs. This flexibility ensures that each site maintains its own unique look while staying within the network’s guidelines.
Plugins are also managed at the network level. By going to Network Admin > Plugins, you can install and activate plugins across all sites or give site admins the ability to install specific plugins for their individual sites. This ensures that essential tools are available while preventing unnecessary plugin bloat across the network.
Each site admin has control over content and settings, allowing them to customize menus, widgets, and page layouts to align with their goals. Whether the site is a business website, an online store, or an educational platform, site-specific settings help define its purpose. For example, a business site may focus on branding and lead generation, while an educational platform may prioritize course layouts and student engagement. This level of customization ensures that every site within the network serves its intended audience effectively.
Final Thoughts: Step-by-Step Setup Guide for WordPress Multisite Hosting
WordPress Multisite offers a powerful way to manage multiple websites under one dashboard, reducing administrative hassle and cutting down on hosting costs. However, it does come with its own set of challenges, such as plugin compatibility issues and specific hosting requirements. To fully leverage the benefits of Multisite, choosing the right hosting provider and tools is essential.
With Bluehost’s Multisite-optimized hosting and the Bluehost AI Website Builder, you can easily create, manage, and scale your network without technical roadblocks. Whether you’re running a business with multiple brand sites, a blog network, or an educational platform, Bluehost delivers the speed, security, and expert support needed to keep your websites performing at their best.
By investing in a reliable hosting solution designed for Multisite functionality, you can focus on growing your online presence while ensuring a seamless experience for visitors across all your sites. Ready to simplify website management? Explore Bluehost’s Multisite hosting plans today!