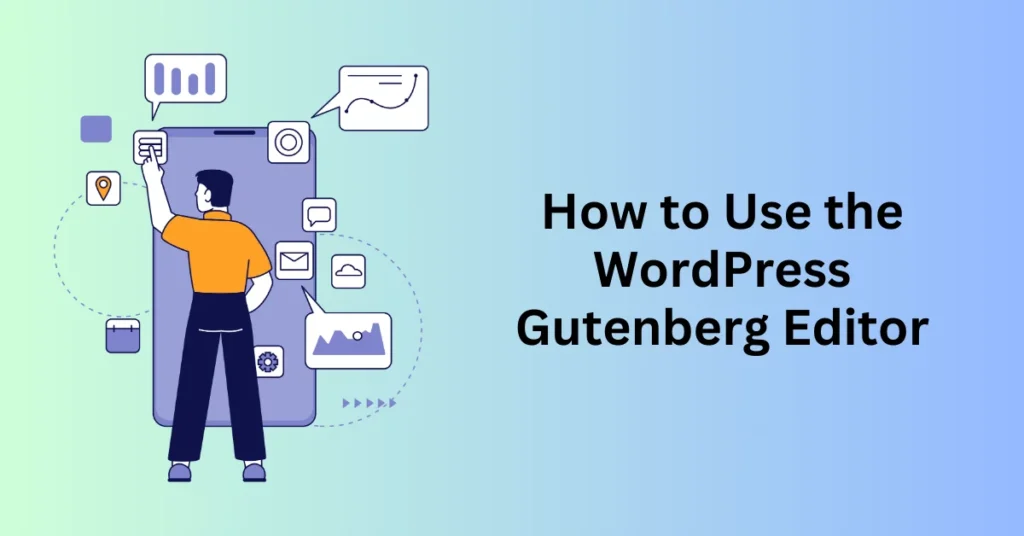
If you’ve recently created content on WordPress after taking a blogging hiatus, you may have noticed a significant change. WordPress has replaced its classic page and post editor with a sleek new option known as the Gutenberg block editor.
This new content composer is now the default editor for WordPress, and it may take some time to get used to. For WordPress.com users, adapting to this change is imminent since the Classic Editor has been retired as of June 2020.
On the other hand, Bluehost users build WordPress websites using WordPress.org, which is a different software version that allows for more variations in use. However, this change won’t immediately affect you. That said, Gutenberg is most certainly the future of WordPress, which is why it’s worth getting to know now. Familiarizing yourself with the block editor will help you make the most of your WordPress experience moving forward.
Start Your WordPress Website with Bluehost Web Hosting
What Is the Gutenberg Block Editor?
The Gutenberg block editor is an innovative page and post composer introduced in WordPress. It has revolutionized how users create and manage content on their websites. Named after Johannes Gutenberg, the inventor of the printing press, this editor pays homage to the transformative impact of the printing press. This invention enabled the wide and efficient dissemination of information.
The Gutenberg editor was launched in November 2018 as part of the WordPress 5.0 update. Consequently, this launch marked a significant milestone in the platform’s evolution.
Furthermore, what sets the Gutenberg editor apart from the classic WordPress editor is its block-based approach to content creation. Instead of using a traditional linear editing format, Gutenberg allows users to add various types of content blocks directly onto a page. For example, these blocks can include text, images, videos, and more. As a result, this design promotes a more visual and intuitive editing experience. Users can see exactly how their content will appear on the front end as they compose it.
Moreover, one of the standout features of Gutenberg is its sleek and minimalistic interface. The editor is designed to reduce clutter, enabling users to focus on creating content without unnecessary distractions. This streamlined approach enhances usability, particularly for those who may not be particularly tech-savvy. Additionally, the introduction of blocks adds a What You See Is What You Get (WYSIWYG) component to the editing process. This feature helps WordPress compete with popular website builders like Squarespace and Wix. By simplifying content creation, Gutenberg empowers users to design visually appealing pages without needing extensive technical knowledge or coding skills.
Start Your WordPress Website with Bluehost Web Hosting
How to Add Content to WordPress with the Gutenberg Block Editor
The Gutenberg block editor in WordPress allows users to seamlessly add various types of content to their pages or posts, enhancing the overall editing experience. To get started with the block editor, you first need to create a new page or post on your website. Here’s a step-by-step guide to help you navigate the features of Gutenberg effectively:
1. How to Add a Title in Gutenberg WordPress Editor
To set the title of your page or post, click where it says “Add title” and type in your desired text. This acts as the main heading, which will be displayed prominently at the top of your content.
2. How to Add Content to the Blog Post Body in Gutenberg WordPress Editor
To add text to the body of your post or page, you can either start typing directly in the whitespace below the title or add a specific block. This flexibility allows you to format your content as needed right from the start.
3. How to Add a Block Using the Gutenberg Block Editor
Blocks are the foundational elements of the Gutenberg editor, revolutionizing the way WordPress users create content. With blocks, you can easily design visually appealing pages without any coding knowledge.
To add a block, click the encircled plus sign located to the right of the text area or at the top left of the editor. When the block menu appears, you can browse through a wide variety of block types—over 50 are available! These blocks allow you to:
- Add text and images
- Adjust formatting
- Insert widgets
- Embed external content
Once you find the block that suits your needs, select it and follow the provided instructions to customize your content. You can repeat this process to add multiple blocks, creating a rich and engaging layout for your page or post. Additionally, you can type / to bring up a list of blocks for quick inline selection.
4. How to Arrange Gutenberg Blocks
Arranging blocks in Gutenberg is straightforward. To reposition a block, hover over it until you see an outline along with arrows and dots on the left side. You can click the up arrow to move the block one position up, or the down arrow to move it one position down. If you want to place the block in a different location, click and hold the dots between the arrows, then drag the block to your desired spot.
5. How to Format Gutenberg Blocks
To format a block, simply click on it, and a formatting toolbar will appear above it. This toolbar provides essential tools, such as:
- Adding hyperlinks
- Duplicating the block
- Editing the block’s HTML
Depending on the type of block you’re using, additional functionality may be available, especially if you have installed plugins that enhance the editor. For more detailed settings, you can access the Block tab located in the right sidebar, which offers various options to customize your block further.
Start Your WordPress Website with Bluehost Web Hosting
How to Publish Pages and Posts on WordPress with the Gutenberg Block Editor
Once you’ve crafted a page or post that you’re pleased with, it’s time to make it live on your website by publishing it. Publishing essentially takes your draft—crafted behind the scenes—and makes it accessible to your audience. Additionally, you can adjust visibility settings to control who can see your published content, adding an extra layer of management.
Before diving into the publishing process, it’s essential to understand the distinction between posts and pages on WordPress:
Posts: Users typically use these to share timely, topical content, such as informative guides, news updates, or blog entries. The system displays posts in chronological order within the blog section of a website, and users generally update them more frequently than pages.
Pages: In contrast, pages are meant for evergreen content that doesn’t change often, like a biography or the company’s story on an About page. Other common examples of pages include homepages, contact pages, and service descriptions. While pages can be updated as needed, the overall number of pages on a WordPress site remains relatively stable compared to posts.
How to Publish a Page or Post Using the Gutenberg Block Editor
1. Open the Publishing Settings Menu
When you’re ready to publish your content, navigate to the Document tab located in the right sidebar to access the publishing settings. If the sidebar is not visible, you can easily restore it by clicking the gear icon in the top right corner of your screen.
2. Select Your Publishing Settings
Within the publishing settings, you have the flexibility to customize several options:
Publication Date and Time: You can set a specific date and time for your content to go live, allowing you to schedule posts for the future. This feature is especially useful for timely articles, ensuring that they publish automatically without needing to click “publish” manually.
Post Author: This option allows you to designate the author of the post, which is helpful for multi-author websites.
Featured Image: The featured image plays a vital role in visual representation. It can accompany your posts or pages to enhance their appeal and provide a visual context. In some WordPress themes, the featured image may also be displayed prominently in the header of the page or post.
Tags: Tags are useful for organizing content, helping readers easily find related posts within your website. By assigning relevant tags, you can enhance navigation and improve the overall user experience.
3. Publish Your Content
Once you’ve configured your settings, take a moment to save your draft and preview how it will appear when live. After reviewing everything, you can publish your post or page by clicking the appropriate buttons in the top right corner of your screen.
By following these steps, you can effortlessly publish your content on WordPress, ensuring that your hard work reaches your audience and engages them effectively. Happy publishing!
How to Reinstall the Classic WordPress Editor
Adjusting to changes in software can be challenging. This is particularly true when adapting to updates like the Gutenberg block editor in WordPress. If you prefer the familiar feel of the Classic Editor, you can easily switch back. Simply install it as a plugin on your WordPress site. Here’s how to do it:
1. Go to the Plugins Directory
Begin by hovering over the Plugins option in the left sidebar of your WordPress dashboard. This will reveal nested options. From there, click on Add New to access the plugins directory.
2. Find the Classic Editor
In the search bar of the plugins directory, type in Classic Editor. This will help you locate the plugin quickly.
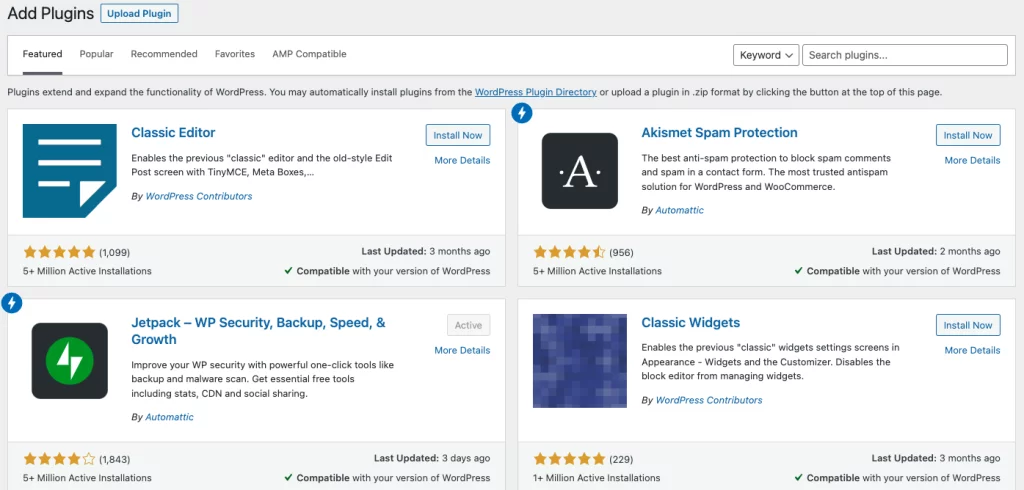
3. Install the Classic Editor
Once you find the Classic Editor plugin in the search results, click the Install Now button. After the installation completes, click Activate. With this action, you will revert to the classic WordPress editor for your posts and pages.
Now, when you create a new page or post on your website, the Gutenberg block editor will no longer be the default option. You can work with the familiar layout and features of the Classic Editor instead.
By taking these simple steps, you can regain the editing experience you’re comfortable with. This ensures that your workflow remains smooth and efficient.