There are many different eCommerce store builders out there that help you to create your first or next eCommerce store easily. And with the popularity of the business model of print-on-demand, anyone can start a successful business online in no time. Today, we are going to share how to use Wix store and Printful to build your fashion empire online.
Don’t worry if this is your first time. As long as you know how to use the internet, you can build your eCommerce store. Wix store has made it very easy to build an online store while Printful simplifies the product creation and fulfilment process.
We will share step by step on how to create your eCommerce store, set up payments, create your first product and upload it to your store. And also your fulfilment process.
1. Create your Printful and Wix accounts
First of all, in order to start the process, you will need to have an account with both Printful and Wix. This is how they track your products and store them based on your account.
Set up Printful Account
Creating a Printful account is easy. It is free to create and you can head to the Printful website and sign up for a new account. No credit card is required.
You just need to follow the signup process and provide the required information to complete the account creation.
Then, after you completed the signup process, you may log in to your Printful account. There are some tutorials for you to get familiar with the Printful dashboard and features.
Don’t worry about that, we will go through how to create your first product later. Let’s focus on something more important. The payment method. You are not required to pay anything now. But this payment method is very important to automate your order processing and fulfilment process. With the payment method set, once someone purchases from your store, the order will be sent to Printful for order fulfilment.
Set up Wix Account
Then, it’s time to create a Wix account. Similar to the Printful account, the Wix account is free too. Simply head to the Wix homepage and then, click on the Get Started button. Go through the account creation process and enter the information required.

Once you are ready, head to Wix Stores app to install the online store app for the online store builder feature with free templates. And also, a payment gateway app to receive payments.
The last registration step on Wix’s end is to choose which website editor you want to build your online store. You can get started by clicking on the Design Site tab at the top right corner of your homepage.
You can start with Wix’s website builder, by answering the questions about your website requirements, Wix will create the website for you.
Or if you want to create it manually yourself, you may also start with a pre-built template.
Normally we will prefer to start with the template and customize it based on our preference. This is an easier way to get started as you can see which template is suitable for your store and what’s suits your business more. However, this will take more time for you to customize and start.
This is why, if you are in hurry, you may start with the website builder tool by answering the questions. Try to answer as detailed as possible to get the best-suited design.
2. Add Wix Stores to your online store
Wix Stores is an element that you can add to your Wix site. It’s like the app store for your Wix website to add the eCommerce store feature to your Wix website. Wix by default comes as a basic website and the site owner can add different features to it by adding elements. This will help reduce the website’s weight by removing unnecessary elements for the website.
After you add the Wix Store to your Wix website, you will now be able to sell products, set up payment methods, create coupons, and more. In addition, you’ll now be able to integrate with different marketing tools and SEO strategy too to boost your website traffic.
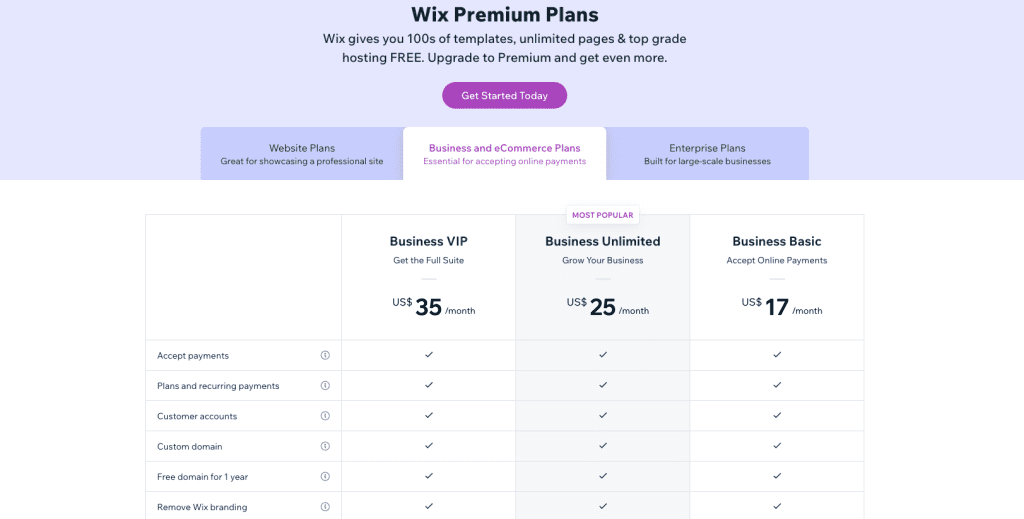
Wix Stores is free to use as well, hence, you can add it to your Wix website without paying any fees. However, Wix will require you to sign up for their Business & eCommerce plans in order to start processing payments.
To add your brand personality and design to your eCommerce store, you can start with the Wix online store template and customize it to the feel and look that you want.
3. Connect Wix Stores to Printful
Now your eCommerce store is ready, it’s time to integrate your Printful account into it. The Printful app is the link between your Wix online store and the Printful account. With the integration in place, all your products created in Printful will be published on your Wix store as well. And that’s important for your fulfilment process. With the integration between your Wix Stores and Printful being done, all orders that came in will be sent to Printful automatically for order processing, production and shipping.
Here’s how you connect Wix Stores to Printful.
- Go to your Printful account and log in.
- Next, in the Printful Dashboard side menu, click Stores > Choose platform.
- Then, find Wix and click Connect.
- Finally, follow the steps to complete the integration
And now, after the integration is done. It’s time to customize your online store layout.
4. Customize your Wix online store
When you have your online store design template selected in step 2, you can now customize it by adding or removing any element that you want or don’t want from it.
One of the keys to a website that converts well is to be clean and simple. Don’t be over-excited and add too many elements to your online store. Those will only create distractions for your potential customers but not converting.
People are easy to be distracted. This is why you should always reduce the elements and complexity of your website or product pages in order for people to focus on one thing. To buy from you.
In basic, your eCommerce store should have the following pages: a Homepage, Product Page, About Us page, FAQs, and Contact page. It would be good if you have some terms & conditions, a privacy policy and also a shipping and return policy to avoid any disputes.
Most of these pages will be available with the templates, but if not there, you may add them on your own.
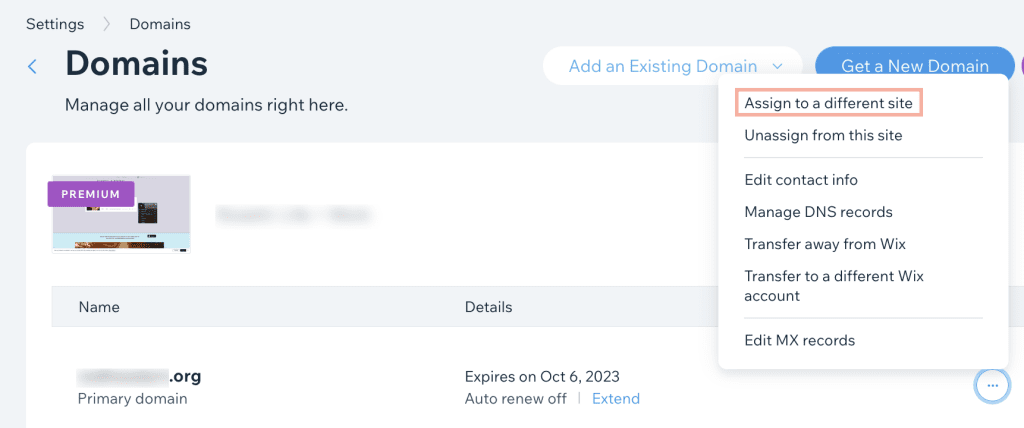
Add Your Custom Domain Name
A domain name is a unique address that identifies a website on the internet. Wix does provide a free domain name with all Wix websites. Many new business owners will just use it and never realise how it will hurt their business.

Normally the domain name by Wix will be like username.wixsite.com/yourstorename. However, this domain is very bad for your business. First of all, it does not look professional. Next, it does not represent your brand. And it tells your potential customers that you are not professional or not serious as you are not able to invest in a domain name for your business.
So, make sure you get one. It was not very expensive anyway. You can get one from a third-party registrar like Godaddy or Namecheap and configure it to your Wix store.
5. Design and Publish Printful Products to Wix Stores
Printful, one of the most famous print-on-demand service providers, offers a variety of products for you to customize and sell. So, what you need to do is to choose the product that you want to sell, and customize it with your unique design.
After selecting the product you want to sell, you can upload your design to Printful. You can either design it yourself with Canva or outsource it to someone at Fiverr or Upwork. Canva is easy to use and provides different templates for you to start and customize for your product.
To design your product,
- Go to your Printful Dashboard > Stores > click Add next to your Wix online store.
- Then, choose a product and upload a design. When you’re done, click Proceed to create mockups.
- Next, pick the product mockups you want for your store and click Proceed to the product description.
- Then, add your product title and description and click Proceed to price.
- Finally, set your pricing and hit Submit to store. Your product is now published and is live on your Wix store.
6. Connect a payment method to your Wix online store
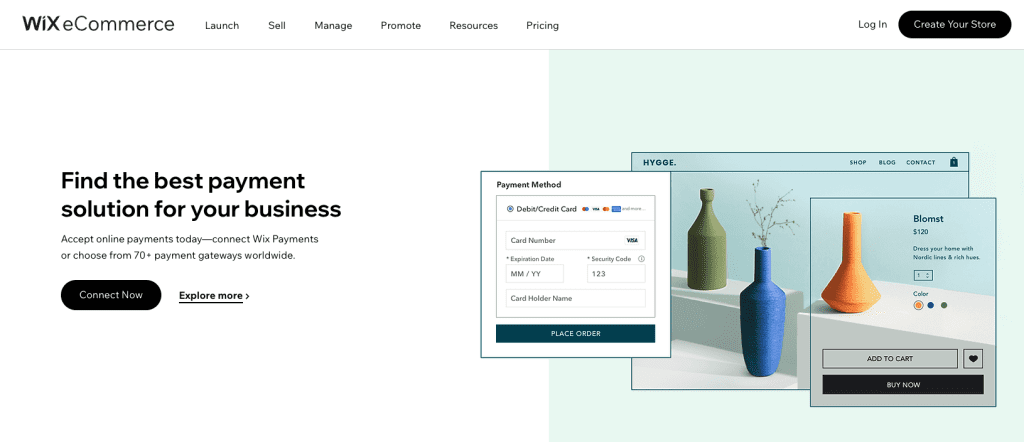
Wix supports different payment gateways according to your business’s location. You just need to set it up based on the payment gateway available.

Here’s how you set up your payment gateway on Wix Stores:
- Go to your Wix Dashboard.
- Then, in the left-side menu, click the Settings tab, Accept Payments.
- Finally, connect the Wix Payment methods or any third-party providers you want your customers to use.
7. Set up shipping on Wix Stores
When configuring your shipping settings for Wix Stores, you need to set your shipping regions and fulfilment services.
At your Wix Dashboard, in the side menu, click Settings, then Shipping & fulfilment. Domestic and international shipping regions will be preset based on your location. You’ll see that each region has specific countries assigned to them. You can change those by clicking Edit.
You can add a new region by clicking on the New Region button and then assigning countries to it. Since the fulfilment will be done by Printful, you will be using their shipping rates.
That means you need to set up separate regions for the USA, Europe, Canada, Australia, New Zealand, and worldwide. Note that Wix doesn’t offer Europe as a shipping region, so you’ll have to add each country manually.
The Wix and Printful integration support Flat Rate shipping only. So, there might be a mismatch in the shipping rate between Printful and Wix. You need to make sure your pricing strategy is able to cover the shipping rates to avoid losing money.
However, if possible I would suggest choosing Free Shipping for your order. You may not need to sacrifice the profit to cover the shipping cost. Instead, include that in your product price to cover it.
Setting free shipping is the easiest for the Wix store. And it’s the best shipping option for your customers. Human psychology just doesn’t want to pay for shipping. As they are buying things from you, they would expect free shipping with it.
To set up free shipping, select Free Shipping from the dropdown in the Shipping Calculation block and save your settings.
8. Choose the Wix Business Premium plan
As mentioned before, you will need to subscribe to a premium plan to accept payments in your Wix store. And this is the most important part of your online store. You are here to make money.

You will only need to get the Business basic plan to start selling on Wix with Printful. For a higher plan, you can upgrade when your business grows. The price is $17 per month for the Business Basic ecommerce plan.
Final Thoughts – Launch Your Wix Store with Printful
Starting a Wix store with Printful can be easy. With this guide, you can start your own Wix Store even by today, without requiring any experience or technical knowledge.
So, let’s go ahead and start today.


