You have decided to start your own blog. Your first step to creating your online presence with a website for your business. There are so many platforms out there and one of the best CMS platforms is WordPress. But how to build a WordPress blog in a few simple steps?
Follow us to see how you can do it with just 5 simple steps. Setting up a professional WordPress blog is simple with the right platforms and tools. You don’t need to be a professional coder or programmer to do that. Instead, it is as simple as filling up forms to build a WordPress blog.
Before you start, you need to decide on the niche for your blog and the content.
Step 1: Select A Website Hosting Service Provider Company
Unless you are using a hosted solution like ClickFunnels, Shopify, Wix and etc, where they will host your website, you will need a place to host your website. For a physical business, it will be a physical shop. And for a blog, it will be a server to host your website. It can be a physical server, virtual server or cloud server hosting.
Different Web Hosting For WordPress
Your website is stored on the server with a dedicated public address where your visitors can access them. Here’s where WordPress web hosting companies come in. There are many different web hosting companies out there that are providing good hosting solutions. Both have their own advantages and disadvantages. And if you are looking at the WordPress official website, there are three web hosting companies recommended. Bluehost, Dreamhost, Siteground.
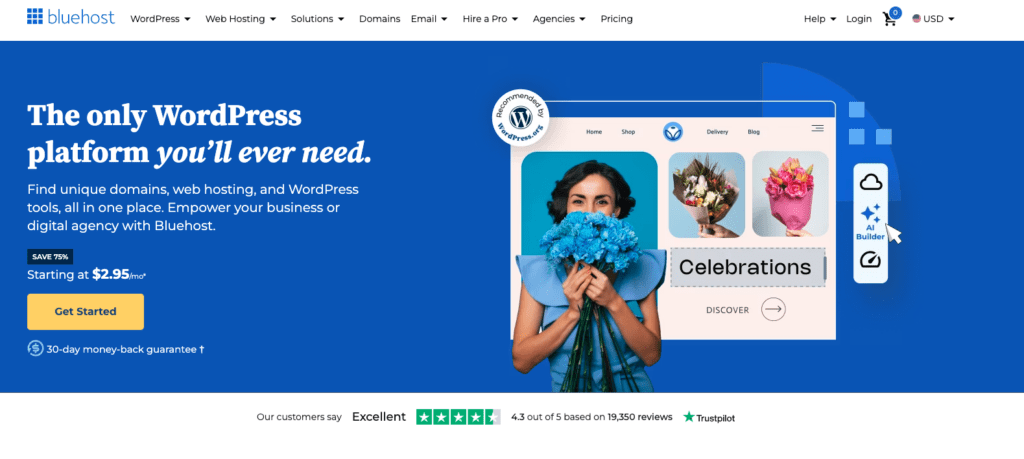
With Bluehost on the top of the list for WordPress-recommended web hosting, for over ten years, we are going to use Bluehost in this guide today. And of course, you can free to choose your own web hosting service provider. Or you can just use Bluehost web hosting just like us.
As a long-term web hosting service provider for WordPress, Bluehost has optimized its web hosting package, one-click WordPress install, 24/7 expert tech support and excellent SLA across all different plans.
Not only that, you have the choice of shared hosting, virtual private server(VPS) hosting and dedicated hosting. Each provides a different level of Service Level Assurance for different business needs.
As someone who just starts out a new blog, we will recommend getting the shared hosting package and upgrading to VPS or dedicated server hosting later when your business grows.
Sign Up For Bluehost
Not only that but with less than $3 per month, you can start your WordPress web hosting with Bluehost. All you need to do is go ahead to the Bluehost homepage and click “Get started now”.
After you clicked on the button, you can now choose the hosting package you want, and select whether you want to subscribe on a monthly basis or annual basis. And of course, if to commit to an annual subscription, you will get a better deal there.
Then, you will be prompted to choose your domain name because all Bluehost plan comes with a free domain name. Or if you have your domain name ready, you can also enter your existing domain name to continue.
Next, fill out all the basic information on the registration page, choose any add-ons you need, then fill in your payment information, and finally press the submit button. Once your complete this purchase process, your web hosting server is ready. But it is empty at the moment. You will need to install WordPress to it.
Step 2: Install WordPress Website to Your Web Hosting Server
Now, you can start to install your WordPress to your Web Hosting Server. Don’t worry, it is super easy with Bluehost. Most web hosting companies including Bluehost offer one-click installation for WordPress.
All you need to do is to click a few buttons. That’s all.
In your Bluehost control panel, Click on the My Sites tab from the side navigation menu to the left. Then, Click the Create Site button. Next, a new window will appear for two highly recommended website builders. Finally, click the Start Building button under the WordPress option and enter the Admin Information.
Here you will need to fill in our site name, and site tagline, and in the advanced tab it would be your admin Email address, WordPress Admin username and password. You can amend this later in your WordPress dashboard -> Settings.
Once your complete and submit that. Just sit down and wait. The installation tool will complete the entire setup in a couple of minutes. After that, you will be directed to your new WordPress blog login page where you can start customizing it.
Step 3: Login To Your New WordPress Blog And Customize It
To log in to your WordPress dashboard, you can add “/wp-admin” at the end of your domain URL and click enter. For example, if my URL is https://example.com, then my admin dashboard URL will be https://example.com/wp-admin.
Another way to log in to your log would be from your Bluehost account. Click on the My Sites tab from the side navigation menu to the left and then, Manage Site to log in to your WordPress.
Customize Your WordPress Blog With A Theme
Now your new build WordPress blog is running on the default theme without any content. It’s plain and boring. To customize it, you will need to select a theme of your choice. The WordPress theme controls the look and feel of the entire website. Not only the front page but also the other useful pages.
For this, we always use the Astra theme. Astra theme is free to use for most of its theme templates, with some premium templates. You can start with the free one and customize based on your needs. Astra provides a lot of different theme templates based on website type and industry. This includes business & services, creative, community, Ecommerce, blog and multipurpose websites.
You may browse through the template library and choose the one that suits your website.
How to Install a Theme for Your Blog?
To install the Theme for your new build WordPress blog, log in to your admin dashboard, and click on the Appearance – Themes section on the left sidebar. Then, click on add themes and search for the “Astra” theme or any other theme you have chosen. Then click install and activate. Next, you can go to the Starter Template section to pick the template you need and install the template.
How to Customize Your WordPress Theme?
Next, click on the customize button on your theme. Here you can customize your header, font, page layout, footer, and menu. You may just change the setting there
If you are a technical person with technical skills, you can work directly with WordPress source files and style sheets too. It’s accessible from the files section of the hosting dashboard.
Install Plugins for Your WordPress Blog
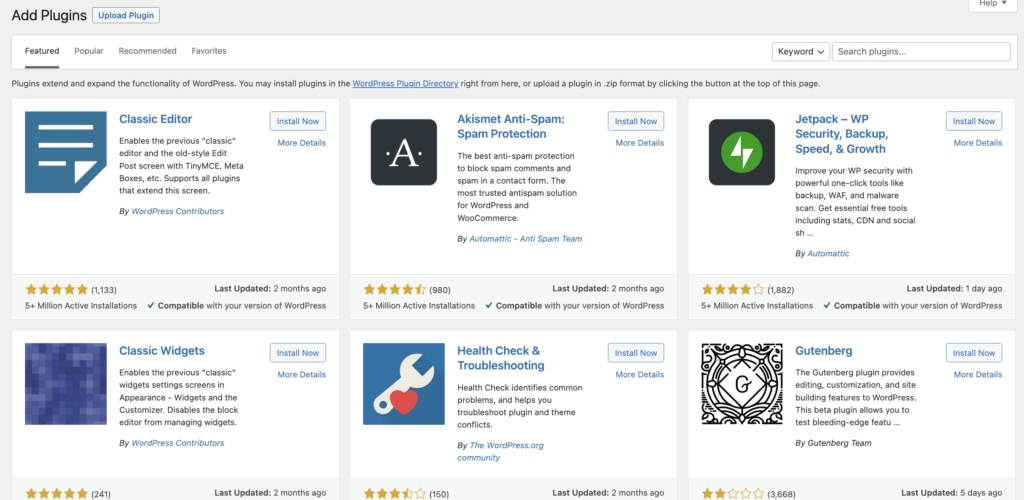
WordPress platform is designed as an open CMS platform that can be used for various types of websites. Hence, it is built with a very basic function only for a basic site to work. This is to avoid unnecessary load for the website if it’s not required for some website types.
For example, if you are building a corporate website or a blog, you may not need the Ecommerce function. You will need the contact form and popup creator to collect leads.
Hence, WordPress creates separate plugins to add features to your WordPress website. You can choose from hundreds of free plugins from the WordPress plugin section. However, be sure that you don’t overwhelm and install too many different plugins. Only install those you need to avoid the extra plugins slowing down your website loading speed.
Some basic plugin for a WordPress blog includes tools for SEO, social sharing, cross-posting to other sites, managing email lists, tracking analytics, contact form, and more.
One of the very important ones would be the SEO plugin like The Yoast SEO plugin that will help to provide suggestions to optimize your website based on the search engine on-page ranking algorithm to boost traffic and ensures that you’re maximizing your visibility in top search engines such as Google.
Step 4: Create and Publish Your First Blog Post
As a CMS platform, it is very easy to create and post content with the WordPress admin dashboard. There are two types of content that you can create: pages and posts. Page is the static information page like the Contact Us page, About Page, Policies and Disclaimers. And the post is for frequently updated content like a blog post.
Posts is where you have the content editor for your blog post. In the Post section, click on Add New to create a new post. Once you have completed your post, click “Publish” to make it live or you can save it as a draft and continue editing it later. Or if you want to schedule it to publish later, you can do it too in the content editor.
Step 5: Analyze Your WordPress Blog Data
Knowing your data and being able to read the data is how you can grow your website. Understanding what’s working and where you can optimize your website for better performance. You can do this by using the Google Analytics tool.
You can track your website performance for the customer acquisition method, customer behaviour, conversion and others.
Final Thoughts – How to Build a WordPress Blog in 5 Simple Steps
If you are reaching this stage, you should have your website created and launched. There are a few things that you need to tweak and optimize to perfect your blog. Getting your blog published is just the starting point. Creating content and marketing your blog to your audiences is more important to create a successful website.
Consistency is the key to winning. If you need some support or help when building your blogs and content, let us know and our team will see how we can support.
