Elementor is a leading WordPress page builder known for its user-friendly interface and extensive customization capabilities. One standout feature of Elementor, especially in the Pro version, is the ability to incorporate custom CSS into your website. This feature empowers you to go beyond the limitations of default settings, enabling you to craft unique designs and implement advanced functionality effortlessly.
Custom CSS is a powerful tool for web designers and developers looking to personalize their websites with precision. By leveraging custom CSS, you can:
- Achieve Unique Designs: Modify design elements to align with your brand’s identity.
- Expand Design Flexibility: Customize aspects such as fonts, colors, sizes, and layouts beyond Elementor’s built-in options.
- Implement Advanced Functionality: Introduce creative hover effects, animations, and dynamic styles.
- Target Specific Elements: Apply CSS selectively to widgets, sections, or specific templates, keeping changes localized.
In this guide, we’ll explore several ways to incorporate custom CSS into your Elementor website, ranging from built-in features in Elementor Pro to third-party solutions like The Plus Addons.
What is CSS?
CSS, or Cascading Style Sheets, is a powerful styling language used to design and format web pages. It works in tandem with HTML, which structures the content of a webpage, by telling web browsers how to display these elements in a visually appealing and consistent manner.
CSS allows web developers and designers to control various aspects of a webpage’s appearance, such as:
- Colors: Adjusting background, text, and border colors.
- Fonts: Customizing typography, including font family, size, weight, and style.
- Layout: Structuring content through spacing, alignment, and sizing.
- Positioning: Precisely placing elements on the screen or within containers.
- Animations and Effects: Adding motion or visual effects for a dynamic user experience.
Key Features of CSS
- Separation of Content and Design
CSS enables a clear separation between the content (HTML) and its presentation. This makes it easier to maintain and update the design of a website without altering the underlying structure of the content. - Efficiency and Reusability
By using CSS, developers can define a style once and apply it to multiple HTML elements or pages. For instance, a single stylesheet can dictate the design for an entire website, ensuring consistency while saving time and effort. - Ease of Maintenance
CSS simplifies website updates. Instead of modifying each webpage individually, designers can make a single change in the CSS file to update styles across the site. This is especially valuable for large websites. - Customizability
CSS provides the flexibility to create unique and visually stunning designs. Developers can experiment with colors, layouts, and responsive design techniques to ensure a website looks great on different devices.
How CSS Works
CSS is based on a system of rules and properties that define how HTML elements should be styled. A CSS rule consists of:
- Selectors: Specify which HTML elements the rule applies to (e.g., h1, .class, #id).
- Properties and Values: Define the style, such as color: blue; or font-size: 16px;.
CSS rules can be applied:
- Inline: Directly within an HTML element using the style attribute.
- Embedded: Within a <style> tag in the HTML <head>.
- External: In a separate .css file linked to the HTML document.
CSS streamlines the process of creating visually appealing and consistent designs. Without it, developers would need to rely on complex and repetitive HTML styling attributes, which are harder to manage and less flexible. With CSS, modern web pages can be responsive, accessible, and engaging, ensuring a better user experience across all devices.
In summary, CSS is a fundamental tool in web development, enabling the creation of professional, unique, and responsive websites with less effort and more control.
Benefits of Adding Custom CSS in WordPress with Elementor
Using custom CSS in Elementor offers a range of advantages, enabling greater control over your website’s design and functionality. Here are the key benefits:
1. Advanced Customization
Custom CSS gives users the ability to extend Elementor’s built-in styling options, unlocking a world of highly specific and intricate customizations. This added flexibility allows you to refine and tailor the appearance of your website to align perfectly with your brand identity or creative vision. With custom CSS, you can go beyond the standard capabilities of Elementor, implementing unique design features such as hover effects, animations, and bespoke layouts that may not be achievable with Elementor’s default tools alone. This level of control enables you to create a more dynamic, engaging, and personalized user experience, setting your website apart from others and making it truly one-of-a-kind.
2. Consistency Across Your Website
Applying custom CSS globally ensures a cohesive and consistent design across your entire website. By standardizing key elements such as colors, fonts, spacing, and layouts, you can create a unified user experience that is in perfect harmony with your brand identity. This consistency enhances the overall aesthetic and usability of your site, making it more visually appealing and easy to navigate. Furthermore, global CSS streamlines the design process, allowing you to update multiple pages or widgets at once by modifying a single CSS file or rule. This not only saves valuable time but also guarantees a polished and professional appearance across every page of your site, ensuring that your design remains seamless and high-quality throughout.
3. Improved Performance
Custom CSS can significantly simplify your website’s code by reducing the need for extra plugins or inline styling. This leads to cleaner, more efficient code, which not only helps streamline your website’s performance but often results in faster load times and a better overall user experience. Additionally, by minimizing the reliance on additional plugins, you reduce the risk of compatibility issues, ensuring smoother functionality across your site. This reduction in plugin usage also enhances the overall performance and reliability of your website, making it easier to maintain and update over time. As a result, custom CSS helps to create a more efficient, reliable, and scalable website that delivers a better experience for both users and administrators.
4. Enhanced Flexibility
Custom CSS in Elementor opens the door to greater creativity and flexibility, allowing you to design truly unique and standout websites. By incorporating custom CSS, you gain the ability to create tailored layouts, smooth transitions, and dynamic animations that can set your site apart from competitors. Additionally, it offers the advantage of fine-tuning even the smallest details, which enables you to achieve pixel-perfect designs that go far beyond the limitations of Elementor’s built-in options. As a result, your website can achieve a polished and professional look that reflects your brand’s identity and meets your specific design goals. This level of customization not only enhances the visual appeal of your site but also ensures a seamless and engaging user experience.
5. Ease of Implementation
Elementor makes it easy to add custom CSS, even for users with limited coding experience, simplifying the customization process. The platform’s live preview feature is particularly helpful, allowing you to see changes in real-time. This ensures accuracy while saving valuable time during the design process, as you can immediately verify the impact of your adjustments. Furthermore, custom CSS snippets can be applied in a flexible way—whether directly to individual elements, sections, or pages for targeted adjustments, or site-wide for broader design consistency across your entire website. This versatility enables you to fine-tune your site’s appearance, creating a more cohesive and personalized user experience.
How to Add Custom CSS in Elementor? (4 Methods)
Adding custom CSS in Elementor is a simple process that can greatly enhance the style and functionality of your website.
By using any one of these four methods, you can easily add custom CSS to your website and take control of your site’s style.
1) How to add Custom CSS with Elementor HTML Widget ?
Adding custom CSS to your Elementor website can help you fine-tune your design and bring unique styling to your pages. One of the simplest ways to do this is by using the HTML widget. This widget allows you to insert custom HTML and CSS directly into your page without modifying your theme files, making it a beginner-friendly option. Here’s how to do it:
To add custom CSS using Elementor, start by opening the page you want to edit in the Elementor Editor. Navigate to the desired page and click the Edit with Elementor button to launch the editor.
Next, locate the HTML widget in Elementor’s sidebar. You can find it quickly by searching for “HTML” in the widget panel. Drag and drop the widget into the section or column where you want your custom CSS to take effect.
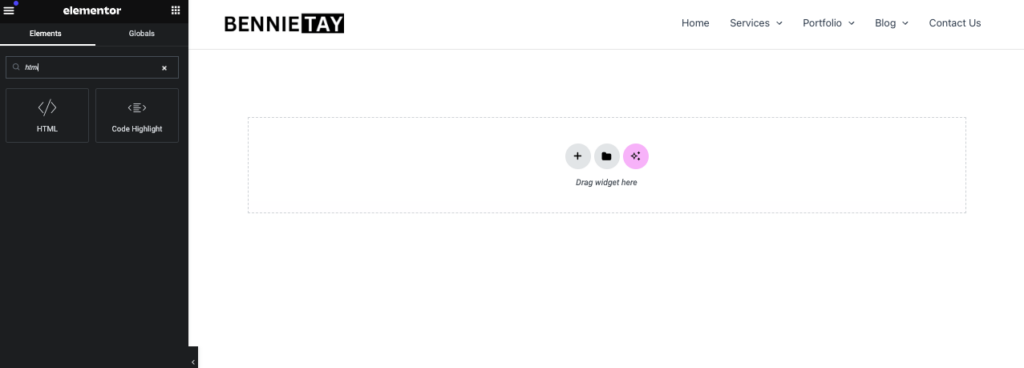
Once the HTML widget is placed, click on it to open its settings panel on the left-hand side. Here, you’ll find a text area where you can input your custom HTML and CSS. If you’re an Elementor Pro user and prefer to apply CSS globally or keep it separate from HTML, you can switch to the Advanced tab and use the Custom CSS section. For users of Elementor Free, this feature is unavailable, so the CSS must be added directly within the HTML widget.
To add your custom CSS, write your code inside <style> tags for better organization and clarity. For example:
<style>
    .custom-class {
        color: #ff5733;
        font-size: 20px;
        text-align: center;
    }
</style>
<div class="custom-class">This is a custom-styled element.</div>
Once you’ve added your code, click Update to save your changes. Preview the page to ensure your custom styles are applied correctly.
2) How to add Custom CSS with Theme Customizer
Adding custom CSS to a Classic WordPress theme is a straightforward process using the Theme Customizer. This method is beginner-friendly and does not require any coding expertise. By using the Additional CSS option in the Customizer, you can apply custom styles and preview changes in real time.
To add custom CSS using the WordPress Theme Customizer, begin by logging into your WordPress dashboard. From there, navigate to Appearance > Customize to open the Theme Customizer interface.
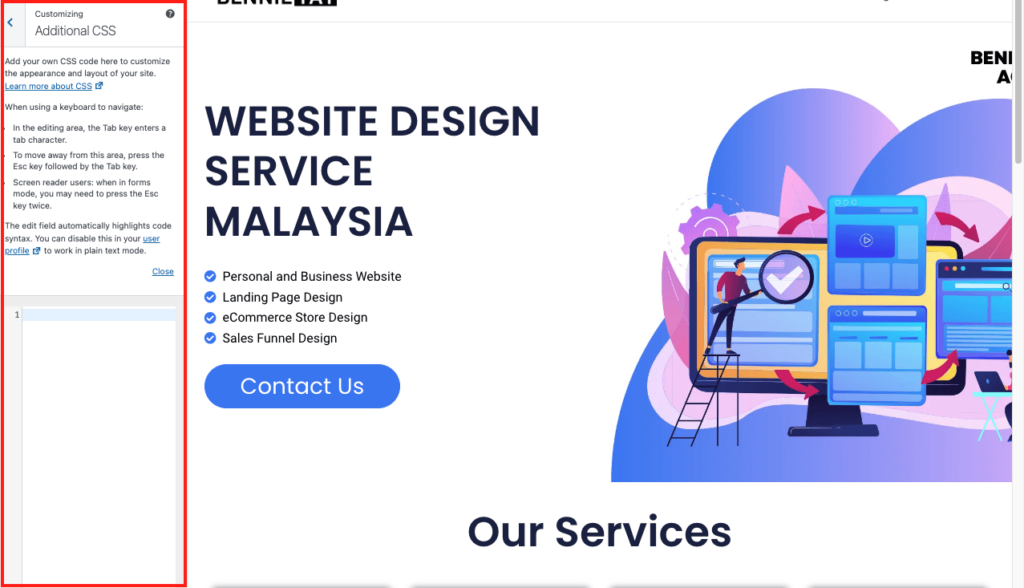
Once inside the customizer, locate the Additional CSS option in the menu. Click on it to open the CSS editor where you can enter your custom code.
In the editor, you can add your custom CSS. For example:
body {
  background-color: #f4f4f4;
}
h1 {
  color: #333;
  font-size: 32px;
  text-transform: uppercase;
}
The editor will initially contain a placeholder comment (e.g., /* Add your CSS here */). You can either remove or overwrite this comment with your own CSS styles.
As you make changes, the Customizer will provide a live preview, allowing you to see the effects in real-time. Test your CSS to ensure it works as expected.
Once you’re happy with your changes, click the Publish button to apply the custom CSS to your live website.
Important Notes
- Compatibility with Classic Themes:
This method works with Classic WordPress themes. However, it is not compatible with Full Site Editing (FSE) themes, such as those using the new Block Editor and templates created in the Site Editor. - CSS Scope:
Custom CSS added through the Customizer is site-wide. It will apply to all pages and posts unless you use specific CSS selectors to target particular elements. - Rollback Options:
If you need to revert your changes, you can simply edit or delete the CSS code from the Additional CSS editor.
3) How to Add Custom CSS with Elementor PRO?
Elementor Pro takes customization to the next level, offering a Custom CSS feature that allows you to apply CSS directly to specific templates, sections, columns, or widgets. This feature is particularly useful for creating targeted design changes without impacting the overall site layout or relying on external tools.
Step-by-Step Guide to Adding Custom CSS with Elementor Pro
To customize a page or template in Elementor, begin by navigating to the desired page and clicking Edit with Elementor from your WordPress dashboard. Once the Elementor editor is open, click on the specific widget, section, or column you want to style. For this example, we’ll use the Text Editor widget.
Next, in the settings panel on the left, click on the Advanced tab. Scroll down to find the Custom CSS section and click the pencil icon to open the CSS editor. Here, you can write your custom CSS code directly. For instance, to change the text color of the widget, you can use the following code:
selector {
  color: #ff5733;
  font-size: 18px;
  font-weight: bold;
}
The selector keyword automatically targets the element you’re editing, simplifying the process by eliminating the need to write complex selectors. Once you’ve added your CSS, click Update to save your changes. Finally, preview your page to see how the customizations appear on the live site.
4) How to Add Custom CSS with The Plus Addons for Elementor
The Plus Addons for Elementor is a popular plugin designed to expand Elementor’s capabilities. Among its many features, it allows users to add custom CSS directly to containers, sections, or widgets, streamlining the process of making advanced design adjustments. Additionally, it provides pre-built CSS styles for those seeking ready-made design solutions.
Step-by-Step Guide to Adding Custom CSS with The Plus Addons for Elementor
To get started with custom CSS using The Plus Addons for Elementor, first, go to your WordPress dashboard. Navigate to Plugins > Add New, search for “The Plus Addons for Elementor,” and click Install. Once the plugin is installed, click Activate to enable its features.
Next, navigate to the page or post you want to edit and click Edit with Elementor to open the Elementor editor. Identify the specific container, section, or widget where you want to apply your custom CSS and click on it to open its settings panel.
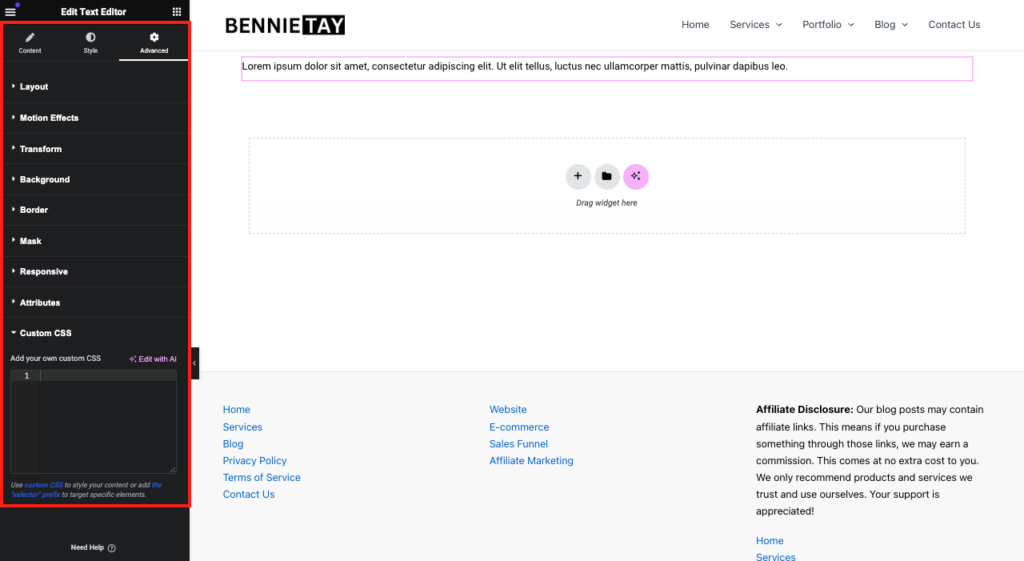
In the settings panel, go to the Advanced tab, then scroll down to find the Plus Extras section. Click to expand it, and you’ll see a Custom CSS field where you can input your CSS code. For example, to style a container, you might use:
.custom-container {
  background-color: #f0f0f0;
  padding: 20px;
  border-radius: 10px;
}
Make sure to use the appropriate CSS selectors to target the desired elements correctly. After entering your custom CSS, click Update to save the changes. Finally, preview your page to ensure the styles have been applied correctly.
Final Thoughts: How to Add Custom CSS in WordPress with Elementor
Adding custom CSS to Elementor is an easy and powerful way to elevate your website’s design and functionality. With multiple methods available—such as using the HTML widget, WordPress Customizer, Elementor Pro’s Custom CSS feature, or The Plus Addons for Elementor—you can choose the approach that best fits your needs and technical expertise.
While custom CSS can significantly enhance your site’s aesthetics and performance, it’s crucial to apply it thoughtfully. Overuse or poorly written CSS can lead to conflicts, slower page loading times, and unexpected design issues. Always test your changes thoroughly to ensure they align with your website’s goals and provide an optimal user experience.
