Managing a WordPress website can be a breeze—at least until you encounter the challenge of working with code. Thanks to AI-driven website builders and drag-and-drop page editors, you can easily manage most website tasks without ever touching a single line of code. However, sooner or later, you’ll find yourself needing to add elements like Google Analytics, ReCaptcha, or Facebook Pixel. At that point, things can quickly feel a bit overwhelming. This is precisely when you’ll need to insert custom code into your WordPress header and footer.
Fortunately, the process of working with code in WordPress is much simpler than it may initially seem. In fact, adding custom code can be straightforward and stress-free. To help you, this guide will walk you through five easy-to-follow methods for adding code to your website’s header and footer. By the time you finish, you’ll feel empowered and ready to seamlessly integrate any custom code into your WordPress site with confidence!
Why Add Code to Your Website’s Header or Footer?

Adding code to the header or footer of your website is a common task for webmasters and site owners, as it helps integrate essential tools and features. Here are some of the most common reasons for doing so, explained simply:
1. Connect Google Analytics
Google Analytics is a powerful tool for tracking your website’s performance, such as visitor counts, behaviour, and traffic sources. To use it, you need to link your website to your Google Analytics account. While there are plugins to handle this, manually adding the tracking code to the header can often be a cleaner and more direct method.
2. Install the Facebook Pixel
If you run Facebook ads or want detailed analytics on how users interact with your website, the Facebook Pixel is essential. It tracks actions visitors take on your site and links them to your Facebook account for better ad targeting. While plugins can simplify this process, adding the code directly to the header or footer is often quicker and avoids reliance on third-party tools.
3. Verify Website Ownership
When you register your website with services like Google Search Console or set up features like CAPTCHA, you may be asked to verify that you own the website. This is often done by adding a small snippet of code to your homepage header, allowing the service to confirm your ownership.
4. Add Custom CSS
CSS (Cascading Style Sheets) is what makes your website look good—it controls colours, fonts, layouts, and more. While most WordPress themes have built-in areas for adding custom CSS, advanced users may prefer adding CSS code directly to the header or footer for more control or global application.
5. Other Integrations and Functionalities
There are countless other reasons you might need to add code to your header or footer, including:
- Embedding third-party tools or widgets.
- Integrating marketing platforms like Mailchimp or HubSpot.
- Adding meta tags for SEO purposes.
The header and footer are ideal for these types of code because they load on every page of your site, ensuring the code is applied universally.
Manual vs. Plugin Approach
While plugins are widely available to handle the task of adding code to your website, manually adding code can often be a more efficient and reliable option. By avoiding additional plugin installations, you reduce the risk of slowing down your site, ensuring it runs smoothly. Manual code integration also minimizes compatibility issues that might arise from outdated or poorly maintained plugins. Additionally, it keeps your website’s backend cleaner and less cluttered, making it easier to manage.
Understanding the reasons and methods for adding code to your site’s header or footer empowers you to enhance your site’s functionality while maintaining optimal performance and control. This approach ensures you can customize your website effectively without relying excessively on third-party tools.
How To Add Your Code Using Astra’s Header and Footer Builder
Astra makes customizing your website’s header and footer simple and efficient with its Header Builder and Footer Builder tools. These features are integrated directly into the WordPress customizer, offering an intuitive drag-and-drop interface that’s easy to navigate, even for beginners.
Here’s a step-by-step guide on how to use these tools to add custom code to your header or footer.
1. Access the Header Builder: To begin, navigate to your WordPress dashboard and go to Astra > Dashboard > Header Builder. This will open the Header Builder interface, where you can customize your site’s header layout.
2. Add an HTML Block: Within the Header Builder, locate an empty area in the header section. Drag and drop an HTML block into the desired spot, which will serve as the container for your custom code.
3. Insert Your Code: Click on the HTML block to open its settings in the left-hand menu. In the content area, type or paste your custom code. Common examples include analytics tracking scripts or custom design elements like call-to-action buttons. This flexibility allows you to enhance both functionality and aesthetics.
4. Set Visibility (Optional): If your code is purely functional, such as a Google Analytics script, and doesn’t need to be visible, adjust its visibility settings. Under the Visibility section, deselect the icons for desktop, tablet, and mobile devices to hide the block across all screen sizes. This ensures your script runs without disrupting the user interface.
5. Publish Your Changes: After finalizing your adjustments, click the blue Publish button at the top of the customizer to save and apply them. The customizer integrates your custom code seamlessly into your header.
Adding Code to the Footer with Astra Footer Builder
Adding code to the footer follows the same process as adding it to the header, with the only difference being the starting point. To begin, navigate to Astra > Dashboard > Footer Builder and follow the same steps used for configuring the header. You can add and configure an HTML block just as you would in the header builder.
Alternatively, instead of an HTML block, you can use a widget block, which is particularly useful if you need to apply the same code across multiple areas of your site. To do this, simply drag a Text Widget into the footer (or header, if needed), paste your code into the widget’s content field, and adjust the visibility settings as required. This method provides flexibility and ensures consistency for site-wide code placement.
Key Benefits of Astra’s Header and Footer Builder
Astra’s Header and Footer Builder offers several advantages that make customizing your website both efficient and user-friendly.
- Ease of Use: With its intuitive drag-and-drop functionality, the builder is accessible to users of all skill levels, from beginners to advanced developers.
- Flexibility: Whether you’re adding tracking scripts, custom HTML, or unique design elements, Astra enables you to tailor your site effortlessly to meet your needs.
- Real-Time Preview: Integrated with the WordPress customizer, Astra lets you preview changes instantly, allowing you to see how your edits affect your site before publishing.
With Astra, modifying your header and footer to include custom code is quick and straightforward. Whether you’re enhancing your site’s functionality or integrating tracking capabilities, the Header and Footer Builder equips you with the tools to make impactful changes with ease.
How To Add Your Code Using the Elementor Header & Footer Builder
If you’re an Elementor Pro user, you can take advantage of the Custom Code feature to add code anywhere on your website. However, if you’re using the free version of Elementor, you can still add code to your header or footer using the Elementor Header & Footer Builder plugin.
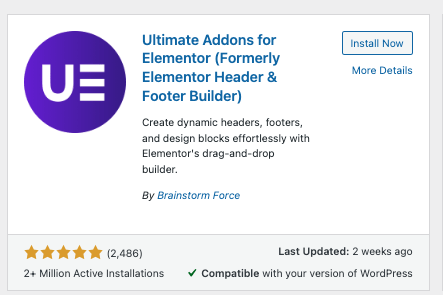
To get started, install and activate the Elementor Header & Footer Builder plugin from the WordPress repository. Once activated, navigate to Appearance > Elementor Header & Footer Builder to access the plugin’s interface.
Then, locate your footer template and hover over it. Click Edit with Elementor to open the footer in the Elementor editor. This editing interface is identical to the one used for posts and pages.
If your footer already has an appropriate section, you can directly add an HTML block or a Text block to it. If not, click the plus icon (+) to add a new line, then drag and drop the desired block into this section. This allows for flexibility in designing or enhancing your footer layout.
Use the block settings on the left to type or paste your code. This can include custom scripts, embedded widgets, or design elements like banners and badges. As you enter your code, the live preview in the center pane will display how and where it appears in the footer.
If the code serves a functional purpose, such as tracking scripts, and you don’t want it visible on your site, go to the Advanced tab in the block settings. Scroll to the Responsive section and toggle the options for Hide on Desktop, Hide on Tablet, and Hide on Mobile.
Once satisfied with your footer modifications, click the Publish button in the top-right corner to save and apply your changes. The new code will now be integrated seamlessly into your footer.
Key Advantages of Using Elementor Header & Footer Builder:
The Elementor Header & Footer Builder provides exceptional flexibility, allowing you to easily add custom code without needing to invest in Elementor Pro. Its drag-and-drop editor offers a user-friendly interface that simplifies the customization process and enables real-time editing. This makes it an accessible tool for users of all skill levels.
Additionally, the plugin is a cost-effective solution, offering advanced functionality at no additional cost. It bridges the gap between basic and advanced design needs, empowering you to enhance your website without upgrading to premium features.
By following the outlined steps, you can seamlessly add custom code to your footer or header using this free plugin. Whether your goal is to improve functionality or integrate third-party tools, Elementor Header & Footer Builder delivers an intuitive and efficient solution for both beginners and experienced users.
How To Add Your Custom Code with the WordPress Customizer
The WordPress Customizer is a built-in tool that allows you to edit various parts of your website, including the header and footer. Its functionality depends on your theme, but most themes provide sections to add custom code, making it a straightforward way to enhance your site.
- Navigate to your WordPress dashboard.
- Go to Appearance > Customize to open the Customizer.
- In the left-hand menu, look for entries labeled Header and Footer.
- Locate the Code Section:
- Depending on your theme, there might be a Custom Scripts or Additional Code section within the header or footer options.
- Some themes directly provide fields for header and footer scripts under these menus.
- Insert Your Code:
- If your theme includes designated areas for custom scripts:
- Copy and paste your code (e.g., tracking codes, widgets, or custom HTML) into the relevant field.
- For themes without dedicated script fields, look for an HTML block or similar options where custom code can be placed.
- If your theme includes designated areas for custom scripts:
- Preview and Publish:
- As you add your code, the preview pane on the right will show a live update of your site.
- Once you’re satisfied with the changes, click the Publish button to save.
Tips for Using the WordPress Customizer
When working with the WordPress Customizer, it’s important to understand its capabilities and limitations. Some themes may restrict the areas where custom code can be added. If you require greater flexibility, consider using a plugin like Insert Headers and Footers or switching to a more customizable theme. To avoid potential issues, always test your custom code in a staging environment before applying it to your live site. Additionally, for non-visual code such as analytics or tracking scripts, ensure they are hidden from visitors by using dedicated script fields or the advanced settings offered by your theme.
Why Use the WordPress Customizer?
The WordPress Customizer stands out for its user-friendly interface, allowing users to make live changes without needing coding expertise. It integrates seamlessly with most WordPress themes, giving you direct access to design and functionality settings. One of its key features is the Live Preview, which lets you see updates in real time before committing to changes.
Whether you’re adding analytics scripts, custom HTML, or making design enhancements, the WordPress Customizer provides a straightforward and efficient way to manage your header and footer. Best of all, it eliminates the need for additional plugins or advanced technical skills, making it an excellent tool for users at all levels.
How to Add Code to Your Header or Footer Using a Plugin
Using a plugin is one of the safest and easiest ways to add code to your WordPress header or footer. It eliminates the risks associated with manual file editing and provides a user-friendly interface for managing code snippets. Two popular plugins for this task are:
- Header Footer Code Manager (HFCM)
- Insert Headers and Footers
Let’s focus on how to use Header Footer Code Manager (HFCM) to add code to your website.
Step-by-Step Guide to Using Header Footer Code Manager
1. Install and Activate the Plugin: To begin, go to your WordPress dashboard and navigate to Plugins > Add New. In the search bar, type “Header Footer Code Manager” and click Install Now. Once the installation is complete, click Activate to enable the plugin on your site.
2. Access the Plugin: After activation, a new menu labelled HFCM will appear in your WordPress sidebar. Click on this menu to access the Snippets page where you can manage your custom code.
3. Add a New Snippet: On the Snippets page, click the Add New Snippet button. You’ll be prompted to fill out several settings for the snippet:
- Snippet Name: Choose a descriptive name to easily reference your snippet (e.g., “Google Analytics Tracking Code”).
- Site Display: Decide where the snippet should be displayed (e.g., sitewide, specific pages, posts, or tags).
- Exclude Pages/Posts: Specify any pages or posts where the snippet should not appear.
- Location: Select whether to insert the code in the header or footer.
- Device Display: Choose whether the code should appear on desktop, mobile, or both.
- Status: Set the snippet as Active or Inactive depending on whether you want it live.
4. Insert Your Code: Scroll down to the Snippet Code text area and paste your custom code. This could include tracking scripts, third-party integrations, or any other custom HTML you wish to add.
5. Save and Activate: Once you’ve added your code, click the Save button to store your snippet. Ensure the snippet is toggled to On in the Snippets list to activate it on your site.
6. Test Your Code: Visit your website to verify that the code is functioning as expected. For tracking scripts like Google Analytics, check your analytics tool to confirm that data is being captured properly.
Benefits of Using Header Footer Code Manager
User-Friendly Interface
Header Footer Code Manager offers an intuitive dashboard that allows you to easily manage and organize multiple snippets in one place. This central interface simplifies the process of handling custom code, saving you time and effort.
Granular Control
With this plugin, you have full control over where and how each snippet is displayed on your site. You can choose to show the code sitewide or target specific pages, posts, or tags, giving you flexibility in how you implement custom code.
Safe and Secure
Using the Header Footer Code Manager plugin eliminates the need for manual file editing, significantly reducing the risk of errors that could break your site. This safer approach ensures your custom code is added without the complications of directly modifying theme files.
Flexibility
The plugin supports a wide range of code snippets, from tracking scripts like Google Analytics to remarketing pixels or custom CSS. Whether you’re integrating third-party tools or enhancing your site’s design, you can easily manage all your code snippets through this plugin.
For those looking for a simpler option, Insert Headers and Footers is another great plugin. It allows you to paste code directly into predefined header and footer fields, making it a straightforward solution without the need for additional customization features like page targeting.
Final Thoughts: How to Add Code to the Header and Footer in WordPress
Adding custom code to the header and footer of your WordPress site doesn’t have to be a daunting task. Whether you’re integrating tracking tools like Google Analytics, adding social media pixels, or embedding custom scripts, there are various methods available that make the process easy and safe. From using intuitive page builders like Astra and Elementor to utilizing plugins like Header Footer Code Manager, you have plenty of options to suit your level of comfort and technical expertise.
For beginners, using plugins or the WordPress Customizer provides a simple and risk-free approach. More advanced users can explore manual file editing. With a child theme in place, they can rest assured that their changes will be protected during theme updates. Regardless of your chosen method, the key is to thoroughly test your code. Ensure it functions as expected before making it live.
In conclusion, adding code to your WordPress site’s header and footer doesn’t need to be a stressful process. With the right tools and a little practice, you can easily enhance your site’s functionality and performance. So, the next time you need to add custom code, you’ll be able to do so confidently and efficiently!