When you first open the WordPress admin dashboard, it might seem overwhelming due to the numerous options available. However, once your site is set up, you’ll primarily use just a few of these options regularly.
The WordPress admin dashboard is your control centre for managing your WordPress site. Common tasks you’ll perform here include:
- Creating and editing posts
- Uploading and managing media
- Installing Themes
- Installing plugins
- Editing widgets
- Managing comments
- Updating WordPress
- Creating and managing users
- Adjusting essential settings
On a day-to-day basis, you’ll mostly use the dashboard for creating and editing posts.
Start Your WordPress Website Today – Exclusive Hosting Discount Available
How to Access The WordPress Admin Dashboard
To log into the WordPress admin dashboard, simply add /wp-admin to the end of your domain. For example, if your domain is https://mydomainname.com, the login URL will be https://mydomainname.com/wp-admin. Alternatively, you can use this URL: https://mydomainname.com/wp-login.php, though it requires a bit more typing.
When prompted, enter your username or email address and your password to log in.
Having trouble accessing the WordPress admin dashboard?
- Firstly, if you’ve forgotten your password, click the “Lost your password” link. Then, you will receive an email with instructions to reset your password.
- If you don’t receive the email or still can’t log in after attempting to reset your password, contact your web host for assistance. They should be able to reset your password for you. Otherwise, if you use a reliable host, like Bluehost, you can expect prompt support.
Start Your WordPress Website Today – Exclusive Hosting Discount Available
The Layout of the WordPress Admin Dashboard
The WordPress admin dashboard is organized into three main areas: the top toolbar, a menu on the left, and a central content area that changes based on your menu selection.
The Top Toolbar
The top toolbar is always visible when you’re logged into WordPress unless you disable it in your user profile settings. This toolbar provides quick access to common tasks:
- Home Icon: Switch between viewing your site and the dashboard.
- Updates Icon: Displays if updates are available, along with the number of updates.
- Comments Icon: Shows the number of comments pending moderation.
- Plus Icon: Allows you to quickly create a new post or page.
- User Profile: Click your name on the right to edit your profile or log out.

Left-Hand Side Menu
The menu on the left side of your screen is your primary navigation tool for managing various administrative aspects of your WordPress site. This menu also offers quick access to different sections, enabling you to efficiently handle your site’s content, settings, and features.
On the other hand, if you find screen space is limited or prefer a cleaner interface, you can collapse this menu. To do so, click the “Collapse menu” button at the bottom. This action will then reduce the menu to show only icons, making for a more minimalist look.
Let’s explore each option in the left-hand menu. The number of options may vary based on the plugins you have installed. For instance, the Yoast SEO plugin adds an “SEO” section to the menu.
Main Dashboard
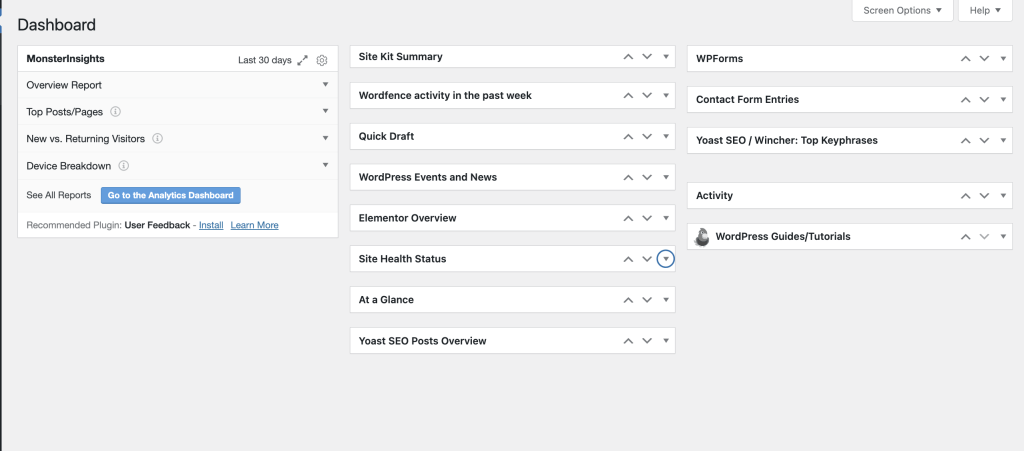
Firstly, upon logging into the WordPress admin screen, the first page you’ll encounter is the Dashboard. This page provides an overview of your site and may display different information based on the plugins installed.
The Dashboard is highly customizable:
- Collapsible Widgets: Each box or widget can be collapsed for a cleaner view.
- Drag and Drop: You can rearrange the boxes to fit your preference by simply dragging and dropping them.
- Screen Options: Use the “Screen Options” tab at the top to show or hide specific boxes, tailoring the Dashboard to your needs.
Posts
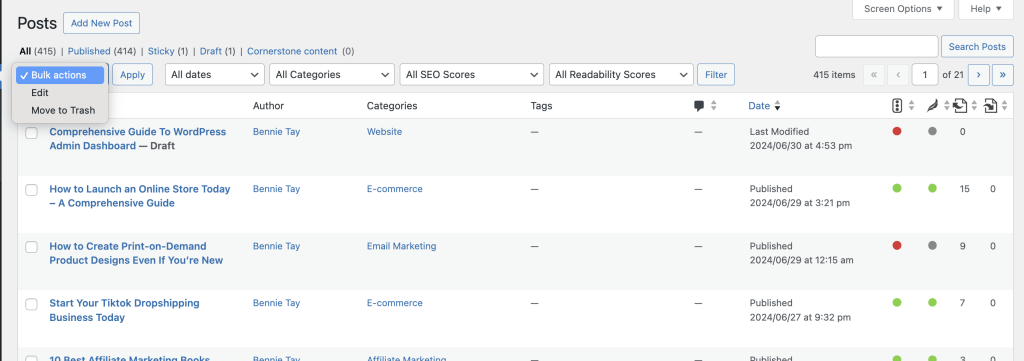
For bloggers, the Posts screen is one of the most frequently used sections. Clicking on the “Posts” tab presents a list of all your blog posts. Here’s what you can do:
- View Posts: Quickly see all posts, and filter them by Published or Draft status using the links at the top.
- Filter Options: If you have many posts, use the filters to sort them by date or category for easier navigation.
- Post Actions: Hovering over a post title brings up a sub-menu with options to Edit, Trash (bin), or Preview the post. You can also click directly on a post title to edit it.
- Add New Post: Start a new post by clicking the “Add New” button or the “Add New” link in the left-hand menu.
- Categories and Tags: Organize your posts using Categories and Tags.
- Categories: Group related posts together. For instance, a “DIY” category might have sub-categories like “Painting” and “Wall-papering.” Typically, a post belongs to one category but can be assigned to multiple if needed. Categories are hierarchical, allowing for a structured organization.
- Tags: Add descriptive tags to your posts to provide more context and improve searchability. For example, a post could be tagged with “easy-project” and/or “5-minute-job” to indicate its difficulty and estimated time to complete.
Media
The Media screen is your central hub for managing all types of media files uploaded to your site, including images, PDFs, and GIFs. Here are the key features and functions:
- View Modes: Use the icons on the left to switch between List mode and Grid mode for viewing your media library.
- Uploading Media: Quickly upload new media by dragging files from your computer’s File Explorer or Finder app directly into the media list area.
- Editing Media: To edit an image, click on its title or hover over it and click “Edit.” In the editing screen, you can modify the title, alternative text, caption, and description. For better SEO, it’s essential to enter a descriptive title and alternative text.
Pages
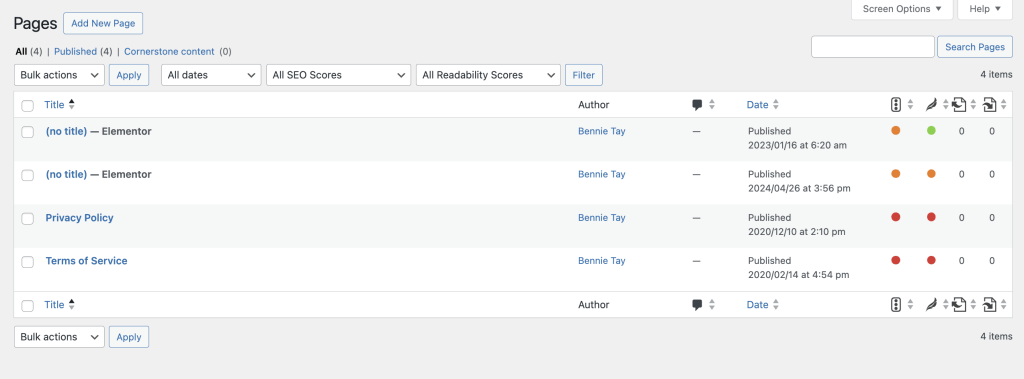
Pages are where you create static content for your site, such as your About page, Contact page, or Home page. Unlike posts, pages do not have categories or tags, but they can be hierarchical, allowing for parent and child pages.
- Managing and Writing Pages: The process of managing and writing pages is identical to the process for posts. You can add a new page, edit existing pages, and arrange them hierarchically as needed.
Comments
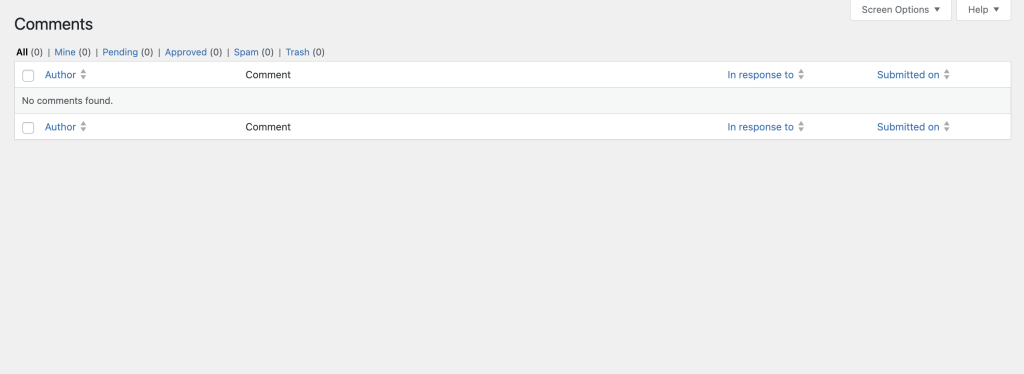
The Comments tab allows you to manage and engage with the comments on your blog. Here’s what you can do:
- Viewing and Approving Comments: You can view all comments and approve them directly from this screen.
- Enabling Comments: Comments are enabled by default, which encourages interaction with your audience. If you need to disable comments, go to Settings -> Discussion. Here, you can also set various discussion options, such as enabling moderation.
- Moderation: Use the links at the top to view comments that are pending moderation.
- Quick Actions: Hovering over a comment will reveal quick links to approve, reply to, or edit the comment.
- Spam Management: Initially, you might receive spam comments. To combat this, consider installing an anti-spam plugin. If your blog is hosted on WordPress.com, spam checking is included by default, so you don’t need to worry about managing it manually.
Plugins
Plugins are essential tools that extend the functionality of WordPress, allowing you to add various features to your site. Whether you need enhanced security, SEO capabilities, or social media integration, plugins can help.
- Installation and Management: If you are using a self-hosted WordPress site or the Business plan on WordPress.com, you have full control over your plugins. To use a plugin, you must first install and then activate it. If you no longer need a plugin, you can deactivate it or delete it completely.
- Navigating Plugins: When you click on “Plugins” in the left-hand menu, you’ll see a list of all installed plugins. To add a new plugin, click the blue “Add New” button or the “Add New” link in the left-hand menu.
Appearance
The Appearance tab is where you can customize the look and feel of your blog, including themes, widgets, menus, and more.
Themes
Use the Themes tab to manage and switch between different themes.
- Choosing a Theme: If you’re unsure which theme to choose, refer to a guide on selecting the perfect theme for your site.
- Activating and Previewing: Hover over a theme to activate it or see a live preview of how your blog will look with the new theme.
- Deleting Themes: Click on a theme and select “Delete” to remove it. It’s recommended to keep only your active theme and one default theme (such as Twenty Twenty-Four).
Customizer
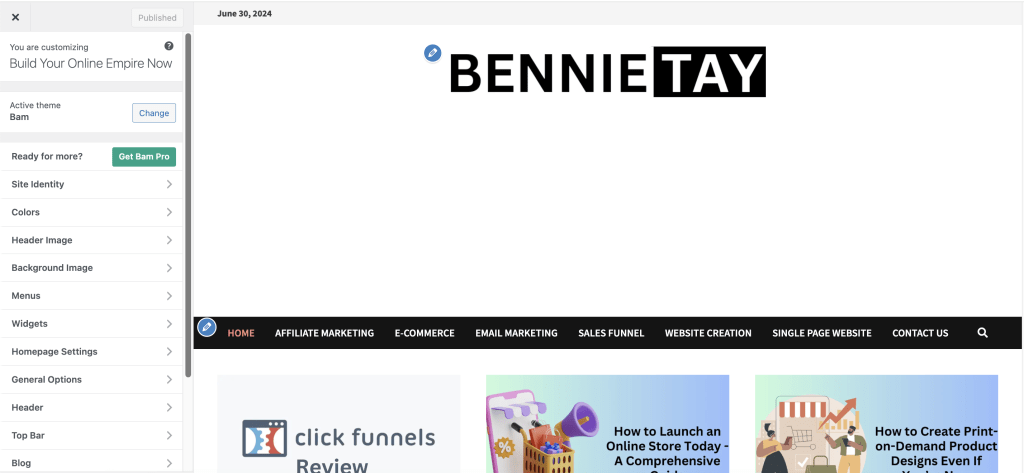
The Customizer allows you to modify your theme and see changes in real-time.
Accessing the Customizer: You can access it under the Appearance tab or from the top toolbar when viewing your blog.
Customization Options: The available options vary by theme. Click on sections to drill down into specific settings.
Tips for Using the Customizer:
- Use the pencil icon to quickly jump to the corresponding customization section.
- Click “Hide Controls” for a clearer, wider view of your blog.
- Use the device icons to preview how changes look on different devices (phone, tablet).
- Navigate through your blog to see the effect of changes on different pages.
- Click “Publish” to save changes, “Save Draft” to save without publishing, or “Schedule” to set changes to go live at a certain time. To discard changes, click the cog icon and then “Discard Changes.”
Widgets
Widgets are small blocks that add specific functions to your site, such as displaying categories in a sidebar.
- Managing Widgets: Add widgets to widget-enabled areas like sidebars or footers. Drag a widget from the available widgets section to the desired area and configure its settings.
- Widget Areas: The number and types of widget areas depend on your theme. Most themes have at least one sidebar and may include footer and header areas.
Menus
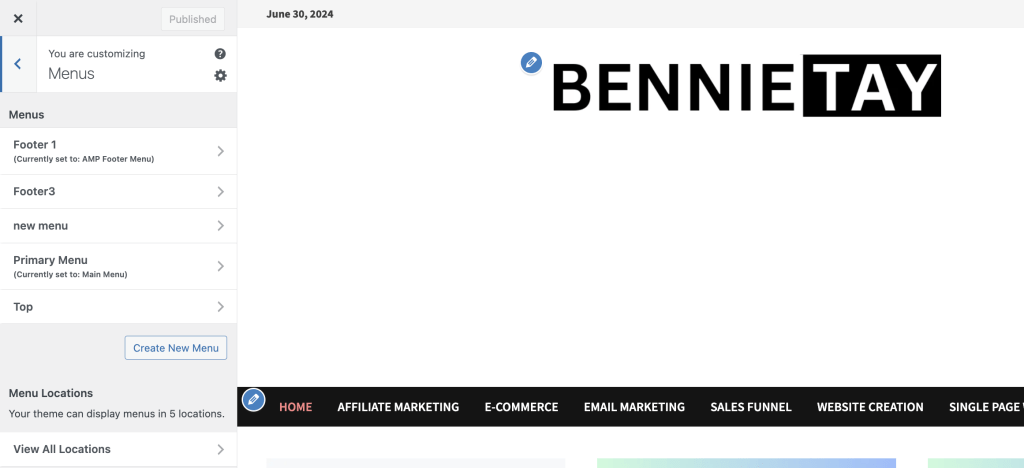
Use the Menus tab to control what pages, posts, or categories appear in your site’s navigation menu.
- Creating and Editing Menus: If you don’t have a menu defined, use the “Create a Menu” link to set one up, then assign it to a location in the Menu Settings section.
- Adding Menu Items: Add new items from the “Add Menu Items” section and use drag-and-drop to arrange them.
Users
The Users tab in WordPress allows you to manage all user accounts associated with your site. Here’s a comprehensive guide to utilizing this feature:
Initial Setup: When you first install WordPress, an administrator account is created. This account has the highest level of access, allowing full control over the site.
User Roles: If you need others to log into your site, you can assign them different roles with varying levels of permissions:
- Administrator: Full access to all features and settings.
- Editor: Can manage and publish posts, including those created by other users.
- Author: Can publish and manage their own posts.
- Contributor: Can write and manage their own posts but cannot publish them.
- Subscriber: Can only manage their profile and read content.
Adding New Users: To add a new user, click the “Add New” button or the “Add New” link in the left-hand menu. Then, fill in the required details, including username, email, and password, and assign an appropriate role.
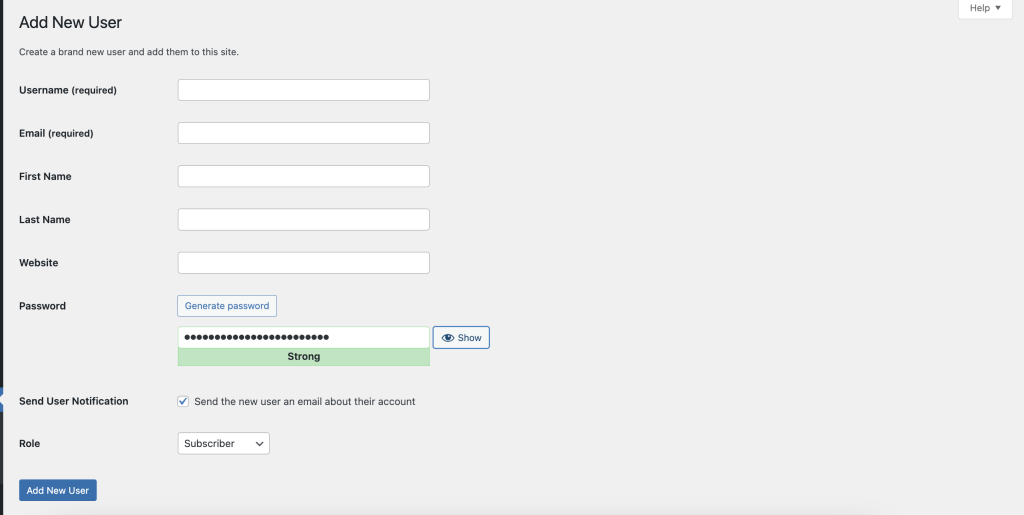
Editing User Profiles:
- Accessing User Profiles: Click on a user or hover over their name and select “Edit” to modify their profile.
- Modifiable Details: You can update information such as the user’s name, email address, nickname, and color scheme for the admin panel. Note that the username cannot be changed once it is set.
- Profile Customization: Users can also customize their own profiles by logging in and accessing their profile settings.
Tools

The Tools tab in WordPress is designed for performing various administrative tasks, though you may not need to use this section frequently. Here are the key functionalities it offers:
Import: If you’re migrating from another blogging platform like Blogger or Tumblr, you can now use the Tools -> Import option to import your existing posts and content from those platforms.
Export: Should you decide to move your blog to another host, you can also use the Tools -> Export option to export your posts and other content. However, for a complete migration, it’s best to copy your site’s backend MySQL database. Your new hosting provider should be able to assist with this process.
Site Health: Introduced in WordPress version 5.0, this feature allows you to assess and improve your site’s health. It provides recommendations for enhancing security and performance, such as:
- Removing inactive themes and plugins.
- You can update your PHP version via cPanel in your hosting account or by contacting your hosting support team.
GDPR Compliance: This section also includes tools for exporting and erasing personal data, helping you comply with GDPR regulations. This is particularly useful if your site allows user registrations.
Settings
The Settings tab is where you configure essential aspects of your WordPress site. Properly setting up your site from the beginning can save you from potential issues later on.
Essential Settings: It’s highly recommended to review and adjust the settings after installing WordPress. Key settings to consider include:
- General Settings: Configure site title, tagline, URL, and email address.
- Writing Settings: Adjust the default post category and format, and configure the post via email.
- Reading Settings: Set the homepage display, number of posts per page, and RSS feed settings.
- Discussion Settings: Manage comment settings, such as moderation and email notifications.
- Permalinks: Setting up permalinks is crucial for SEO and should be done early on to avoid complications. Proper permalink settings create clean and readable URLs for your posts and pages.
Start Your WordPress Website Today – Exclusive Hosting Discount Available
How To Customize Your WordPress Admin Dashboard
While you can’t extensively change the appearance of the WordPress dashboard, there are a few customization options available to enhance your user experience.
Change the Color Scheme
The most common adjustment is changing the colour scheme. To do this, go to Users -> Profile, where you can select from various colour schemes to personalize your dashboard.
Show/Hide the Top Toolbar
In addition to changing the colour scheme, you can also decide whether to show or hide the top toolbar when viewing your site. You can also find this setting in the Profile section. It’s generally recommended to keep this toolbar visible as it provides quick access to essential admin functions.
Enable Shortcut Keys for Quick Comment Moderation
For those who handle a large volume of comments, enabling keyboard shortcuts for comment moderation can be very helpful. Besides, this feature can be activated in the Profile settings, making the process of moderating comments faster and more efficient.
Turn Off the Visual Editor
Finally, you have the option to turn off the visual editor when writing posts, also found in the Profile settings. However, it is advisable to keep the visual editor enabled, as it offers a more intuitive and user-friendly writing experience.
Final Thoughts: Comprehensive Guide To WordPress Admin Dashboard
In this article, I’ve walked you through everything you can do within the WordPress Admin dashboard to help manage your WordPress blog. Moreover, depending on the plugins you install, there may be additional features available.
To explore these extra options further, I recommend consulting the developer’s website for comprehensive information on how to maximize your WordPress experience.
Start Your WordPress Website Today – Exclusive Hosting Discount Available
