Are you ready to create your website but unsure where to start? Welcome to WordPress CMS! Today, WordPress is the premier solution for building professional-looking sites without requiring any prior knowledge of WordPress or technical skills. Whether you’re looking to establish a personal blog, launch an online store, or manage a corporate website, WordPress provides the tools and flexibility to help you achieve your goals.
This beginner’s guide will walk you through the process of using WordPress CMS to efficiently build and manage your website.
Are you ready to dive in? Let’s get started!

Table of Contents
ToggleGetting Started with WordPress CMS
In 2024, WordPress CMS will continue to be a dominant force in the world of website creation and management. Powering over 43% of all websites on the internet, it remains one of the most widely used content management systems (CMS) globally. This is largely due to its scalability, flexibility, and ease of use, which have collectively made it the go-to choice for individuals, small businesses, and large enterprises alike.
Moreover, according to BuiltWith, more than 36% of the top 10,000 websites on the web are built on WordPress CMS, further highlighting its value and trustworthiness for businesses of all sizes. Whether you’re managing a personal blog, an e-commerce site, or a large-scale corporate website, WordPress seamlessly adapts to your needs, making it a versatile solution for millions of users.
What is WordPress?
At its core, WordPress is an open-source content management system (CMS) that allows users to build, manage, and update websites without needing advanced technical knowledge. The key benefit of WordPress lies in its accessibility—both for beginners and experienced developers—enabling anyone to create a professional-looking website with relative ease.
WordPress comes in two versions:
- WordPress.org – The self-hosted version offers complete control over your website. You’ll need a domain name and hosting plan, but you’ll have access to the full array of features, including plugins, themes, and custom code.
- WordPress.com – A managed, hosted version that simplifies setup but offers less control and fewer customization options compared to WordPress.org. It’s ideal for beginners or those seeking a more hands-off approach.
We will dive deeper into the differences between these two later on in the guide.
Benefits of Using WordPress CMS
If you’re looking to build a website, WordPress CMS is one of the most powerful and flexible platforms available. Its user-friendly nature, vast customization options, SEO capabilities, responsive design, and large support community make it a standout choice for millions of website owners.
Below are some of the key benefits of having a WordPress website:
User-Friendly Interface
One of the most appealing aspects of WordPress is its easy-to-navigate interface, making it accessible even for beginners. The WordPress dashboard is designed with simplicity in mind, providing a straightforward and intuitive experience. Whether you’re adding blog posts, creating new pages, or managing plugins, everything can be done with just a few clicks.
Even if you’re new to building websites, the learning curve is minimal. You don’t need any coding experience to get started. With user-friendly options for editing content, uploading media, and configuring settings, you’ll be able to manage your website efficiently from day one.
Highly Customizable
WordPress is renowned for its customization capabilities. No matter the type of website you’re building—whether it’s a blog, portfolio, online store, or corporate site—WordPress offers a vast array of themes and plugins to suit your needs.
- Themes: WordPress offers thousands of free and premium themes that allow you to completely change the look and feel of your website. Most themes are also responsive, ensuring your site looks great on all devices, including mobile phones and tablets.
- Plugins: With over 60,000 plugins available, you can extend the functionality of your site in countless ways. Whether you want to add a contact form, enable e-commerce features, or improve site security, WordPress plugins make it easy to add new features without needing any development skills.
These customization options mean that WordPress is not just a blogging platform—it’s a versatile tool capable of supporting any kind of website.
SEO-Friendly
Search engine visibility is essential for the success of any website, and WordPress is designed with search engine optimization (SEO) in mind, making it easier for your site to rank higher in search results like Google.
SEO Plugins: With popular plugins such as Yoast SEO, optimizing your WordPress site becomes straightforward. These tools allow you to easily edit meta titles and descriptions, create SEO-friendly URLs, and manage keyword usage, all of which improve your site’s visibility in search engines.
Clean Code: WordPress adheres to high coding standards, ensuring your website loads quickly and is well-optimized for search engines right out of the box.
Mobile Responsiveness: Since mobile-friendliness is a key factor in search engine rankings, WordPress themes are built to be responsive, further enhancing your SEO potential. This ensures your site performs well on all devices, ultimately boosting its chances of ranking higher in search results.
Responsive Design
In today’s digital landscape, where more than half of all web traffic originates from mobile devices, having a responsive website is no longer optional; rather, it has become a necessity. Fortunately, WordPress themes are typically designed to adapt automatically to various screen sizes, ensuring that your site looks and functions optimally, whether viewed on a smartphone, tablet, or desktop.
Moreover, a responsive design not only guarantees that your website maintains its visual appeal across devices but also enhances its functionality. This flexibility significantly improves user experience, as visitors can easily navigate and interact with your content regardless of the device they are using. Additionally, it contributes positively to your website’s SEO performance. Search engines prioritize mobile-friendly sites in their rankings, making responsiveness a key factor in achieving higher visibility and attracting more traffic. Therefore, investing in a responsive WordPress theme is essential for reaching a broader audience and improving your site’s overall effectiveness.
Large Support Community
One of the greatest strengths of WordPress CMS lies in its vast global community. Since WordPress is open-source, it benefits from a large, dedicated user base that consistently contributes to its development and support. As a result, whether you’re setting up your website, troubleshooting an issue, or customizing your theme, there’s no shortage of resources available.
Additionally, from official WordPress tutorials to countless blogs, forums, and YouTube channels, users of all skill levels can access extensive documentation. WordPress boasts active forums where both users and developers discuss common issues, share tips, and offer support. So, whether you’re dealing with a plugin issue or trying to implement a custom feature, the community is often the quickest way to find a solution.
Many developers and agencies offer specialized WordPress support services for those who prefer professional assistance. With this thriving ecosystem, you’re never alone on your WordPress journey, making it much easier to build, maintain, and scale your website.
Choosing Between WordPress.com and WordPress.org CMS
WordPress.com vs WordPress.org
Before diving into how to use WordPress CMS, it’s crucial to understand the difference between WordPress.com and WordPress.org. While both platforms share the same core technology and allow users to create websites, they differ significantly in terms of features, control, and flexibility. Deciding which version is right for you depends on your goals and level of experience.
What is WordPress.com?
WordPress.com is a hosted platform where the technical aspects, such as hosting, security, and updates, are managed for you. It offers a range of plans, including a free option, making it ideal for beginners or users who want to get started quickly without having to deal with the complexities of web hosting.
- Free Plan: WordPress.com’s free plan is perfect for users who need a basic website or blog. However, it comes with several limitations:
- WordPress.com Subdomain: Your site’s URL will include a subdomain (e.g., yourwebsite.wordpress.com), which may not look as professional as a custom domain.
- Ads: WordPress.com places ads on free websites, and you won’t have control over what ads are shown.
- Limited Customization: You’ll have access to a restricted set of themes and limited customization options, which might not allow you to fully personalize your site.
- Paid Plans: WordPress.com offers several paid tiers that unlock more features, such as:
- Custom Domain Name: You can use a personal or business domain without the WordPress.com branding.
- Increased Storage: Depending on the plan, you’ll get more storage space for media and content.
- Advanced Design Tools: With higher-tier plans, you can access premium themes, custom CSS, and other tools to enhance your site’s design and functionality.
Overall, WordPress.com is a good option for users who prioritize ease of use and don’t want to handle technical details like hosting, backups, or updates. However, it does have limitations in terms of flexibility and customization.
What is WordPress.org?
WordPress.org is often referred to as the self-hosted version of WordPress. With WordPress.org, you download the WordPress software for free and install it on your hosting server. This approach provides complete control over every aspect of your website.
- Freedom to Choose Hosting: While the WordPress software itself is free, you’ll need to purchase web hosting from a third-party provider (e.g., Bluehost, SiteGround, or WP Engine) and a domain name. This gives you the flexibility to choose a hosting plan that suits your budget and website’s performance needs.
- Full Customization Control: Unlike WordPress.com, WordPress.org allows you to install any themes and plugins you want. This means:
- Thousands of Themes and Plugins: You can fully customize your site’s appearance and functionality using both free and premium themes and plugins.
- Unlimited Customization: With access to the core code, you can edit your site at any level, adding custom code or features that are not available on WordPress.com.
- No Ads: You won’t have any third-party ads on your site unless you choose to monetize it with your ads, such as using Google AdSense or other ad networks.
- Monetization and Scalability: WordPress.org is perfect for users who want to monetize their site, set up an online store using plugins like WooCommerce, or scale their website for future growth. It’s designed to handle everything from small personal blogs to large, high-traffic sites.
Setting up your WordPress CMS Website
Step 1: Get Your Domain Name and Hosting
To create a WordPress site, the first step is to secure two essential components: a domain name and web hosting.
- Domain Name: This is your website’s address on the internet (e.g., www.bennietay.com) and is how visitors will find your site.
- Web Hosting Provider: A hosting service stores your website’s files and makes them accessible online. Choosing a hosting provider that supports WordPress simplifies the setup process.
Choosing a Hosting Provider
When selecting a web hosting provider, it’s essential to ensure they offer WordPress-specific hosting with features like one-click installations. This feature, in particular, simplifies the process of getting your WordPress site up and running quickly. Additionally, a quality hosting provider should offer excellent uptime, fast loading speeds, and robust security features to keep your website performing optimally.
With this in mind, Bluehost emerges as an ideal choice for WordPress hosting. Not only is it one of the officially recommended hosts by WordPress, but it is also recognized for its ease of use and reliable service. Here’s why Bluehost truly stands out:
- One-Click Installations: Bluehost simplifies the WordPress installation process with a single click, making it beginner-friendly.
- Domain Name Generator: Not sure which domain name to choose? Bluehost offers a domain name generator tool that provides creative, keyword-based suggestions to help you find the perfect domain for your website.
- Comprehensive Hosting Packages: Bluehost packages include a free domain for the first year, SSL certificates to secure your site, and 24/7 customer support.
- Official WordPress Recommendation: As a host recommended by WordPress itself, Bluehost offers a solution that is well-optimized for running and managing WordPress sites effectively.
Once you’ve chosen a hosting provider and registered your domain name, you’re ready to move on to the next step—installing WordPress.
Step 2: Install WordPress CMS
Now that you have your domain name and hosting, it’s time to install WordPress on your server. The process may differ slightly depending on your hosting provider, but most services simplify the installation.
If you’ve chosen Bluehost as your hosting provider, the process is even simpler. Bluehost automatically pre-installs WordPress on your hosting account for WordPress hosting plans. However, if you need to install WordPress manually, follow these steps:
- Log in to Your Bluehost Account Manager.
- Navigate to the Hosting Tab: In the side navigation menu, select the Hosting option.
- Click on Add Site: Choose to create a new WordPress site by selecting the “Add Site” button.
- Select Install WordPress: Follow the on-screen prompts and click Continue to proceed.
- Enter Your Website Details:
- In the Site Title field, input the name of your website. If you’re unsure, you can skip this step and set it later.
- In the Enter Domain Name field, type in your domain name or select a temporary domain if needed.
- Complete Installation: The process will begin, and it may take a few minutes to complete. Once done, click Log in to WordPress to access your site’s dashboard.
Now that you’ve successfully installed WordPress, it’s time to start building and customizing your new website.
Step 3: Install And Customize Your WordPress Theme
Choosing the right WordPress theme is a crucial step in designing your website, as it dictates the overall appearance, layout, and user experience. With thousands of free and premium themes available, you can find one that perfectly aligns with your brand and website goals.
How to Select and Install a WordPress Theme:
- Go to Appearance > Themes in your WordPress admin dashboard.
- Click “Add New” to browse the extensive selection of themes available directly from WordPress.
- Filter Themes by Features: You can sort themes by popularity, industry, or specific features like responsive design, customization options, or e-commerce compatibility.
- Preview Themes: Before committing to a theme, you can preview how it will look on your site by clicking “Preview.” This lets you see the layout and design in action.
- Install and Activate the Theme: Once you’ve chosen a theme that fits your needs, click Install, and then hit Activate to apply it to your site.
After installing your theme, you’ll want to customize it to reflect your branding and preferences. Most WordPress themes offer various customization options, such as:
- Customizing the Header and Footer
- Choosing Font Styles and Colors
- Modifying Layouts (e.g., full-width vs. sidebar)
For more advanced design flexibility, consider using a page builder like Elementor or Beaver Builder, which allows you to create custom layouts and design elements using drag-and-drop functionality.
Step 4: Customize Your Homepage with Widgets
Widgets are powerful content blocks that you can place in designated areas of your website—such as the sidebar, footer, or even directly on the homepage—depending on the theme you choose. They’re a simple yet effective way to display key elements and add interactivity to your site.
Here are some common uses for widgets:
- Recent Posts: Show your latest blog articles to keep visitors informed and engaged.
- Categories: Help users navigate your site by displaying content categories in an easily accessible format.
- Social Media Icons: Add social media links to encourage visitors to connect with you across different platforms.
- Search Bar: Make it easy for users to search your site for specific content.
- Contact Forms: Allow visitors to reach out to you directly by email or through a form.
How to Add and Manage Widgets:
- Navigate to Appearance > Widgets in your WordPress dashboard.
- On the left, you’ll see a list of available widgets, and on the right, the widget areas supported by your theme (e.g., sidebar, footer, homepage).
- Drag and drop a widget from the available list into your preferred widget area.
- Customize the widget’s settings: Depending on the widget type, you can modify its title, content display, or any other settings available.
- Save and Preview: After setting up the widget, save your changes and preview them to see how they appear on your site.
Some themes even allow you to use widgets directly within the homepage layout, offering more creative control over the placement of your content.
Widgets are a user-friendly way to enrich your site’s functionality without needing any coding knowledge. They can enhance the user experience by providing quick access to important information and creating a more dynamic, engaging homepage.
Advanced Customization with CSS
While WordPress themes and page builders offer extensive customization options, you may want even more control over the design elements of your site. This is where Custom CSS comes into play. With custom CSS, you can adjust the look and feel of your site without directly editing theme files, ensuring your changes are future-proof, even if your theme is updated.
How to Add Custom CSS in WordPress
- Go to Appearance > Customize > Additional CSS in the admin dashboard.
- In the Additional CSS panel, you can enter custom CSS code to make further design tweaks. For example:
- Change colours: Tweak your site’s colour palette to match your branding.
- Adjust font sizes and styles: Modify typography to improve readability or aesthetics.
- Modify margins and spacing: Fine-tune layout spacing for better visual alignment.
After entering your custom CSS, hit Publish to apply the changes. You’ll see the results in real-time in the preview window. This gives you full creative control to fine-tune your website’s design and create a unique look that reflects your vision.
Step 5: Configure Your WordPress Website Reading Settings
After installing and customizing your WordPress theme, the next step is to optimize your site’s settings to ensure smooth performance and deliver a user-friendly experience. To achieve this, configuring your Reading Settings plays a crucial role in determining what content appears on your homepage.
By default, WordPress is set to display your most recent blog posts on the homepage, which is ideal for blog-centric websites. However, if you’re creating a business website, portfolio, or landing page, you may prefer to showcase a static homepage. A static homepage allows you to present specific content, such as a welcome message, services, or key information, providing a more tailored and professional look for visitors.
Here’s how to configure your Reading Settings:
- Navigate to Settings > Reading in the WordPress admin dashboard.
- Choose Your Homepage Display: You’ll see two options:
- Your latest posts: This option will show your most recent blog posts on the homepage.
- A static page: Select this if you want to display a custom homepage.
- If you select A static page, choose a page for your homepage and another for your blog, if you have one.
- You can create a new page by going to Pages > Add New and naming it something like “Home” for your homepage and “Blog” for your posts page.
- After configuring the settings, hit Save Changes to apply your preferences.
Displaying a static page on your homepage gives you greater control over the first impression visitors have when they land on your site.
Step 6: Create Basic Pages with WordPress CMS
Every WordPress website needs a set of essential pages to provide a solid foundation and offer key information to visitors. These core pages help ensure your site functions properly and delivers a smooth user experience.
Essential Pages to Build:
- Home Page: The homepage is the first page visitors see when they land on your site. It should showcase key elements like your business value, calls to action (CTAs), and an overview of what your site offers.
- About Page: Use this page to introduce yourself, your business, or your team. Share your story, values, and mission to help visitors connect with your brand on a personal level.
- Contact Page: Provide visitors with a way to reach you, whether through a contact form, phone number, email address, or social media links. Make it easy for users to get in touch.
- Privacy Policy Page: This page is essential for compliance with data privacy laws, such as GDPR or CCPA. Outline how user data is collected, stored, and used on your site to build trust with your visitors.
- Product or Services Page: Showcase your offerings, whether products or services. Provide detailed descriptions, high-quality images, and clear pricing to encourage visitors to take action.
- Thank You Page: After visitors complete a desired action, such as submitting a form or making a purchase, direct them to a thank you page. This page can acknowledge their action and provide further instructions or resources.
- FAQ Page: Answer common questions that your visitors may have. This helps reduce the number of inquiries you receive and can streamline the user experience by providing quick answers.
- Terms and Conditions Page: This page outlines the rules and legal agreements between your site and its users, protecting your business and establishing clear expectations.
How to Create a New Page in WordPress CMS:
- Go to Pages > Add New in your admin dashboard.
- Enter the Page Title and the content you want to display.
- Format your page using the editor, adding images, videos, or text as needed.
- Click Publish to make the page live on your website.
Building these essential pages gives your website structure and ensures visitors can easily find important information.
Step 7: Install Essential WordPress CMS Plugins
Plugins enhance your WordPress website by adding extra functionality, from SEO improvements to form management and site security. The vast plugin library allows you to customize and extend your site’s capabilities based on your needs.
How to Install Plugins in WordPress:
- Navigate to Plugins > Add New in the WordPress dashboard.
- Search for a Plugin: You can search for specific plugins based on your needs (e.g., “SEO,” “security,” “contact forms”).
- Click Install next to the plugin you want, then click Activate once installed.
Essential Plugins for Beginners:
- Yoast SEO: A powerful SEO tool that helps optimize your site for search engines by guiding you through best practices like adding meta descriptions, optimizing keywords, and improving readability.
- SiteLock: Provides enhanced security for your website, protecting it from malware, hacks, and other online threats.
- WPForms: A beginner-friendly contact form plugin that allows you to create simple forms for users to fill out, such as contact forms or subscription forms.
- UpdraftPlus: A reliable backup plugin that allows you to schedule regular backups of your site, ensuring you won’t lose important data in case of a crash or technical issue.
While plugins offer great benefits, it’s essential to only install the plugins you need. Too many plugins can slow down your site’s performance, so focus on quality rather than quantity.
Step 8: Creating Your Content in WordPress CMS
Content is the lifeblood of any website, whether you’re building out informative blog posts, showcasing products, or creating service pages. Regularly updated, high-quality content helps engage your audience, improve your site’s SEO, and establish your site as a valuable resource.
How to Create a Blog Post:
- Go to Posts > Add New in the WordPress dashboard.
- Enter a Post Title that conveys the subject of your content.
- Write Your Content: Use the WordPress editor to add and format text, images, videos, and other media to enhance your post.
- Optimize with SEO: Before publishing, make sure your post is optimized with keywords, meta descriptions, and proper heading structures (H1, H2, etc.) to improve visibility on search engines.
- Click Publish when you’re ready to make the post live.
Regularly posting fresh content is key to maintaining engagement and improving SEO. Consistency is crucial, whether you’re publishing weekly blog posts, updating your product pages, or creating new landing pages for your services. It not only keeps visitors coming back but also helps search engines recognize your site as active and relevant.
Step 9: Monitoring and Management of Your WordPress CMS Website
Ensuring your WordPress CMS website remains functional and secure requires ongoing monitoring and regular maintenance. A proactive approach can help you avoid performance bottlenecks and security vulnerabilities.
Key Ways to Monitor Your Website:
- Keep WordPress Updated: Regularly update your WordPress core software, themes, and plugins. This helps ensure your website benefits from the latest features, bug fixes, and security patches. Failing to update can leave your site vulnerable to security threats and compatibility issues.
- Use Google Analytics: Google Analytics is a powerful tool for tracking website traffic, user behavior, and performance metrics. With it, you can monitor key data like:
- Page load times
- Bounce rate
- Visitor demographics and behavior
- Conversion tracking
- Pages with the highest traffic
This data will help you identify problem areas or opportunities for improvement on your website.
- Troubleshoot Slow Load Times: Slow websites can frustrate visitors and hurt your search engine rankings. If you notice performance issues, take these steps:
- Deactivate Unnecessary Plugins: Having too many plugins, especially poorly coded ones, can slow down your site. Deactivate and remove any that aren’t essential.
- Optimize Images: Compress images to reduce their file size without compromising quality.
- Use Caching: A caching plugin (e.g., W3 Total Cache) can significantly reduce load times by serving cached versions of your pages.
- Contact Your Hosting Provider: If slow performance persists, your hosting provider may need to adjust server settings or recommend upgrades like a Content Delivery Network (CDN) for faster load times.
Consistently monitoring your website helps ensure it runs smoothly and continues to provide an excellent user experience.e
Step 10: Back Up and Update Your WordPress CMS Website
Backing up your WordPress site is one of the most critical steps you can take to protect your data and ensure that your site can be quickly restored in case of any issues. How to Back Up Your WordPress Site:
- Automatic Backups via Hosting Provider: Many hosting providers, including Bluehost, offer automatic backups as part of their hosting services. Make sure this feature is enabled and that backups are stored securely.
- Install a Backup Plugin: If your hosting provider doesn’t offer automatic backups or you want extra protection, install a plugin like UpdraftPlus. This popular backup tool allows you to schedule backups and store them in secure locations like Google Drive, Dropbox, or Amazon S3.
- Manual Backups Before Major Changes: Always create a manual backup before installing new plugins, updating themes, or making significant changes to your website. This way, if something goes wrong, you can quickly restore your site to its previous state.
- Store Backups Securely: Keep backups in secure cloud storage or external drives for easy access. Having multiple copies in different locations ensures you’re protected in case of hardware failure or data corruption.
Along with backing up your site, keeping your WordPress software, themes, and plugins up to date is vital for maintaining security and performance. Schedule regular updates to ensure your site remains stable, functional, and secure.
SEO for your WordPress CMS Website
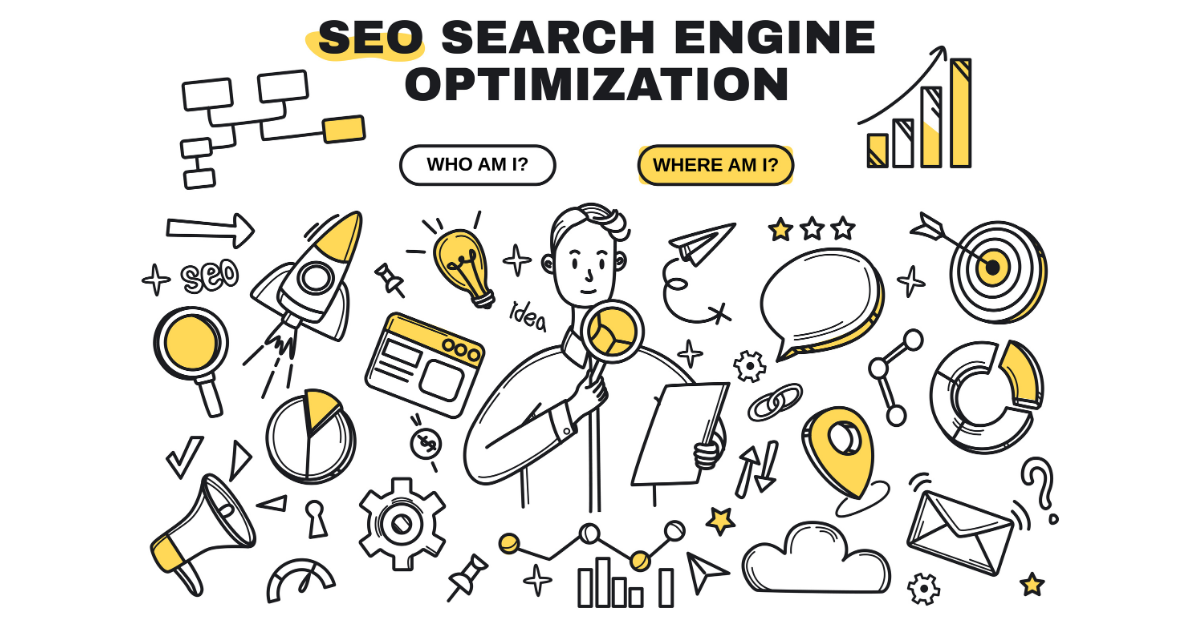
Optimizing your WordPress site for search engine optimization (SEO) is crucial for boosting visibility, driving organic traffic, and securing better rankings in search engine results. Fortunately, WordPress makes SEO more accessible through a range of powerful tools and plugins that enable users to implement effective SEO strategies without requiring advanced technical expertise.
One of the key advantages of using WordPress is the abundance of SEO plugins designed to simplify the optimization process. These plugins allow you to manage everything from meta tags and keywords to improve overall site performance, helping you stay competitive in search rankings. Two of the most popular SEO plugins are:
- Yoast SEO: This plugin offers a comprehensive set of tools to optimize content, meta descriptions, page titles, keywords, and readability. Yoast also provides a built-in analysis that offers suggestions for improving on-page SEO.
- Rank Math: Another highly regarded plugin, Rank Math provides advanced SEO features such as keyword optimization, rich snippets, and local SEO tools. It also integrates easily with Google Search Console to track performance.
These plugins are invaluable for WordPress users who want to enhance their site’s rankings without needing deep SEO expertise. They guide users through best practices for optimizing both on-page and technical SEO elements.
1. Keyword Research and Content Optimization
At the heart of any successful SEO strategy is keyword research. By identifying the right keywords, you can align your content with what people are searching for and improve your chances of ranking higher in search engine results.
- Google Keyword Planner is a free tool that helps you discover keywords with high search volumes and low competition. Other tools like SEMrush and Ahrefs offer more advanced keyword research features, including insights into your competitors’ keywords.
- Once you’ve identified the right keywords, strategically incorporate them across your website’s content, including:
- Page titles
- Meta descriptions
- Headings (H1, H2, etc.)
- Image alt text
- URL slugs
Optimizing content around targeted keywords ensures that search engines can better understand your site’s relevance to user queries.
Internal Linking is another important SEO tactic. By linking to related pages within your website, you help search engines crawl your site more effectively while encouraging users to explore additional content. This boosts both site structure and user engagement.
2. Site Speed and Performance
Page speed is a critical ranking factor in SEO. Google prioritizes websites that offer fast, smooth user experiences, and a slow site can hurt your rankings and lead to higher bounce rates. To improve your site’s speed:
- Compress images: Large images slow down page load times. Use image compression tools (like TinyPNG or Smush) to reduce image sizes without sacrificing quality.
- Minimize file sizes: Combine and minify CSS, JavaScript, and HTML files to reduce the amount of code that needs to be loaded.
- Caching: Installing caching plugins like W3 Total Cache or WP Super Cache can greatly improve load times by serving cached versions of your pages. These plugins help reduce server load and boost performance, especially for returning visitors.
Choosing a reliable, high-performance web host optimized for WordPress can also make a significant difference. Many hosting providers offer WordPress-specific hosting plans that are pre-configured for optimal performance.
3. Secure Your WordPress Site with SSL
Security is another important factor in SEO. Google gives preference to websites that have SSL certificates (which enable HTTPS encryption). Having an SSL certificate installed on your website not only protects sensitive user data but also signals to Google that your site is secure, which can improve your search rankings.
Most hosting providers, including Bluehost, offer free SSL certificates powered by Let’s Encrypt as part of their WordPress hosting plans. Installing an SSL certificate ensures that any data transferred between your site and its visitors (like passwords or payment information) is encrypted, boosting user trust and SEO performance.
Custom Homepage for WordPress CMS Website
A custom homepage can transform the look and functionality of your website, helping you make a strong first impression and showcase your content in a more tailored, engaging way. Whether you’re promoting a blog, showcasing products, or driving conversions, a personalized homepage ensures that your visitors quickly understand your site’s purpose and are guided toward key actions.
WordPress provides various ways to create a custom homepage, offering extensive customization options through themes, page builders, and widgets.
Selecting a WordPress CMS Theme
The first step in creating a custom homepage is choosing a WordPress theme that supports homepage customization. Many themes come with built-in homepage templates, but for greater flexibility, you may want to use a page builder.
If you’re using Bluehost for hosting, you can take advantage of its Wonder Blocks page builder. Wonder Blocks simplifies website building with drag-and-drop content blocks and customizable templates, making it an excellent choice for non-technical users. It allows you to:
- Build professional-looking pages with ease.
- Add content sections, images, and interactive elements without touching a line of code.
- Use pre-made layouts or create your unique designs.
This flexibility makes Wonder Blocks perfect for those who want to quickly create a polished, custom homepage.
Customizing the Homepage Layout
Once you’ve installed your WordPress theme, the customization process begins:
- Access the Customizer: Head to your WordPress dashboard and navigate to Appearance > Customize. This opens the theme customizer, where you can modify your homepage layout.
- Modify Layout Elements: Depending on your theme and page builder, you can adjust the structure, such as:
- Adding content blocks like testimonials, featured products, or recent blog posts.
- Customizing header images, colours, fonts, and overall layout.
- Adding widgets to display extra functionality like a search bar, recent posts, or social media icons.
- Enhancing Engagement: Use these custom design elements to create a more engaging experience. For instance:
- Feature your latest blog posts to keep visitors updated.
- Display testimonials or client logos to build credibility.
- Highlight products or services with calls-to-action that guide visitors toward conversion points (like signing up for a newsletter or purchasing a product).
Setting a Static Homepage
By default, WordPress displays your latest blog posts on the homepage. However, if you’re creating a custom homepage, you’ll likely want to replace this default setting with a static homepage.
To set up a custom homepage in WordPress, start by navigating to the WordPress dashboard and selecting Settings > Reading. Next, under the “Your homepage displays” section, choose the A static page option. From the dropdown menu, select the page you’ve customized as your homepage, ensuring it displays the content you want to highlight for your visitors.
This ensures that visitors are greeted with your custom design rather than a list of blog posts.
How to Design a Mobile-Friendly WordPress Website
With over half of global web traffic coming from mobile devices, optimizing your WordPress website for mobile is no longer optional; it’s essential. A mobile-friendly site not only enhances user experience but also contributes significantly to your SEO efforts, as search engines prioritize mobile usability in their rankings. Here are key strategies to ensure your WordPress site is fully optimized for mobile users.
1. Use a Responsive WordPress Theme
When building your site, selecting a responsive WordPress theme is crucial. A responsive theme automatically adjusts its layout and design to fit various screen sizes, ensuring a seamless user experience across devices, from desktops to tablets and smartphones. Here’s what to look for in a responsive theme:
- Fluid Grids: Ensure that your layout adapts to different screen widths.
- Flexible Images: Check that images scale appropriately without losing quality.
- Media Queries: These CSS techniques help adjust styles based on the device’s characteristics, like width and resolution.
Before finalizing your choice, review the theme’s mobile preview to see how it looks on smaller screens.
2. Improve Page Load Times
Fast loading times are critical for mobile users, who often browse on slower networks. To enhance your site’s performance:
- Compress Images: Large image files can significantly slow down your site. Use plugins like Smush or Imagify to optimize images without sacrificing quality. These tools can automatically resize and compress images as you upload them, helping to maintain optimal load times.
- Minimize Unnecessary Files: Reduce the number of plugins you use and remove any unused themes. Fewer files mean less load time. You can also combine and minify CSS and JavaScript files using tools like Autoptimize to streamline page loading.
- Utilize Performance-Enhancing Tools: Many hosting providers offer caching solutions and performance optimization tools that can further improve site speed for mobile visitors. Enabling these features can dramatically reduce load times by serving cached versions of your pages.
3. Test Mobile Performance
Regularly testing your website’s mobile performance is essential to identify and rectify any issues:
- Google’s Mobile-Friendly Test: This tool assesses how well your site performs on mobile devices. It highlights potential problems such as slow load times, unresponsive elements, and navigation issues. Simply input your URL, and the tool will provide insights and recommendations.
- Usability Testing: Ensure that clickable elements like buttons, menus, and links are easily accessible on smaller screens. They should be large enough to tap without zooming in, and the spacing between them should prevent accidental clicks.
- Cross-Device Testing: It’s important to test your site on various devices and browsers. Tools like BrowserStack allow you to simulate how your website appears across different environments.
4. Optimize Content for Mobile
Content plays a crucial role in delivering a positive mobile user experience. Mobile visitors typically prefer concise and easily scannable information, so it’s important to shorten text blocks by breaking content into smaller paragraphs and incorporating bullet points for clarity. This makes it easier for readers to absorb key information without feeling overwhelmed by large chunks of text.
Another essential factor is font size. Ensuring that your text is legible on smaller screens improves readability and user engagement. A good guideline is to use a minimum of 16px for body text, allowing users to read comfortably without zooming in.
Finally, simplifying navigation is vital for mobile usability. Streamline your menu for smaller screens, possibly incorporating a hamburger menu that expands when tapped. Prioritize essential links so users can easily find what they need, creating a smooth and intuitive browsing experience.
Leveraging WordPress plugins for advanced functionality
WordPress plugins are invaluable tools that allow you to add advanced functionality to your website without requiring extensive technical knowledge. Whether you aim to improve your site’s SEO, enhance security, or boost performance, there’s a plugin designed to meet virtually every need. Below, we’ll explore some essential types of plugins that can help you optimize your WordPress site effectively.
1. SEO Plugins
Optimizing your website for search engines is essential for attracting organic traffic, and using the right SEO plugin can make this process much simpler. One of the most popular and effective options for WordPress users is Yoast SEO. This powerful plugin guides you through the process of optimizing your content by analyzing your text and providing actionable suggestions for improvement.
With Yoast SEO, you can easily manage key elements such as meta tags, allowing you to edit titles and meta descriptions to make them engaging and keyword-rich. It also offers readability feedback, helping you create articles that are clear, concise, and user-friendly. Additionally, its keyword optimization feature lets you track targeted keywords and assess how well your content performs for them.
Beyond these core functions, Yoast SEO also generates XML sitemaps and offers social media integration, making it a comprehensive tool for boosting your site’s visibility and search rankings.
2. Security Plugins
Securing your website from potential threats should be a top priority for any site owner. Cyberattacks such as malware infections, brute force attempts, and other vulnerabilities can compromise your site’s performance, data, and credibility. Implementing reliable security plugins is an effective way to protect your website and maintain its integrity.
SiteLock is a comprehensive security solution that offers multiple layers of protection. Its firewalls block malicious traffic before it even reaches your site, while malware scanning regularly checks for vulnerabilities and potential threats. Additionally, its login protection feature adds an extra layer of security to your login process, helping deter unauthorized access.
Another valuable tool is CodeGuard, a backup and security plugin designed to keep your site safe and recoverable. It offers automated backups of your files and databases, ensuring you can restore your site quickly if needed. The plugin also provides change notifications, alerting you to any modifications made to your site so you can respond promptly to unauthorized activity.
By integrating these security plugins, you can significantly reduce the risk of cyber threats and ensure your website remains protected, stable, and trustworthy.
3. Performance Plugins
Improving your site’s speed and overall performance is crucial for user experience and SEO. Performance plugins can help you optimize your site to ensure fast load times.
- W3 Total Cache: Storing static versions of your pages involves creating static HTML files, which significantly reduces the load on your server and improves load times for visitors. Additionally, minifying files by compressing HTML, CSS, and JavaScript further decreases page load times, enhancing the overall performance of your website. Together, these strategies contribute to a faster, more efficient user experience.
- WP Super Cache: Generating static HTML files allows these files to be served directly to users, significantly speeding up your site. Additionally, enabling caching for visitors further enhances performance, particularly for high-traffic websites. Together, these strategies ensure a smoother and more efficient browsing experience for your audience.
By integrating performance plugins like these, you ensure that your site runs smoothly, providing a better experience for your visitors.
Final Thoughts: Comprehensive Guide on How to Use WordPress CMS for Beginners
Learning how to navigate WordPress CMS may initially appear overwhelming; however, by following this comprehensive step-by-step guide, you can effortlessly create a fully functional website.
A crucial aspect of establishing a successful site is selecting the right web hosting provider. Bluehost offers a seamless experience specifically designed for WordPress users. With features like one-click WordPress installation, robust customer support, and plans optimized for speed and security, Bluehost ensures your website operates efficiently.
Bluehost hosting services cater to a wide range of needs, whether you’re running a small WordPress blog or managing a high-traffic eCommerce platform, while providing the scalability you need as your site continues to grow. Therefore, if you’re looking for a dependable WordPress hosting solution to support your website, you can confidently get started with Bluehost so that you can build and manage your WordPress CMS site with ease.

