Print-on-demand is one of the easiest and most cost-effective ways to launch a Shopify business due to its low barrier to entry. The initial investment is minimal—you only pay for the products you sell and cover Shopify’s monthly fees. Plus, you don’t have to worry about production, as your print provider handles all of that for you.
If this business model appeals to you, let’s dive into the essentials of how to start selling print-on-demand on Shopify. In this guide, we’ll walk you through the 9 key stages of launching a successful Shopify store using print-on-demand. Each stage includes smaller steps and insights to help you understand not just the process, but the reasoning behind each action.
What is a Print-on-demand Store
A print-on-demand (POD) store is an e-commerce business model that allows entrepreneurs to sell custom-designed or personalized products without the need for a large upfront investment in inventory. In a POD store, products are only produced and shipped to customers once an order is placed.
This unique business model empowers individuals and small businesses to create and sell a wide range of custom merchandise, from t-shirts and hoodies to mugs, posters, and phone cases, featuring their own designs or artwork.
The key advantage of a print-on-demand Shopify store is its flexibility and low risk. Store owners can upload their designs or artwork to a POD platform, which then integrates with their online store.
When a customer places an order, the POD provider handles everything, from printing the design on the chosen product to packaging and shipping it directly to the customer’s doorstep. This eliminates the need for inventory management and minimizes the risk of unsold stock, making it an appealing option for entrepreneurs looking to start a side hustle or test a new business idea with minimal upfront costs.
POD stores are not limited to traditional physical products. Many platforms also offer the option to create and sell digital products such as e-books, downloadable artwork, and more.
This versatile business model allows creators to showcase their unique ideas and artwork, reaching a global audience while avoiding the challenges and costs associated with traditional inventory-based businesses.
How to sell print-on-demand products on Shopify
Step 1. Create a Shopify account
The first step in launching your Print-on-Demand Shopify store is to create an account. Shopify offers a 3-day free trial, allowing you to explore its features and set up your business before committing to a subscription plan. Here’s how to get started:
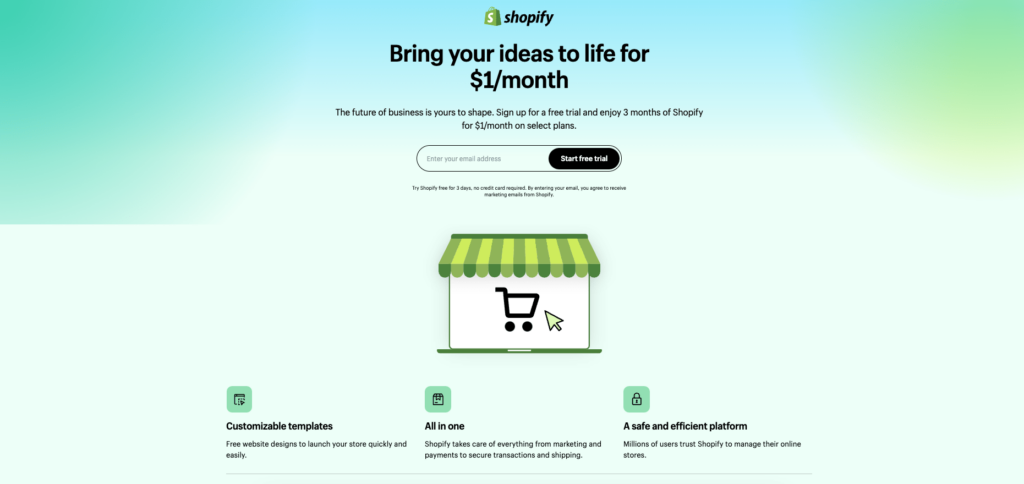
You can sign up for Shopify using your email, Facebook, or Google account. After signing up, Shopify will ask you a few basic questions about your business. These questions are meant to customize your experience, but don’t worry—none of the settings are permanent, and you can update them later as your business evolves.
Once the initial setup is complete, you’ll be directed to your Shopify dashboard. This is where you’ll manage every aspect of your online store, from product listings to customer orders.
Next, you’ll need to select a name for your print-on-demand Shopify store. This name will be part of your Shopify domain (e.g., storename.myshopify.com). Although this domain is created based on your store name, you can change the store name later if necessary.
Set Up a Custom Domain
While Shopify automatically assigns you a default domain (e.g., storename.myshopify.com), having a custom domain (e.g., www.yourstorename.com) is essential for building brand credibility. A personalized domain name makes it easier for customers to remember and find your store online. You have several options when it comes to domains:
- Purchase a domain through Shopify: This is the easiest option, as Shopify will automatically configure your domain settings.
- Buy from a third-party provider: If you prefer, you can purchase a domain from providers like GoDaddy or Namecheap and connect it to your Shopify store.
- Use an existing domain: Already own a domain? You can link it to your Shopify store effortlessly.
Select a Print-On-Demand Service Provider
Before you finish setting up your store, you’ll need to choose a print-on-demand (POD) service provider to handle your product fulfillment. Print-on-demand services allow you to sell customized products without worrying about inventory or shipping logistics. With many POD options available, it’s important to choose one that aligns with your business goals.
In the next section, we’ll dive into how to select the best print-on-demand service for your store.
Step 2. Choose a print-on-demand company
Selecting a reputable print-on-demand (POD) company is crucial for ensuring customer satisfaction and encouraging repeat business. High-quality products, reliable shipping, and seamless integration with Shopify can make or break your online store’s success. Here are some essential tips to help you choose the best print-on-demand partner:
1. Order Product Samples
Before committing to a POD provider, order sample products to assess their quality firsthand. This lets you evaluate:
- Product quality: Examine the materials, stitching, and overall feel.
- Printing accuracy: Ensure that colours, designs, and details match your expectations.
- Packaging and presentation: Consider how well the product is packaged and branded.
- Shipping speed and tracking: Test the delivery process to understand how long it takes and how transparent the tracking system is. By experiencing the purchase process as a customer, you can confidently promote the product in your store.
2. Compare Shipping Rates and Times
Shipping speed is a top priority for online shoppers, with 68% stating that fast shipping is a key factor in their overall experience. When comparing POD providers, consider both:
- Shipping rates: Lower shipping costs can attract more customers and boost sales.
- Delivery times: Check how long orders take to reach different regions, especially if you’re aiming for a global customer base. Some POD companies have fulfillment centres in multiple locations, which can significantly reduce delivery times for international orders.
3. Ensure Shopify Integration
Choosing a print-on-demand provider that integrates smoothly with Shopify is essential for managing your store efficiently. A good integration allows for:
- Automatic order processing: Orders are forwarded to the POD provider automatically, reducing manual work.
- Easy product syncing: Products can be added to your store with a few clicks, simplifying inventory management.
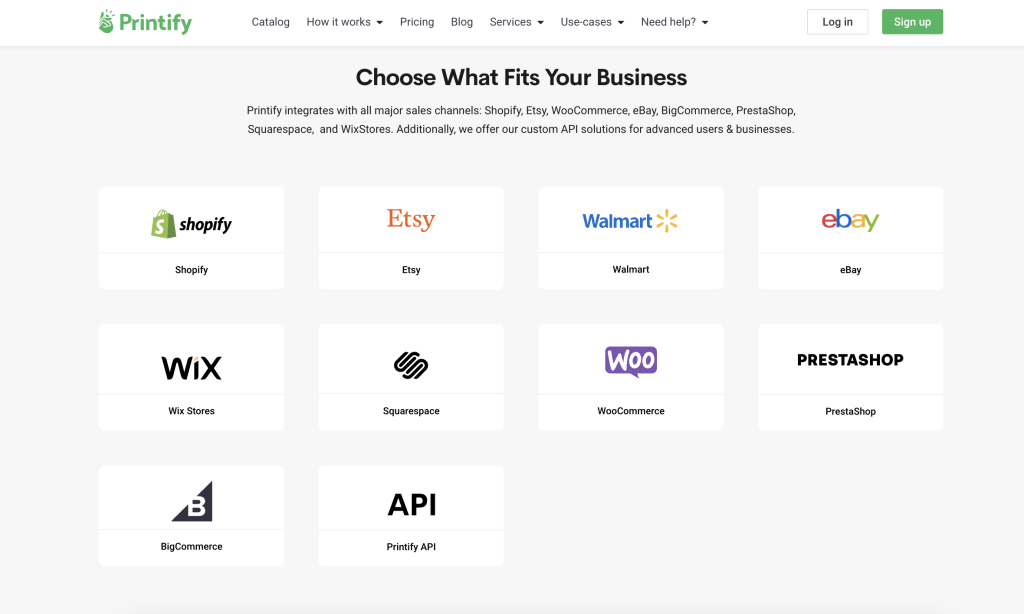
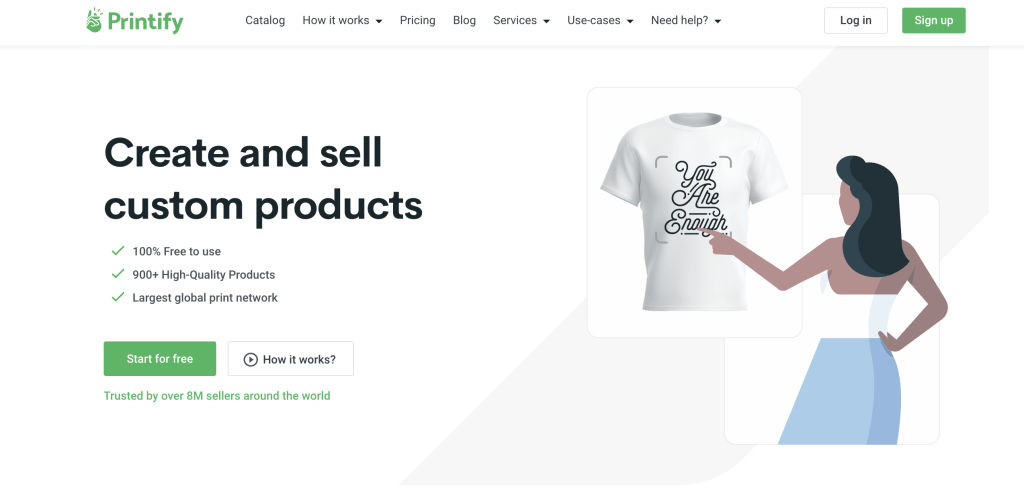
For instance, Printify is a well-known print-on-demand company that integrates seamlessly with Shopify. It automates order fulfillment and shipping, saving you time and streamlining the entire process.
4. Read Reviews and Join Communities
Research is key when selecting a print-on-demand company. Look for:
- Customer reviews and feedback: These offer insight into the experiences of other store owners.
- Testimonials: Check out case studies and success stories on the POD provider’s website.
- Online forums and communities: Join Shopify or eCommerce forums to hear firsthand experiences from other sellers about specific POD companies. These insights can help you avoid potential pitfalls and make an informed decision.
5. Evaluate Product Variety
A diverse product catalogue offers more opportunities to grow your store. Look for POD providers with a wide range of products, from clothing and accessories to home decor and tech gadgets. For example, Printify partners with suppliers worldwide, offering a vast selection of items like apparel, shoes, tech accessories, drinkware, and home decor. This diversity gives you more flexibility to expand your product line and meet customer demands.
However, it’s important to check whether the products are printed directly by the POD provider or outsourced to third-party vendors. Outsourcing can sometimes lead to inconsistencies in product quality, so you’ll want to verify this before committing.
Once you’ve chosen the right print-on-demand provider, you’re ready to proceed to the next stage of building your Shopify business: creating your store. This involves designing your storefront, adding products, setting pricing, and launching your marketing efforts.
Step 3. Build your own Print-On-Demand Shopify Store
Creating a successful print-on-demand Shopify store begins with choosing a theme that reflects your brand’s identity and provides a smooth shopping experience. Shopify offers a wide range of both free and paid themes that are mobile-friendly, responsive, and easy to customize.
1. Select a Theme That Matches Your Brand
Your store’s design should align with your brand image and appeal to your target audience. Shopify’s Theme Store offers a variety of themes, which you can filter by industry, style, and features. Whether you’re in fashion, home decor, or tech, you’ll find themes tailored to your business needs.
- Free Themes: Shopify provides 13 free themes, which are perfect for store owners looking to minimize upfront costs. Despite being free, these themes are high-quality and customizable.
- Paid Themes: For more advanced features and unique designs, consider investing in a paid theme. These themes often include additional functionality and design elements that can help your store stand out.
Before committing to a theme, be sure to:
- Check the ratings and reviews: These will give you insight into the theme’s performance and usability.
- Preview the demo: View the theme demo on both desktop and mobile devices to ensure it looks great and functions smoothly across all screen sizes.
2. Customize Your Theme
After selecting a theme, use Shopify’s intuitive theme editor to customize it to match your brand’s style and tone. The editor allows you to modify various elements, including:
- Layout: Arrange your homepage to highlight key products, promotions, and categories.
- Colours and Fonts: Adjust the colour scheme and typography to reflect your brand identity.
- Images and Text: Upload your own images and write engaging copy to showcase your products and offers.
To create an engaging shopping experience, focus on:
- User-Friendly Homepage: Make your homepage visually appealing while keeping it simple and easy to navigate. Highlight a few top-selling or featured products and use compelling call-to-action buttons, such as “Shop Now” or “Browse Collections,” to guide customers.
- Clear Navigation: Your store’s navigation should be intuitive, with clear categories for products. Include a search function so visitors can easily find specific items.
Since a large portion of online shopping occurs on mobile devices, it’s crucial to ensure that your theme is mobile-optimized. Test how your store looks on smartphones and tablets, and make sure the layout is responsive, fast-loading, and easy to navigate on smaller screens.
3. Install Essential Apps
To enhance your store’s functionality, head over to the Shopify App Store and install key apps that streamline your operations and improve customer experience. For a print-on-demand business, the following apps are essential:
- Printify: One of the most popular apps for print-on-demand businesses, Printify helps manage your products, process orders, and handle fulfillment without the need for inventory.
- SEO Optimization Apps: Improve your store’s search engine ranking with SEO tools like SEO Manager or Plug in SEO. These apps will help you optimize product descriptions, meta tags, and other SEO elements to drive organic traffic.
- Email Marketing Tools: Email marketing is a powerful way to engage with your audience and convert visitors into customers. Apps like Klaviyo or Omnisend make it easy to create targeted campaigns, automate follow-ups, and build your email list.
- Customer Review Apps: Build trust and social proof by displaying customer reviews on your product pages. Apps like Yotpo or Judge.me allow customers to leave feedback, which can significantly boost credibility and conversion rates.
Once you’ve selected your theme, customized the design, and installed essential apps, your Shopify store will be ready to go live. From there, you can focus on refining your product offerings, optimizing for conversions, and marketing to your target audience.
Step 4. Choose products and create designs
You don’t need to be a professional designer to create beautiful and unique custom products. What’s essential is understanding your target audience and their preferences. The right product design, combined with strong market insights, can set you up for success in the print-on-demand world.
Before diving into design, it’s important to understand what makes a product sell well. Here are five key traits of a potential Shopify bestseller:
- Clear Target Audience: Your product should cater to a specific group of people with shared interests or needs.
- Strong Market Demand: Ensure there is a demand for the product you want to sell by conducting market research or analyzing current trends.
- Low Competition or Unique Selling Point (USP): If the market is saturated, your product should offer something unique—whether it’s design, functionality, or personalization options.
- High Fulfillment Quality and Reliability: The quality of the product and fulfillment process should be top-notch to build trust with customers and encourage repeat business.
- Legal Compliance: Make sure your product designs comply with intellectual property laws and industry regulations.
Once you’ve identified your target audience and product, it’s time to start customizing. The process is simpler than it seems. Follow these six steps to create your own custom products:
1. Research and Identify Trends
The first step in creating a successful print-on-demand product is researching current market trends. Take the time to explore platforms like Pinterest, Instagram, and Google Trends to see what designs and themes are gaining traction within your niche. Pay close attention to the types of products, colors, and styles that are popular among your target audience. Staying informed about these trends will not only inspire your own designs but also help you predict future demand. By identifying emerging patterns and preferences, you can position your products to meet the expectations of your customers and stay ahead of the competition.
2. Define Your Niche
Once you have a clear understanding of the trends, it’s essential to define your niche. This step involves narrowing down your target audience and understanding their specific needs and preferences. Ask yourself who your ideal customer is and what they are looking for in a product. Are you catering to a broad demographic, or are you focusing on a specialized group with unique tastes? The clearer you are about your niche, the more focused and effective your designs will be. Defining your niche will also help you differentiate your brand and create a stronger connection with your audience, ultimately leading to higher engagement and sales.
3. Sketch or Plan Your Designs
With your niche and trends in mind, you can begin the creative process of sketching or planning your designs. At this stage, you don’t need to be a professional artist or have complex tools—simple sketches or outlines will suffice. The goal is to map out your ideas and visualize how your designs will look on the products you intend to sell. Consider what kind of message or aesthetic you want to convey and how it aligns with your audience’s preferences. Brainstorm multiple concepts, explore different styles, and don’t hesitate to experiment with various elements. This step is about translating your ideas into tangible designs that resonate with your customers.
4. Choose Your Design Software
After outlining your ideas, it’s time to choose the right design software to bring them to life. Depending on your skill level and design complexity, there are various tools available to suit your needs. For beginners, platforms like Canva offer an easy, drag-and-drop interface, making it simple to create professional-looking designs without much experience. If you’re more experienced, Adobe Illustrator provides advanced features for greater creative control. For those looking for a free option with more power, GIMP is an excellent alternative to Photoshop. Select the software that you feel most comfortable with and that will allow you to achieve the level of detail required for your designs.
5. Create Your Designs
Now that you’ve chosen your design software, it’s time to create your digital designs. This is where your ideas come to life, so focus on crafting designs that align with your brand and appeal to your audience. Pay close attention to elements like colour schemes, ensuring they reflect your brand identity and create visual harmony. Fonts should be both aesthetically pleasing and easily readable. You’ll also want to maintain balance in your design—avoid overcrowding the space with too many elements, and make sure the key aspects of the design stand out. The final product should be visually appealing, on-brand, and engaging enough to capture your customers’ attention.
6. Optimize Your Designs for Printing
The last step before launching your product is optimizing your designs for printing. This ensures that your designs look just as good on the physical product as they do on the screen. Start by saving your files in the correct format—most print-on-demand services prefer high-resolution PNG files with transparent backgrounds. It’s also important to check that your designs are at least 300 DPI (dots per inch) to guarantee crisp, high-quality prints. Lastly, make sure your designs are sized appropriately for the products you’ll be printing on, following the specific guidelines from your print-on-demand provider. Proper optimization will help you avoid issues like blurriness, cropping, or distortion when your products are printed.
Step 5. Add high-quality images
Adding high-quality images to your Shopify store is one of the most critical steps for creating a professional look and driving sales. Your product photos are often the first interaction a potential customer has with your brand, and they can make or break the customer’s decision to make a purchase. Here’s how to make the most of your product images and create a visually appealing, trustworthy online store.
1. Use High-Resolution Images
The clarity and sharpness of your images can significantly impact the overall perception of your store. High-resolution images make your site look polished and professional, allowing customers to zoom in and closely examine the product details. This is particularly important for products with intricate designs, textures, or features that customers need to see clearly before they make a buying decision. Blurry or pixelated images can give the impression of low-quality products and discourage purchases.
2. Showcase Multiple Angles
Customers can’t physically handle your products, so providing multiple angles is essential to bridge that gap. Displaying your product from different perspectives—such as the front, back, side, and top views—gives shoppers a better understanding of what they’re purchasing. This is especially important for apparel, accessories, and custom-designed items where details like stitching, print quality, or fabric texture matter. You can also include close-up shots of important features to give customers confidence in the product’s quality and craftsmanship.
3. Include Lifestyle Photos
In addition to standard product shots, lifestyle images are a powerful way to showcase your products in real-world settings. These photos help customers visualize how your product fits into their lives, whether it’s clothing being worn, home decor styled in a room, or accessories being used outdoors. Lifestyle images create an emotional connection by showing your product in action, making it more relatable and desirable. This can significantly increase conversion rates as customers feel more confident about how they might use the product.
4. Maintain Consistent Backgrounds
A consistent, professional background across all product images creates a cohesive and aesthetically pleasing look for your store. A plain white or light-coloured background is often recommended as it keeps the focus on the product and avoids distractions. When all of your images have the same background, it not only gives your store a clean, unified appearance but also enhances the shopping experience by making it easier for customers to compare different products. Avoid busy or inconsistent backgrounds that can make your store look disorganised.
5. Optimize Images for Fast Loading
While high-resolution images are important, you also need to ensure they are optimized for fast loading times. Slow-loading websites frustrate users and lead to higher bounce rates, meaning potential customers may leave your store before they even see your products. Use image compression tools to reduce file sizes without sacrificing quality. This ensures that your images load quickly while maintaining the sharpness and detail that customers expect. A fast, smooth browsing experience is essential for keeping users engaged and moving through the purchase process.
6. Generate True-to-Life Product Images
To keep upfront costs low, especially for new or small businesses, you can use digital mockups or generate true-to-life product images through print-on-demand services. These images are often created using advanced technology to give an accurate representation of what the final product will look like. This method not only saves on the cost of professional photography but also speeds up the process of adding new products to your store. However, it’s important that these images still look realistic and high-quality to build trust with your customers.
High-quality images can make your products stand out, instill confidence, and ultimately drive more sales. Whether you’re using professional photography or digital mockups, ensuring your images are sharp, consistent, and well-optimized will go a long way in creating a successful Shopify store.
Step 6. Set competitive pricing for your products
Finding the right balance between affordability for your customers and profitability for your business is crucial to long-term success. Competitive pricing doesn’t necessarily mean offering the cheapest products—it means providing value that aligns with the quality and uniqueness of your offerings. To achieve this balance, you’ll need to carefully consider both market trends and your business costs.
1. Research Your Market
Start by conducting thorough market research to understand the pricing landscape for similar products. Look at what your competitors are charging and consider factors like product quality, design uniqueness, and brand reputation. Analyzing competitor pricing will give you a sense of what customers are willing to pay, and whether your product has a strong value proposition that allows you to price higher. Competitive pricing ensures that you’re not underselling or overpricing your products, both of which can harm your sales.
2. Calculate Your Costs
Once you have an idea of market pricing, it’s time to calculate all the costs associated with your product. Begin with the base price from your print-on-demand provider, which typically includes the production of the item and any printing or customization fees. Next, factor in additional costs such as Shopify transaction fees, shipping expenses, taxes, and marketing costs. Having a clear understanding of your total expenses is essential to ensure that your pricing covers these costs while leaving room for profit.
3. Add Your Profit Margin
With your costs calculated, you can now determine the retail price by adding your desired profit margin. For print-on-demand Shopify businesses, a good profit margin usually falls between 20% and 40%, depending on your market and target customers. For example, if your total cost to produce and deliver a product is $20, and you aim for a 30% profit margin, your retail price should be around $26. Pricing too low can hurt profitability, while pricing too high may reduce sales volume, so finding the right balance is key.
4. Test and Adjust Your Prices
Pricing is not a one-time decision. It may take time and experimentation to find the optimal price point for your products. Start by testing different price points and monitoring your sales performance. Use Shopify’s analytics tools to track how price changes affect your conversion rates, profit margins, and customer behavior. Be patient with this process—over time, you’ll find the pricing “sweet spot” that maximizes both sales volume and profitability.
By taking a strategic approach to pricing, you’ll ensure that your business remains competitive while maintaining healthy profit margins.
Step 7. Write compelling product descriptions
Crafting detailed, interesting, and unique product descriptions is key to turning casual browsers into committed buyers. Here’s how to write product descriptions that not only engage your audience but also drive conversions:
1. Focus on Benefits, Not Just Features
While features are important, customers are more interested in how the product will improve their lives. Instead of simply listing product specifications, explain the benefits. For example, instead of stating that a t-shirt has a “crew neckline,” you could highlight its versatility by saying, “The simple crew neckline makes it a versatile piece that can be easily styled for any casual occasion.” By framing features as benefits, you help customers visualize how the product fits into their lifestyle.
2. Use Clear, Engaging Language
The tone of your product descriptions should match your brand identity, whether it’s casual, fun, professional, or luxurious. Write in a way that resonates with your target audience. If your brand is playful and trendy, use lively and approachable language. If you cater to a more professional market, keep the tone formal yet inviting. The goal is to create descriptions that feel authentic to your brand while keeping customers interested.
3. Be Specific to Build Trust
Specificity is essential when writing product descriptions. Include important details such as materials, dimensions, and care instructions. These specifics help customers make informed decisions and build trust in your brand. For instance, instead of saying “made of soft fabric,” specify “crafted from 100% organic cotton for a soft, breathable feel.” The more detailed your description, the more confident customers will feel in purchasing the product, as they’ll know exactly what to expect.
4. Incorporate Keywords for SEO
To improve your product’s visibility online, naturally, incorporate relevant keywords into your descriptions. Use phrases your potential customers are likely to search for, but ensure the keywords flow organically within the text. This not only boosts your product’s ranking in search engine results but also helps customers find your products more easily. For example, if you’re selling eco-friendly apparel, you could incorporate terms like “sustainable fashion,” “organic materials,” or “environmentally conscious clothing.”
5. Tell a Story
Whenever possible, tell a brief story about the product’s inspiration or creation process. Storytelling adds a personal touch and can make your product more memorable. For instance, if you’re selling handmade jewellery, you could describe how the design was inspired by a particular place or culture. Customers love to feel connected to a product’s story, which can enhance their emotional attachment to the item and increase the likelihood of purchase.
6. Use Shopify Tools to Enhance Your Descriptions
When adding products to your Shopify store from Printful, you’ll receive pre-written product descriptions. While these are helpful, you can customize them to reflect your brand’s voice and highlight product benefits more effectively. Shopify offers a tool called Shopify Magic, which uses AI to help enhance your product descriptions. Use this tool to refine and personalize descriptions, ensuring they resonate with your audience and improve SEO.
By following these strategies, you’ll create product descriptions that not only inform but also persuade and connect with your customers. Thoughtfully written descriptions can transform a simple online visit into a sale, building both trust and interest in your products.
Step 8. Test your Shopify Store Fully
Before making your Shopify store live, it’s critical to thoroughly test every aspect to ensure a smooth experience for your customers. Here’s a checklist of key areas you should evaluate:
1. Checkout Process
The checkout process is the most crucial step in the customer journey, so it needs to function flawlessly. Go through the entire process yourself, from adding products to the cart to completing a purchase. Test multiple payment methods, including credit cards, PayPal, and any other options you offer. Ensure that discount codes, gift cards, and shipping options work properly. Confirm that orders are processed without any issues and that all transaction details are correct.
2. Product Pages
Your product pages need to be clear, accurate, and fully functional. Check that all product images load correctly and are displayed in high resolution. Verify that the product descriptions are accurate, with the correct details about materials, sizes, and variants such as colours or sizes. Also, test the variant selector to make sure it works smoothly, allowing customers to easily choose options and see updated pricing if applicable.
3. Mobile Responsiveness
Since a large portion of online shoppers use mobile devices, it’s essential to ensure your store is fully responsive. View your store on various devices, including smartphones and tablets, to check that the layout, images, and navigation adapt well to different screen sizes. Test the functionality of buttons, menus, and forms to confirm that customers can easily browse and complete purchases on mobile.
4. Shipping and Tax Calculations
Shipping and taxes can vary depending on customer locations, so it’s important to confirm that these are calculated accurately. Set up test orders using different shipping addresses to ensure the correct shipping rates are applied. If your store handles international orders, use a VPN or similar tool to simulate being in another country and verify that taxes and customs fees are added appropriately for each region.
5. Email Notifications
Your automated email notifications, such as order confirmations, shipping updates, and customer inquiries, should be working properly. Test each email by placing sample orders and checking that the messages are delivered promptly with the correct information. Double-check that emails are branded correctly, with appropriate logos, text, and formatting, and that they provide customers with clear order details.
6. Loading Speed
A fast-loading store enhances user experience and keeps customers engaged. Use tools like Google PageSpeed Insights or GTmetrix to analyze your store’s loading times on both desktop and mobile devices. If pages take too long to load, customers may leave before completing a purchase. Optimize your images, remove unnecessary apps, and implement other performance improvements to reduce load times and create a seamless browsing experience.
By performing these essential tests, you can catch and resolve any issues before your Shopify store goes live. This will ensure that your customers enjoy a smooth, reliable shopping experience, helping to build trust and boost sales from the moment your store launches.
Step 9. Analyze and refine your sales strategy
Once your Shopify store is live, the work doesn’t stop there—continuous iteration is key to growing your business. The first step in optimizing your store’s performance is to regularly review key metrics to understand how customers are interacting with your site and how well your business is doing. Here are the most important metrics to focus on:
1. Conversion Rates
Your conversion rate tells you how many visitors to your site are actually making purchases. A low conversion rate could indicate issues with your product pages, checkout process, or pricing. Regularly track this metric using Shopify’s built-in analytics or Google Analytics. If your conversion rate is below expectations, consider experimenting with product descriptions, images, or improving the checkout process to remove any potential barriers.
2. Average Order Value (AOV)
The average order value (AOV) measures how much a customer typically spends per transaction. A higher AOV can significantly boost your revenue without needing to acquire more customers. Track your AOV and test strategies to increase it, such as offering product bundles, upselling related items, or providing free shipping for orders over a certain amount.
3. Customer Acquisition Costs (CAC)
Understanding how much it costs to acquire a new customer is essential for ensuring profitability. Customer acquisition costs include marketing spend across channels like paid ads, social media campaigns, and influencer collaborations. Use analytics to monitor how much you’re spending to gain new customers, and focus on reducing this cost over time by optimizing high-performing marketing channels or improving targeting.
Shopify’s built-in analytics and Google Analytics provide powerful insights into how customers are interacting with your store. Use these tools to:
- Track traffic sources to see which marketing channels (social media, paid ads, email, etc.) are bringing in the most visitors.
- Identify popular products and categories that drive sales.
- Monitor customer behaviour, such as how long visitors stay on your site and at what stage of the buying process they drop off.
Once you have gathered enough data, use the insights to refine your marketing strategy. Focus on promoting your best-selling products and scale up marketing efforts on the channels that bring in the most traffic and sales. If certain products are consistently popular, consider expanding your offerings in that category. Likewise, if a marketing channel is outperforming others, allocate more resources to it while cutting back on channels that aren’t delivering results.
How much does it cost to set up a Shopify print-on-demand business?
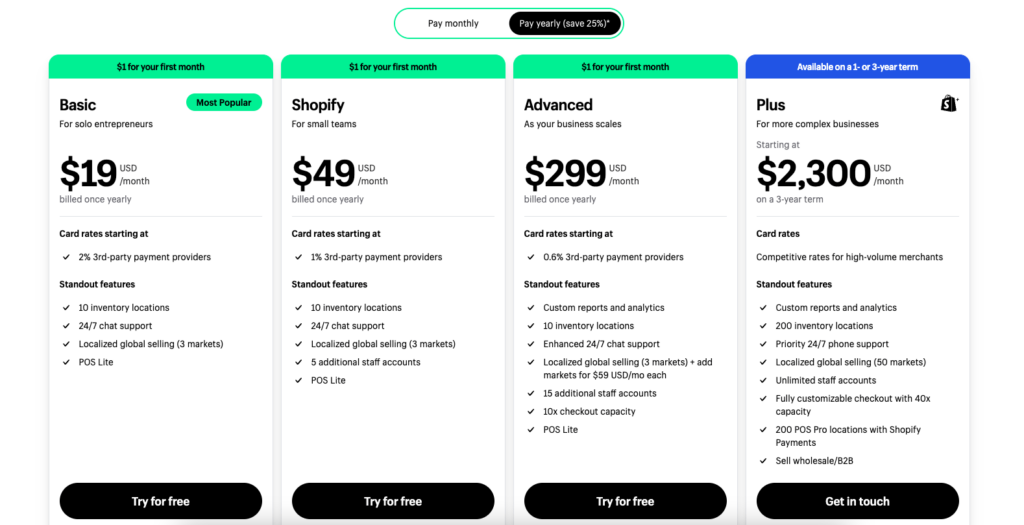
Setting up a Shopify print-on-demand business typically costs between $60 to $200 to get started. Here’s a breakdown of the key expenses involved:
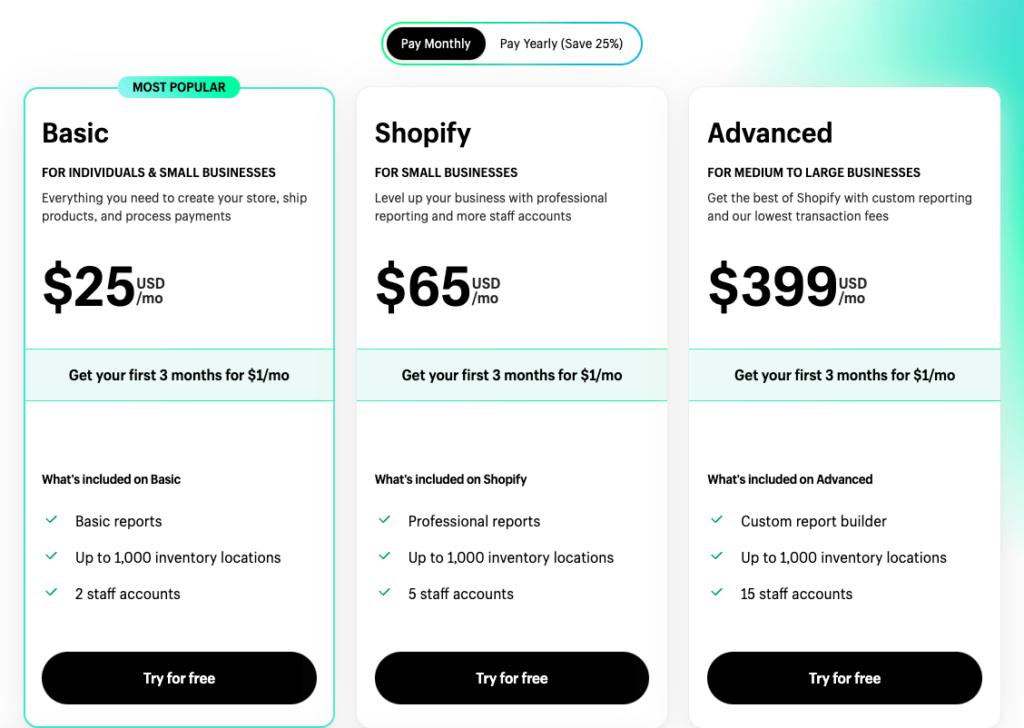
- Shopify Monthly Fee: The most basic Shopify plan starts at $29 per month, which includes hosting, a customizable storefront, and access to key features like payment processing and customer support.
- Domain Registration: While Shopify provides a default domain (e.g., yourstore.myshopify.com), it’s highly recommended to purchase a custom domain (e.g., www.yourstore.com) for branding purposes. Domain registration costs typically range from $10 to $30 per year.
- Print Provider Costs: You’ll also pay your print-on-demand provider for each product you sell. This includes the base cost of the product, printing fees, and shipping charges. You don’t need to pay for inventory upfront, but you’ll only pay for products as they’re ordered.
- Apps and Plugins: Depending on the functionality you need, you may need to invest in additional Shopify apps. Some are free, while others have monthly fees ranging from $10 to $50 or more.
- Marketing and Advertising: While optional, marketing efforts like Facebook or Google ads can range from $50 to $100 or more per month, depending on your budget and advertising goals.
In total, your initial setup costs can range from $60 to $200, depending on the tools and services you choose.
How many print-on-demand apps can you use on Shopify?
You can use multiple print-on-demand apps simultaneously on Shopify, but it’s important to be mindful of potential complications. Adding more apps could increase your product costs and may confuse your customers by generating multiple tracking numbers for different products in one order.
If you plan to use more than one print-on-demand service, it’s advisable to limit your choices to up to two companies. This ensures better management of orders and shipping, while still providing a diverse product range to your customers.
Final Thoughts: How to Sell Print-on-Demand Products on Shopify
Now you know how to start a print-on-demand business on Shopify! The key to success is approaching the process one step at a time. It’s easy to feel overwhelmed by all the tasks involved in setting up your business but breaking them down into manageable steps will help you stay focused and organized. Start by following the steps outlined in this guide, and tackle each one at your own pace.
Remember, building a business takes time and patience. With consistent effort and a clear plan, you’ll be well on your way to launching a successful print-on-demand Shopify store.
