If you’ve been dreaming to launch your own online store, now is the perfect moment to take action. This fall and winter promise several major shopping events, making it an ideal opportunity to finally bring your online store to life.
Delaying your launch any further could mean missing out on the chance to capitalize on the peak shopping season. To maximize your success, it’s crucial to have your store up and running by October. Besides, starting early gives you the necessary time to strategize how to drive traffic, develop effective marketing campaigns, and prepare for major sales events like Black Friday and Cyber Monday.
Don’t wait too long. The time to start building your online presence is now, ensuring your store is ready to attract holiday shoppers and capitalize on the busiest and most profitable time of the year.
How to Setup and Launch an Online Store Today
Having launched online stores numerous times, we’ve refined the process to perfection. Here’s the quickest method to launch your online store, step by step.
1. Pick Your eCommerce Store Platform – Launch an Online Store Today
Choosing the right ecommerce platform is one of the most crucial decisions you’ll face when launching your online store. With a myriad of options available, finding the right fit can be daunting. However, if you’re seeking a straightforward and efficient way to get your store up and running, Shopify stands out as a top contender.
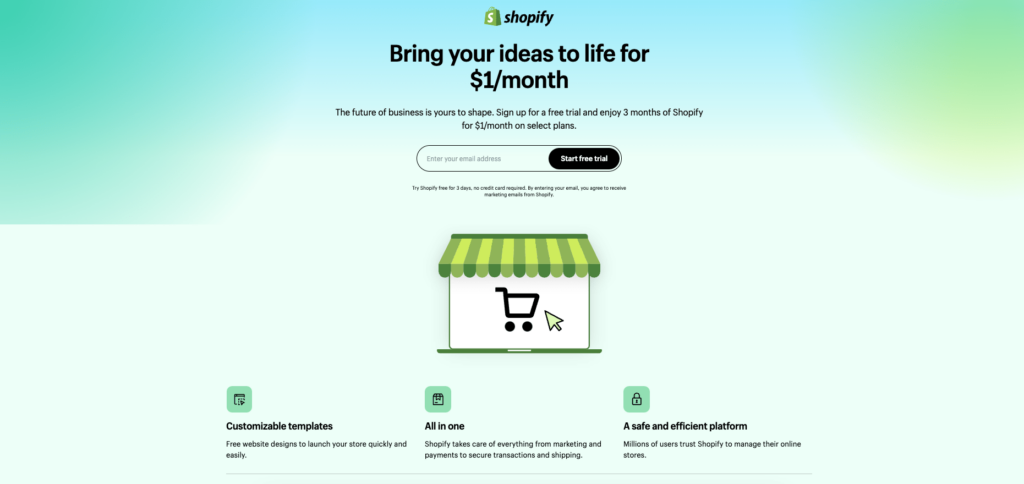
To help you understand why Shopify might be the perfect choice for your ecommerce needs, here’s a detailed list of its advantages and disadvantages:
Shopify pros:
1. Easy and Fast Setup
Shopify is renowned for its user-friendly interface, making it simple to set up an online store quickly. Besides, it comes equipped with essential tools like a logo maker, profit margin calculator, and invoice generator, ensuring a smooth and stress-free launch.
2. All-in-one Hosted Services
One of the standout features of Shopify is that it includes hosting services. This means you don’t have to spend extra time researching and configuring hosting options, as everything is handled for you automatically.
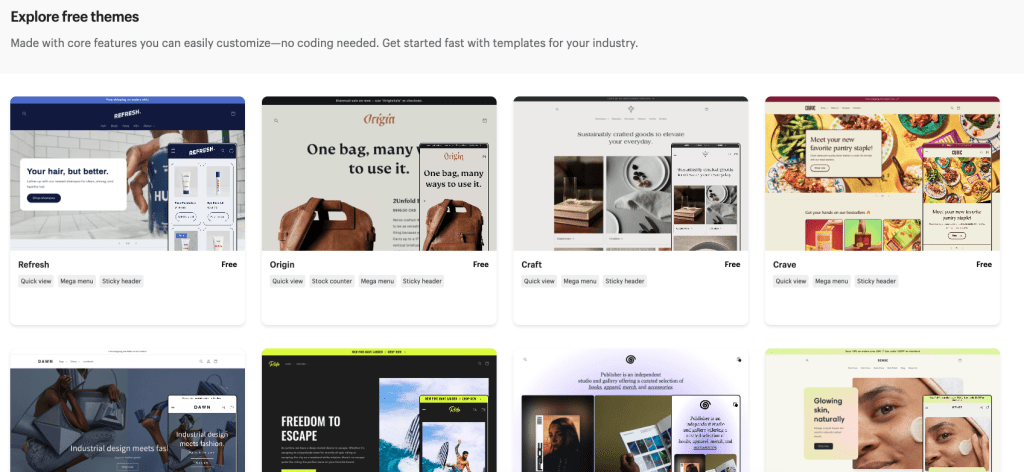
3. Ready-to-Use Themes
Shopify offers a diverse selection of mobile-friendly website templates that you can customize to match your brand’s aesthetics. These themes are designed to be visually appealing and functional, providing a professional look for your store right out of the box.
4. Reliable Customer Support
Shopify is known for its exceptional customer service, available 24/7. If you encounter any issues while setting up or managing your store, you can rely on their support team for prompt and helpful assistance.
5. Tools to Scale Your Business
The Shopify App Store features a wide array of free and paid ecommerce apps designed to help you grow and manage your business. These tools can enhance your store’s functionality, from marketing and sales to inventory management and customer engagement.
Shopify cons:
1. Price
Shopify’s basic plan starts at $25 per month. However, they offer a 3-day free trial with $1 per month for the next three months to help you determine if the platform meets your needs before committing to a subscription.
2. Limited Customization for Advanced Users
While Shopify offers a wide range of customization options, advanced users may find its limitations frustrating. The platform restricts access to the underlying code, which can be a drawback for developers who want complete control over the design and functionality of their store.
3. Transaction Fees
In addition to the monthly subscription fee, Shopify charges transaction fees for using third-party payment gateways. Although you can avoid these fees by using Shopify Payments, the added cost can still be a concern for businesses with tight margins.
If you find that Shopify isn’t the right fit for you, there are several other user-friendly platforms to consider, including BigCommerce, Weebly, Pixpa, and Ecwid. While this guide focuses on setting up your store with Shopify, many of the steps are similar across these platforms, ensuring a smooth transition if you choose to explore other options.
2. Get Your Custom Domain Name – Launch an Online Store Today
For a more professional appearance, consider purchasing a custom domain name for your store. This not only enhances your brand’s credibility but also makes your website easier for customers to remember. The quickest and most straightforward way to acquire a custom domain is through Shopify itself.
Firstly to get started, navigate to your Shopify dashboard and go to the Sales Channels section. From there, click on Online Store and then select Domains.

Next, click the Buy new domain button. Use the search function to find available domain names that align with your brand. Once you find a suitable domain, follow the prompts to purchase it. When you buy a domain through Shopify, it is registered for one year. You can set it up to renew automatically, ensuring your domain remains active without any interruptions.
Important Considerations
Email Accounts: Shopify does not provide email accounts as part of its domain services. However, it does support unlimited email forwarding accounts. This means you can create forwarding addresses (e.g., info@yourstore.com) that redirect to your existing email accounts.
By following these steps, you can seamlessly integrate a custom domain into your Shopify store, enhancing your professional image and improving customer trust.
3. Set Up Your Payment Gateway – Launch an Online Store Today
Accepting payments is a crucial aspect of any business, yet it is often overlooked by new entrepreneurs. Ensuring a smooth and efficient payment process can significantly impact customer satisfaction and business growth. Here are two reliable payment processors that offer fast and easy setup:
Shopify Payments
Shopify Payments is a built-in payment gateway available with Shopify. It is automatically set up as soon as you create your store, streamlining the payment process right from the start.
Availability: Shopify Payments is available in 13 countries and regions, including:
- Australia
- Canada
- Denmark
- Germany
- Hong Kong SAR China
- Ireland
- Japan
- The Netherlands
- New Zealand
- Singapore
- Spain
- United Kingdom
- United States
How to Configure Shopify Payments:
Setting up Shopify Payments is straightforward and quick. Once you create your Shopify store, Shopify Payments is automatically set up. To configure it, navigate to your Shopify dashboard, select Settings, and then click on Payment providers. In the Shopify Payments box, click Activate Shopify Payments. You will be prompted to enter some required details about yourself and your store to complete the setup process. This streamlined setup ensures that your store can start processing payments almost immediately, making it an efficient choice for new entrepreneurs.
PayPal
If Shopify Payments is not available in your country, Shopify will automatically create a PayPal Express Checkout account for the email address used to set up your store. PayPal is the largest and most well-known online payment gateway globally, with over 60% of the market share. They offer two plans for small businesses: Standard and Pro.
How to Set Up PayPal on Shopify:
If Shopify Payments is not available in your region, Shopify automatically creates a PayPal Express Checkout account using the email address associated with your store. To set up and configure PayPal, go to your Shopify dashboard, click on Settings, and then select Payment Providers.
In the PayPal Express Checkout box, select Deactivate. After deactivating, choose your PayPal account type and click Activate. You will need to enter your PayPal account email address and password to log in. On the PayPal permissions page, click I Give Permission, and then click Go Back to Shopify to complete the process.
If you do not have a PayPal Business account with the email used for your Shopify store, you can either add that email to an existing PayPal account or create a new PayPal Business account with the same email address. This setup process ensures that your store can efficiently handle payments through PayPal, offering flexibility for your customers.
If you do not have a PayPal Business account with the email address used to set up your Shopify store, add your email address to an existing PayPal account or sign up for a new PayPal Business account with the same email address.
Neither Shopify Payments nor PayPal requires your business registration number upon sign-up. This allows you to set up a business account and start accepting payments before formally registering your company. Besides, both payment processors offer a quick and straightforward setup process, enabling you to start your online store without unnecessary delays.
By integrating Shopify Payments and PayPal, you can provide your customers with a seamless and secure payment experience, fostering trust and encouraging repeat business.
4. Install the Print-on-Demand app – Launch an Online Store Today
Clothing and accessories are among the top-selling product categories throughout the year, with a significant surge in sales during the holiday season. If you’re considering adding this category to your online store, getting started is straightforward, especially with the right tools at your disposal.
On the other hand, to streamline your operations and reduce overhead, consider partnering with a print-on-demand (POD) dropshipper. A POD service handles the printing of apparel and accessories and ships them directly to your customers. This approach offers several compelling advantages:
- No Upfront Costs: You only pay for the product and printing when an order is placed, eliminating the need for initial capital investment.
- No Inventory Management: You don’t need to maintain stock, allowing you to introduce new products or test different designs without any financial risk.
- Hassle-Free Shipping: Your POD dropshipping partner manages the packaging and shipping, freeing you from logistical concerns.
Getting Started with Printify on Shopify
One of the most user-friendly POD services available is Printify, which integrates seamlessly with Shopify. Here’s how to connect your Shopify store with Printify:
- Access the Shopify App Store: In your Shopify dashboard, click on Apps, then select Visit the Shopify App Store.
- Search for Printify: In the new window, use the search bar to find the Printify app.
- Install Printify: Open the Printify app listing and click Add app, followed by Install app.
- Create or Sign In to Printify: Either create a new Printify account or sign in to your existing account.
- Connect Your Store: On the connection confirmation page, click Connect Store to [your email address] to complete the installation process.
By leveraging a POD dropshipping partner like Printify, you can efficiently manage your clothing and accessories store, minimize costs, and focus on growing your business.
5. Choose Your Products – Launch an Online Store Today
Printify offers a versatile selection of 160 products that you can print and embroider, providing ample opportunities to diversify your online store. For a swift and efficient launch, it’s advisable to begin with print products, as creating designs for them is more straightforward. Additionally, you can use the same print file across multiple products to quickly expand your catalogue.
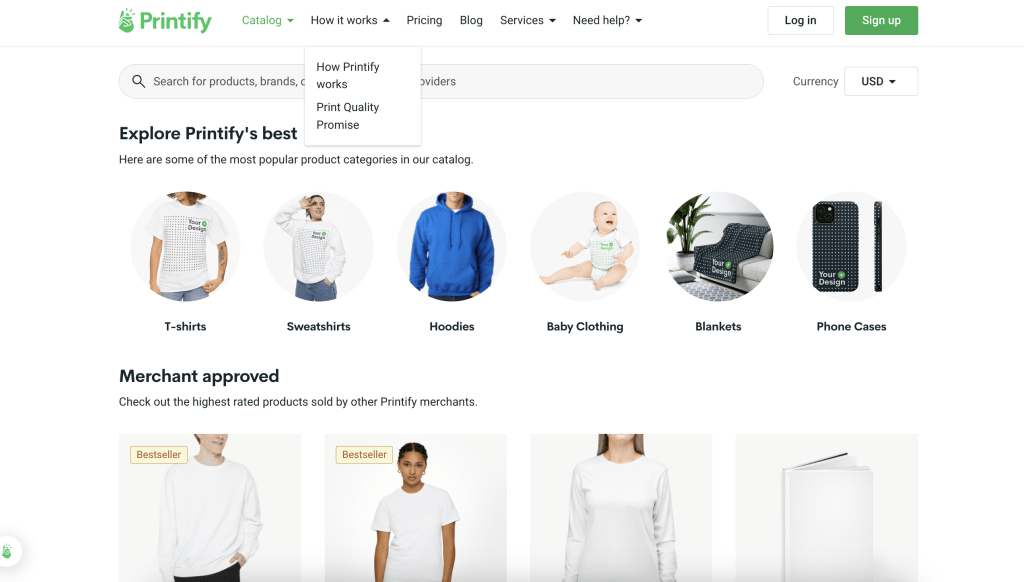
Here are some popular items this season that are perfect for adding your unique printed designs:
- Sweatshirts: Comfortable and stylish, sweatshirts are a staple in many wardrobes and are perfect for showcasing your creative designs.
- Socks: Custom-printed socks can add a fun and unique element to any outfit, making them a popular choice among consumers.
- Mugs: Personalized mugs are always in demand, whether for home use or as gifts.
- Wall Art: Printed wall art can transform any space, making it a great addition to your product lineup.
- Leggings: With their growing popularity, custom-printed leggings can attract a wide range of customers looking for unique activewear.
- Phone Cases: Phone cases with eye-catching designs are a trendy accessory, offering protection and style in one product.
6. Create Your Product Design – Launch an Online Store Today
Creating a design for your print-on-demand product can be done effectively by using design software like Canva or by hiring a freelancer.
Using Canva:
Creating a design for your print-on-demand product with Canva is straightforward and accessible. Firstly, you begin by signing up on Canva.com and selecting the type of product you wish to design, such as a t-shirt or mug. Canva offers a variety of templates or a blank canvas to start from scratch. Then, customize your design by adding text, images, shapes, and backgrounds using their intuitive drag-and-drop interface.
Fine-tune details like colour and placement, and apply filters or effects as desired. Preview your design to see how it looks on the product, make any final adjustments, and then download it in the required format (e.g., PNG for apparel with a transparent background). Finally, upload your design to your chosen print-on-demand platform to complete the process.
Hiring a Freelancer:
If you prefer a more specialized approach or lack the time to design yourself, hiring a freelancer can be an excellent option. Firstly, begin by defining your requirements clearly in a brief, detailing the theme, style, and any specific elements needed. Platforms like Upwork or Fiverr offer access to a wide range of freelance designers.
Review portfolios and proposals to find a freelancer with experience in designing print-on-demand products. Once you’ve selected a freelancer, collaborate closely throughout the design process. Provide feedback and request revisions as necessary to ensure the design aligns with your vision. Upon completion, receive the final design files, and proceed to upload them to your print-on-demand platform for production.
Effective communication is crucial whether you’re using Canva or working with a freelancer. Clearly articulate your expectations and provide constructive feedback to achieve the desired result. Besides, you should prioritize quality by ensuring the design meets the standards required by your print-on-demand platform.
If incorporating images or fonts, verify that you have the necessary rights for commercial use to avoid any legal issues. By following these steps, you can confidently create a custom design for your print-on-demand product, whether through DIY methods with Canva or by collaborating with a skilled freelancer.
7. Add products to your Shopify store
Now comes the most thrilling part: integrating your Printify products into your online store. Follow these detailed steps to seamlessly add your products:
1. Navigate to Your Printify Dashboard:
Firstly, start by logging into your Printify account. If you don’t have an account yet, sign up at Printify.
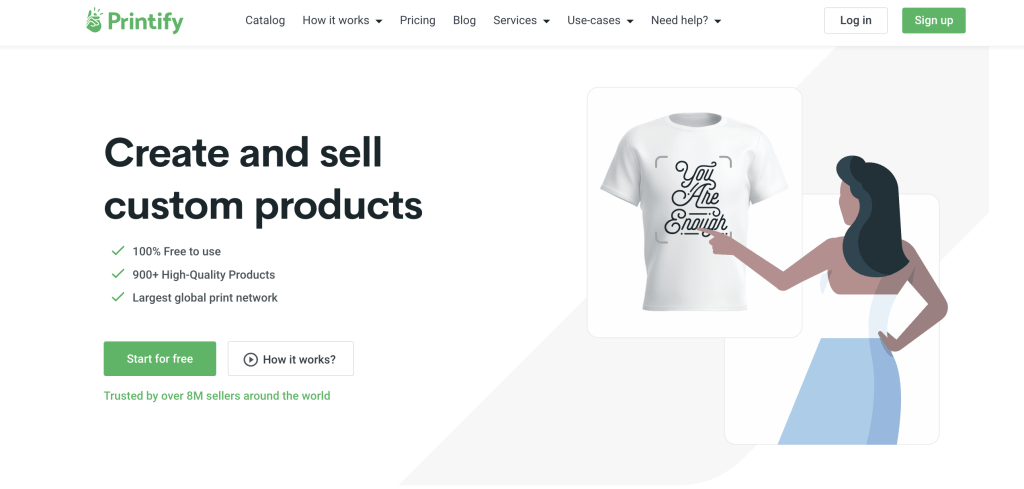
Then on your Printify Dashboard, click on the “Catalog” tab to browse the available products. You can choose from a wide range of items like t-shirts, mugs, phone cases, and more.
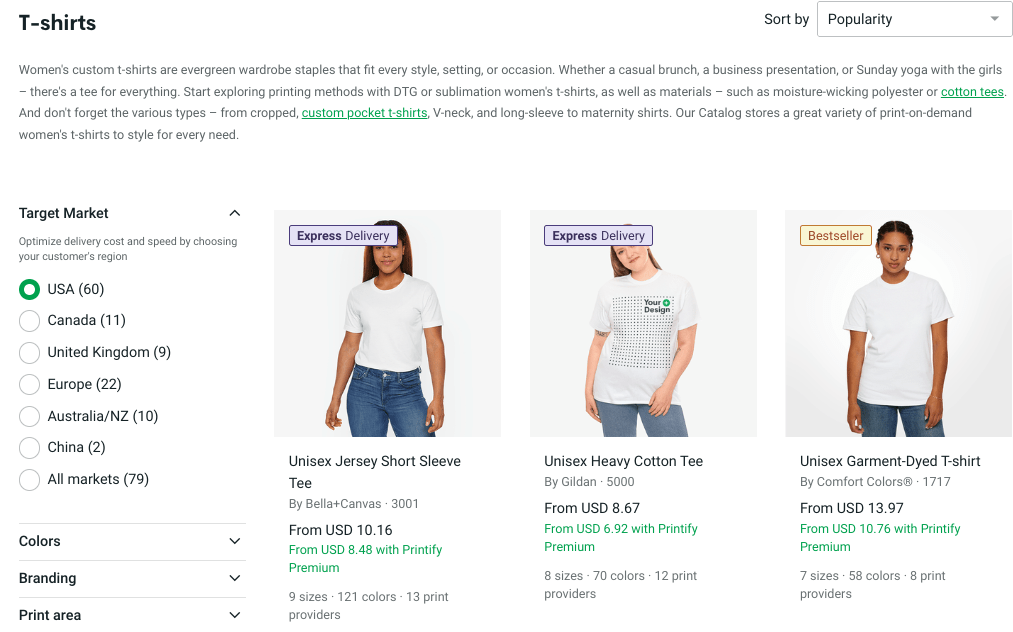
2. Product Selection and Customization:
Secondly, on your Printify Dashboard, click on the “Catalog” tab to browse the available products. You can choose from a wide range of items like t-shirts, mugs, phone cases, and more. Once you find a product you want to customize, click on it to open the product details page. Here, you can select different variations such as size, color, and material.
3. Customize Your Product:
On the other hand, in the product customization page, click on “Start designing” to upload your print file or use Printify’s Design Maker to create a new design. Ensure your design fits within the specified print area and meets the quality requirements. After uploading your design, you can preview how it will look on the product. Adjust the placement and size of your design if needed.
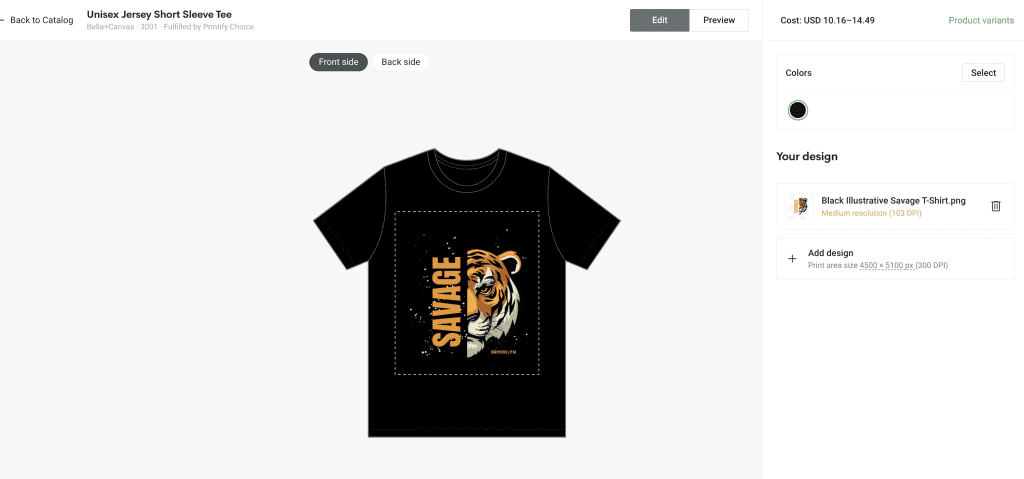
Then, choose from a variety of mockup styles that will be used to display your product in your store. These mockups help customers visualize the product.
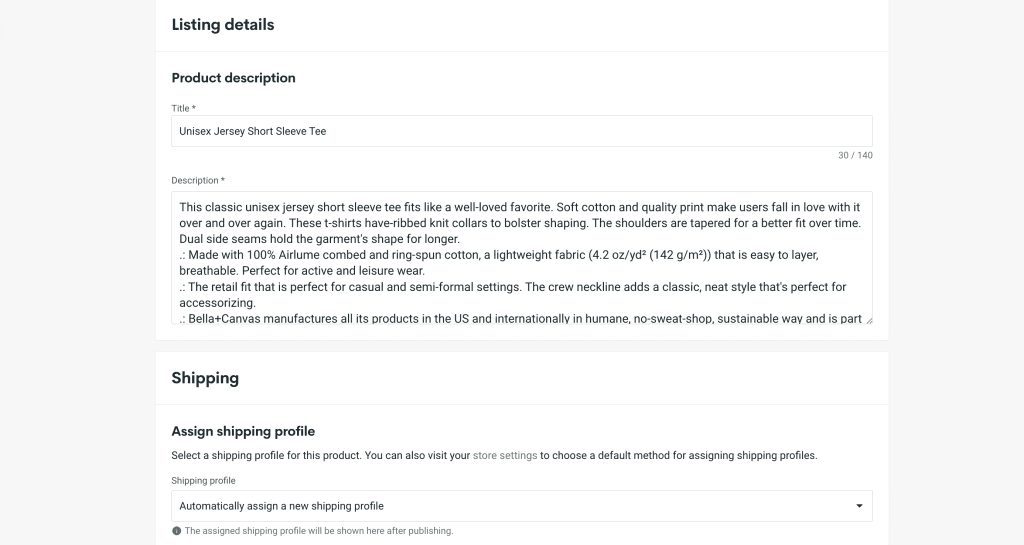
4. Product Titles and Descriptions:
Following by proceed to the product details section where you can edit the title, description, and tags. Make sure to write compelling descriptions that highlight the features and benefits of your product. In the pricing section, you’ll also see the base cost of the product (Printify price), your retail price, and the profit margin. Adjust the retail price to ensure you make a profit.
5. Publish to Your Store:
Finally, after adding your product, review it in your store to ensure everything looks perfect. You should also optimize the product listing by adding additional images, fine-tuning the description, and promoting it through your marketing channels.
You’ve successfully added your first product to your store. Repeat these steps to add more products and expand your offerings. Following these steps ensures a smooth integration of Printify products into your store, helping you to showcase and sell your merchandise effortlessly.
Final Thoughts: How to Launch an Online Store Today – A Comprehensive Guide
There’s no better time to launch your new business than the holiday season. So do future you a favour and take the evening to launch your online store. You won’t regret it!
Once the essentials of your online store are set up, work on improving your storefront and marketing the products. Sometimes later becomes never. So if you want to start selling apparel online, do it today. Use this guide to jumpstart your ecommerce journey, and let us know if you have any questions!
