If you’re building a website with Elementor and want to add a contact form that looks professional and works flawlessly, you’re in the right place. A well-designed contact form not only improves user experience, but it’s also essential for collecting leads, handling inquiries, and keeping communication channels open between you and your audience.
In this step-by-step guide, you’ll learn how to create and customize a contact form using Elementor. Whether you’re using the free version of Elementor or you’ve invested in Elementor Pro, you’ll discover the best method to suit your needs.
Let’s get started!

Table of Contents
ToggleWhy Every Website Needs a Contact Form
Before we dive into the how-to, it’s worth emphasizing why a contact form matters. A contact form:
- Encourages engagement from your visitors
- Helps filter and organize inquiries
- Reduces spam compared to displaying a raw email address
- Creates a seamless user experience on your website
If you want your site to convert visitors into leads or customers, a contact form is non-negotiable. Elementor gives you flexibility when it comes to contact forms, and there are two primary routes you can take:
1. Using Elementor Pro (Recommended for Full Customization)
With Elementor Pro, you gain access to a powerful, built-in form widget that lets you create stylish and highly functional forms directly within the Elementor editor. Thanks to its intuitive drag-and-drop interface, designing forms becomes effortless—no coding required.
But why consider going Pro? Elementor Pro provides full control over your form’s design and layout, allowing you to match it perfectly to your website’s style. In addition, it offers built-in integrations with marketing tools and CRMs, which streamlines lead capture and follow-up processes. Moreover, advanced features such as conditional logic and multi-step forms enable more personalized and engaging user experiences, while the extensive template library helps speed up your workflow.
Furthermore, Elementor Pro ensures seamless performance and a professional appearance—both of which are essential for maintaining credibility and boosting conversion rates. Therefore, if you’re serious about building a high-converting website, upgrading to Elementor Pro is definitely worth considering.
2. Using a Free Third-Party Plugin (Budget-Friendly Option)
Don’t have Elementor Pro yet? No problem. You can still create a fully functional contact form using free WordPress plugins like WPForms, Contact Form 7, or Forminator. Once your form is ready, embedding it into any page built with Elementor is simple—just use shortcodes or widgets.
There are several advantages to this approach: it comes at no extra cost, offers plenty of plugin options, and works well for creating basic forms. However, there are some limitations. Free plugins often provide limited styling and customization, adding more plugins can increase the risk of site slowdowns, and you may need to install additional plugins to enable integrations with marketing tools or CRMs.
Regardless of which method you choose, the next step is to learn how to add a contact form with Elementor Pro in just seven easy steps.
How to Add and Customize a Contact Form in Elementor
A contact form is a must-have feature on any professional website. Whether you’re aiming to collect leads, handle client inquiries, or simply give visitors a way to get in touch, Elementor makes it incredibly easy to create a fully customized contact form, no coding necessary.

In this part of the guide, we’ll walk you through the step-by-step process of adding and customizing a contact form using Elementor Pro. Let’s get started.
Step 1: Add the Form Widget to Your Page
To get started, first open the WordPress page where you’d like to add your contact form. If you’re unsure about the best placement, consider some of the most common and effective options. For instance, the homepage works well for quick access, while the About page is a natural spot where visitors often look for contact information. Alternatively, a dedicated Contact page is ideal if you want to provide more detailed communication options.
Once you’ve opened your desired page in the Elementor editor, you can proceed with the following steps. First, in the left-hand Elementor panel, search for the “Form” widget. Next, drag and drop the widget onto the section of your page where you want the form to appear. At this point, a basic contact form will automatically generate, typically including three standard fields: Name, Email, and Message. These fields provide a solid starting point for a simple form. However, if you’re using Elementor Pro, you will also have access to more advanced customization options, allowing you to tailor the form to your specific needs.
Step 2: Set Up the Basic Form Fields
Elementor pre-populates your contact form with essential fields. These are perfect for a basic contact form:
- Name – so you know who is reaching out
- Email – so you can respond directly
- Message – for the visitor’s main inquiry or feedback
While these fields are enough for simple communication, many websites benefit from gathering more information. For example, if you’re a freelancer, you might want to know a prospective client’s budget or project timeline. If you’re in customer service, order numbers or department selection might be helpful.
Next, we’ll cover how to add more fields to your form.
Step 3: Add New Fields to Your Elementor Contact Form
If you want to expand your form, Elementor makes the process quick and easy. Whether you need to collect additional details from your visitors or tailor the form to suit a specific purpose, adding new fields is simple.
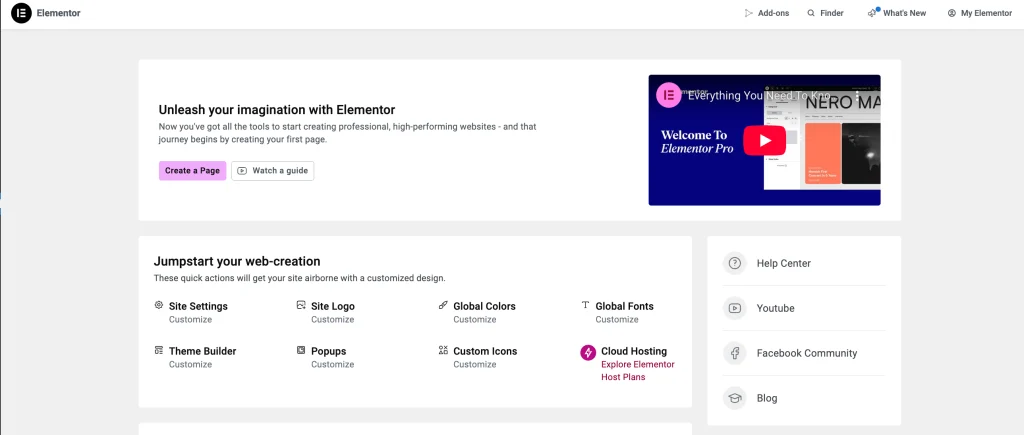
To add a new field, click the “Add Item” button within the form settings panel. As soon as you do, a new field will be added to your form. From there, you can customize the field according to your needs. Choose the type of input (such as text, dropdown, checkbox, or date), rename the label, set placeholder text, mark it as required, and more. This flexibility allows you to design a form that’s perfectly suited to your website’s goals.
Field Type Options
Elementor Pro offers a wide variety of field types you can add to your form, including:
- Text
- Textarea (for longer responses)
- URL
- Phone Number (Tel)
- Radio Buttons
- Select Dropdown
- Checkbox
- Number
- Date / Time Pickers
- File Upload
- Password
- Hidden Fields
- HTML Content
- CAPTCHA (reCAPTCHA v2 & v3)
- Honeypot (Anti-spam)
Each field type serves a unique purpose, depending on what information you want to collect.
Other Key Field Settings
- Label: The label appears above the form field and tells users what to input (e.g., “Your Email Address”).
- Placeholder: This is the faded hint text inside the field before the user types. It’s great for showing examples, like “you@example.com”.
- Required Toggle: Enabling this means users must fill out the field to submit the form.
- Column Width: Use this to arrange fields side-by-side (e.g., two fields at 50% width each for a cleaner, compact layout).
Advanced Field Settings in Elementor
For more control, click on the “Advanced” tab within a specific form field. While not always necessary for simple forms, these settings can be helpful for specific use cases:
- Default Value: Automatically populates the field with a set value unless the user changes it. Useful for things like a default budget or product name.
- Field ID: A unique identifier for backend data handling. Leave it as is unless you’re integrating with code or scripts.
- Shortcode: This lets you reference form field data elsewhere on your site, though it’s typically used in more advanced setups.
Step 4: Configure Where Elementor Form Submissions Are Sent
Once your form is built, the next important step is to set where your form submissions go. Elementor Pro gives you full control over this in the “Email” settings panel.
To access these options:
- Select the form widget in the Elementor editor.
- Navigate to the “Actions After Submit” section and ensure “Email” is selected.
- Then click the “Email” tab that appears below.
Here’s a breakdown of each setting you can configure:
To:
This is the email address where your form submissions will be sent. Moreover, you can send the form to multiple recipients by separating each email address with a comma. This feature is especially useful for teams or departments that handle inquiries collectively, ensuring everyone stays informed.
Subject
Customize the email subject line here. This is the title that will appear in your inbox. Including dynamic information like [field id=”name”] or [field id=”subject”] can help you recognize incoming messages quickly.
Message
This is the email body that gets sent with the form submission. You can customize which fields appear using shortcodes for each input field (e.g., [field id=”email”], [field id=”message”]). If you don’t need to filter anything, Elementor automatically includes all field data.
From Email
This sets the email address that the message appears to be sent to. For best deliverability, use an email associated with your domain (e.g., contact@yourdomain.com). Make sure this address is added to your inbox so you don’t miss any submissions.
From Name
Choose the display name that will appear as the sender in your inbox. This can be dynamic (e.g., pulled from the “Name” field) or static (e.g., “Your Website Contact Form”).
Reply-To
When you hit “Reply” in your inbox, this is the address your response goes to. Typically, you’ll want to set this to the email your user entered. Use the dropdown to link this to the “Email” field from your form.
CC and BCC
Want to send a copy of the message to additional recipients? Use:
- CC (Carbon Copy) – for visible recipients
- BCC (Blind Carbon Copy) – for hidden recipients
Add multiple email addresses by separating them with commas.
Metadata (Optional)
Elementor includes form metadata by default, such as page URL, user agent, and time/date. You usually don’t need to change this unless you’re troubleshooting or integrating with custom logic.
Send As
You can choose between sending emails as Plain Text or HTML. HTML is selected by default and is ideal for better formatting and design.
Step 5: Customize Contact Form Messages for a Better User Experience
A great user experience doesn’t stop when the form is submitted. Elementor Pro lets you customize the feedback messages users see based on their actions. This is your chance to add personality, clarity, or branding to what would otherwise be generic notifications.
Here’s how to do it:
- Click on the “Additional Options” tab in the form widget panel.
- Enable “Custom Messages” by toggling it to Yes.
You’ll now see editable fields for the following messages:
Success Message: This message appears when the form is submitted successfully. Example:
“Thank you! We’ll get back to you within 24 hours.”
You can be friendly, formal, or humorous, whatever fits your brand’s tone.
Error Message: Displayed when something unexpected goes wrong (e.g., a server issue). Example:
“Oops! Something went wrong. Please try again later.”
Required Field Message: Appears if a user tries to submit the form without completing a mandatory field. Example:
“Please fill in all required fields.”
Invalid Input Message: Triggered when a user enters data in the wrong format (e.g., an invalid email address). Example:
“That doesn’t look like a valid email address. Please double-check.”
Pro Tip: Match the Tone of Your Messages to Your Brand
These customizable messages allow you to add warmth and personality to an otherwise robotic process. For example:
- On a casual blog: “High five! Your message is flying through cyberspace to our inbox.”
- On a corporate site: “Your inquiry has been received. A representative will contact you shortly.”
Customizing your form feedback enhances trust, improves user satisfaction, and helps reinforce your brand voice.
Step 6: Style Your Elementor Contact Form to Match Your Brand
A functional contact form is essential, but a well-designed, on-brand form can elevate your website’s professionalism and cohesion. With Elementor, customizing the look and feel of your forms is straightforward, and even small design tweaks can make a big impact.
To start styling your form, click on the contact form widget you added, then navigate to the “Style” tab in the Elementor editor panel. This opens up a wide range of options, allowing you to fully transform your form to match your website’s branding. You can control aspects such as:
- Spacing & Padding – Adjust the space around fields and labels to enhance visual hierarchy.
- Typography – Customize the font, size, and weight of form labels and input text.
- Field Styling – Modify background colors, border radius, and field widths for inputs and textareas.
- Label Colours – Set colors for your labels to improve readability.
- Button Design – Adjust background color, text color, hover effects, border style, and more.
Pro Tip: To style the submit button, use the “Button” dropdown under the Style tab. Here you can change the background color, hover color, text color, border radius, box shadow, padding, and typography.
These styling options let you create a form that looks custom-coded, even though everything is achieved with a few simple clicks. Whether your goal is a sleek, modern design or something fun and colorful, Elementor gives you full creative control to make your forms visually stand out.
Step 7: Publish Your Elementor Contact Form
Once your contact form is fully customized and you’re happy with the layout and styling, it’s time to make it live on your website. Publishing your form is the final step, and Elementor makes it incredibly straightforward.
To publish your form, scroll to the bottom of the Elementor editor. If you’re editing an existing page, click the green “Update” button. If it’s a brand-new page, you’ll see a “Publish” button instead; click that to make the page live.
That’s it! Your contact form is now active and ready for visitors to use. Congratulations. You’ve successfully built and published a fully functional, professionally styled contact form using Elementor Pro.
Why Upgrade to Elementor Pro for Contact Forms?
If you’re serious about designing a high-performance WordPress website with full customization, Elementor Pro is more than just an upgrade; it’s a complete toolkit for web creators.
While the free version of Elementor is powerful, Elementor Pro unlocks features that elevate your site’s functionality, design consistency, and user experience. And when it comes to building sleek, high-converting contact forms, the Pro version shines.
Benefits of Using Elementor Pro for Contact Forms
Here’s why Elementor Pro is the superior solution for most serious website owners:
- All-in-One Form Builder: First and foremost, there’s no need for third-party form plugins. Elementor Pro includes a built-in, drag-and-drop form widget, complete with advanced features that simplify form creation.
- Seamless Integrations: In addition, you can easily connect your forms with popular email marketing platforms like Mailchimp, ConvertKit, ActiveCampaign, and more. This makes it effortless to grow your subscriber list and manage your contacts efficiently.
- Full Site Customization: Moreover, Elementor Pro goes beyond just contact forms. It gives you complete control over every part of your website—including headers, footers, posts, archive pages, and product templates—allowing for a truly personalized web presence.
- Massive Template Library: Furthermore, you gain access to over 300 pre-designed templates, 60+ full website kits, and more than 90 premium widgets. This not only speeds up your design process but also enhances your site’s overall functionality.
- Premium Support & Updates: Finally, Elementor Pro offers premium support and regular updates, ensuring you receive timely assistance when needed while keeping your site optimized and secure.
If you’re already using Elementor as your main page builder, investing in Elementor Pro is a smart next step. Elementor Pro can seriously streamline your workflow and reduce the need for additional plugins.
When You Might Not Need Elementor Pro
Elementor Pro is an incredibly powerful tool, but it’s not essential for everyone. If your website only requires a simple contact form, such as fields for name, email, and message, and you’re not planning to create a highly customized or conversion-focused site, then you can skip the premium version.
The free version of Elementor is an excellent choice if you’re just starting with WordPress, only need a basic contact form without extra integrations, or are working with a limited budget. Additionally, Elementor integrates seamlessly with many of the top free contact form plugins, allowing you to easily embed forms using shortcodes or widgets. As a result, even without Elementor Pro, you can still create functional and professional forms for your website.
How to Add a Free Contact Form in Elementor
Creating a contact form for free is surprisingly simple, and it doesn’t require any coding knowledge. The process typically involves just a few easy steps.
First, install a free contact form plugin from the WordPress plugin directory. Popular options include WPForms Lite, Contact Form 7, or Ninja Forms. Once the plugin is installed and activated, use its built-in interface to build your form by selecting and customizing the fields you need.
After you’ve created the form, the plugin will generate a unique shortcode. Copy this shortcode and head over to your Elementor-designed page. In the Elementor editor, drag and drop the “Shortcode” widget onto the section where you want the form to appear. Then, paste the shortcode into the widget’s field.
Thanks to Elementor’s strong compatibility with WordPress plugins, this method works smoothly and is easy to implement, even if you’re a complete beginner.
Top 3 Elementor-Compatible Contact Form Plugins (Free & Reliable)
Elementor is flexible enough to work seamlessly with many of the most popular WordPress contact form plugins. Below are three standout options that integrate smoothly with Elementor and require no coding to set up.
1. HubSpot – Free CRM + Powerful Forms & Popups
Best for: Marketers and small business owners who want form data directly synced with a CRM.
The HubSpot WordPress Plugin is more than just a form builder. In fact, it’s a complete marketing solution. With over 100,000 active users, it lets you easily add responsive forms, pop-ups, live chat, and even email marketing tools to your site, all for free.
What sets HubSpot apart is its automatic CRM integration. Every time someone fills out your form, their data is synced to your HubSpot dashboard, giving you full visibility into user behavior and lead management.
Elementor Integration: Add HubSpot forms and popups directly to your Elementor-designed pages or sync existing Elementor forms to your CRM.
Pricing: 100% Free
2. WPForms – User-Friendly & Feature-Rich
Best for: Beginners looking for a drag-and-drop interface with room to grow.
WPForms powers over 3 million websites and is widely known for its intuitive builder and reliable performance. The free version (WPForms Lite) includes all the essentials you need to build a basic contact form in minutes.
You can embed WPForms in your Elementor layouts using the Shortcode Widget, and for even more control, third-party Elementor addons like Ultimate Addons for Elementor offer a custom styler for WPForms.
Elementor Integration: Copy the WPForms shortcode and drop it into any Elementor section, easy and effective.
Pricing: Free version available; Pro plans start at $79/year.
3. Contact Form 7 – Lightweight & Widely Trusted
Best for: Users who want a no-frills, totally free contact form solution.
With over 5 million active installs, Contact Form 7 remains one of the most dependable and time-tested form plugins in the WordPress ecosystem. It’s extremely lightweight and allows you to generate and place forms using simple shortcodes.
Although it doesn’t come with a visual drag-and-drop editor, it gets the job done if you’re after basic contact functionality. Plus, tools like Ultimate Addons for Elementor offer a Contact Form 7 Styler Widget to help match your forms to your site’s design.
Elementor Integration: Use the shortcode to insert forms directly into any Elementor page or widget.
Pricing: Completely Free
How to Embed a Contact Form in Elementor (Using WPForms)
Want to add a stylish contact form to your Elementor-designed page, without needing Elementor Pro? Great news: using WPForms (free version) makes it super simple. In this guide, we’ll show you two easy ways to embed a contact form into any Elementor page using WPForms.
Step 1: Install & Create Your Contact Form
From your WordPress dashboard, navigate to Plugins and click on Add New. In the search bar, type WPForms, then install and activate the plugin once it appears in the results.
After activation, go to WPForms in the dashboard menu and select Add New to begin building your form. You’ll be prompted to choose a template, such as the Simple Contact Form, name your form, and then click Create to get started.
Step 2: Customize Your Form
Using WPForms’ drag-and-drop builder, you can easily add, edit, or remove fields to customize your form to fit your specific needs. Common fields include Name, Email, and Message, but you also have the option to include elements like dropdown menus, checkboxes, or even file upload fields.
When you’re done making changes, click Preview to see how your form will appear to users. If everything looks good, click Save to store your form.
Step 3: Generate the Shortcode
After saving your form, click on Embed in the WPForms builder. When prompted, select Use a Shortcode instead of choosing a page.
Next, copy the generated shortcode (e.g., [wpforms id=”1234″]). You’ll use this shortcode in Elementor to embed your form on your page.
Step 4: Embed the Form in Elementor
Method A: Using the Shortcode Widget
To begin, open the page you want to edit and click Edit with Elementor. Next, in the Elementor sidebar, search for Shortcode and drag the widget onto your page. Then, paste your WPForms shortcode into the widget field. As a result, your form will instantly appear within the layout. Finally, once you’re satisfied with the design, click Update to save the changes to your page.
Method B: Using the WPForms Widget (If Available)
Alternatively, if you’re using an Elementor-compatible plugin like WPForms, the process becomes even more straightforward. First, in Elementor’s widget panel, search for WPForms and drag the widget to the desired location on your page. Then, from the dropdown list, select your contact form. Consequently, the form will be embedded instantly, no shortcode required.
Note: Elementor-compatible plugins like WPForms often add a dedicated Elementor widget, making integration easier and more seamless.
Bonus: Style Your WPForms Form in Elementor
If you want your contact form to seamlessly match your site’s overall design, consider using an Elementor addon like Ultimate Addons for Elementor. This powerful plugin enhances your design capabilities by offering advanced styling options through its WPForms Styler Widget.
With this widget, you gain full control over various design elements, including typography, colours, button styles, spacing, and more. It’s an excellent way to ensure your form looks consistent with the rest of your website, creating a more polished and professional user experience.
Final Thoughts: How To Create an Elementor Contact Form
Creating a contact form in Elementor is easier than ever, whether you’re using Elementor Pro or opting for a free plugin like WPForms or Contact Form 7. With just a few clicks, you can build fully functional, beautifully styled forms that match your website’s branding and collect the information you need from visitors.
Whether you want a simple contact form or a feature-rich lead capture form, Elementor gives you the flexibility to get it done without needing to touch a line of code.
So why wait? Dive into Elementor and build your contact form today. Your next lead could be just one message away!

